Look! We're Learning!

Early Learning. Happy Teaching.

  • Shop
  • Printables
  • Homeschool
  • Crafts
  • Parenting
  • Blog
This easy DIY pinwheel craft is a fun way to study wind with the kids!

Simple DIY Pinwheel Craft for Kids

August 16, 2013 by Selena Robinson 2 Comments

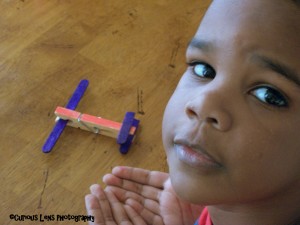
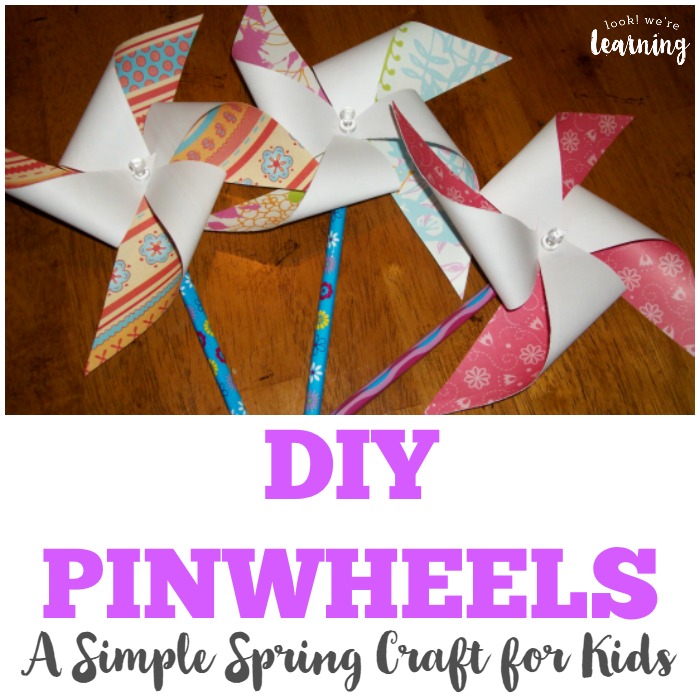
Windy days are made for pinwheels, am I right? Remember getting a pinwheel at the county fair or the book fair at school (my favorite place ever) and running outside to watch it turn in the wind? As a child, I could stare at a pinwheel turn for hours. They were just mesmerizing.

I had never made a pinwheel myself, so I thought the kids would enjoy learning how to make one as an easy spring craft. Like a lot of our projects, this DIY pinwheel craft is very simple and only requires a couple of supplies. If you like this activity, don’t miss our easy spring toilet roll butterfly craft!
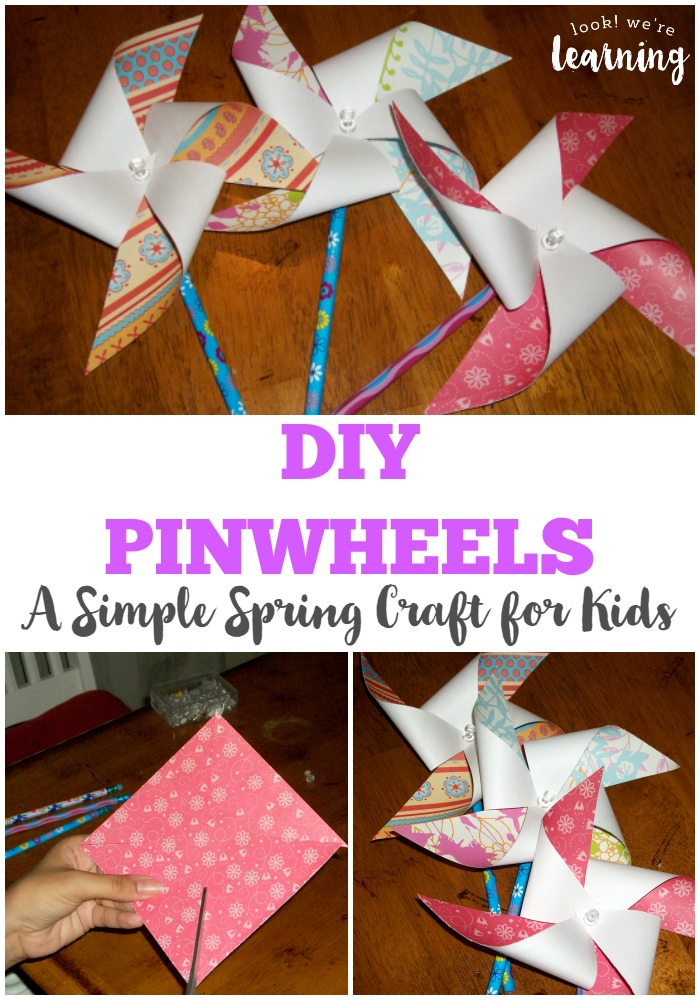
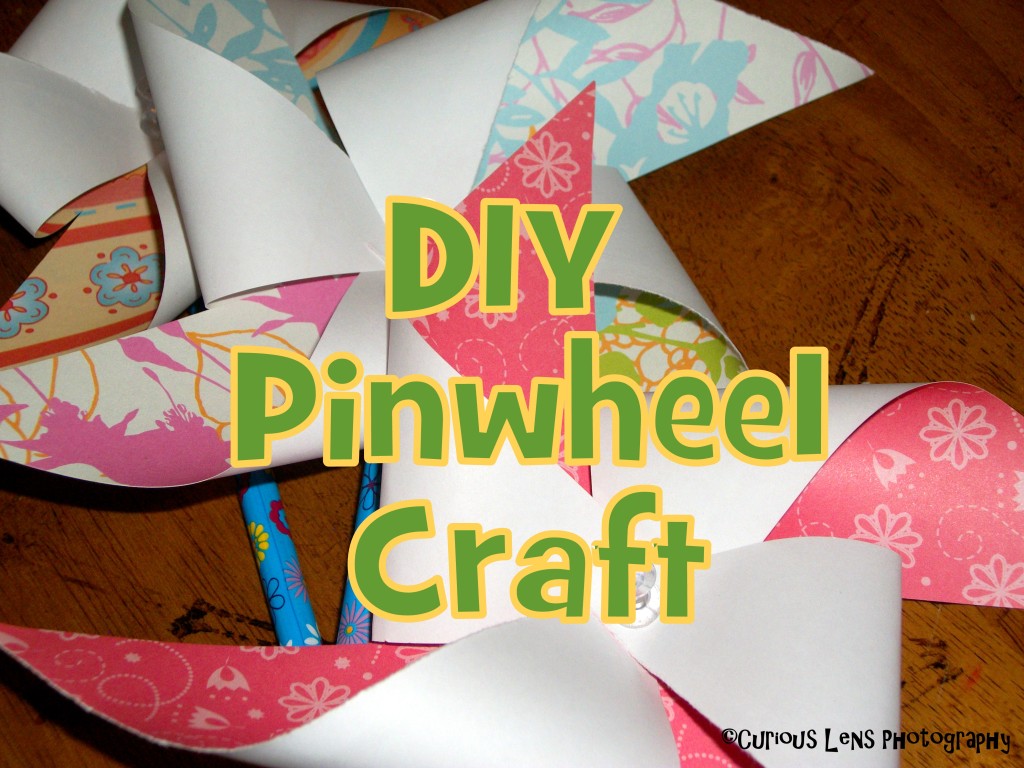
This easy DIY pinwheel craft is a fun way to study wind with the kids!

DIY Pinwheel Craft

To make this pinwheel craft, you’ll need the following:

  • Lightweight 12 x 12 scrapbook paper
  • Pencils
  • Push pins
  • Scissors

DIY Pinwheel Craft: Look! We're Learning!

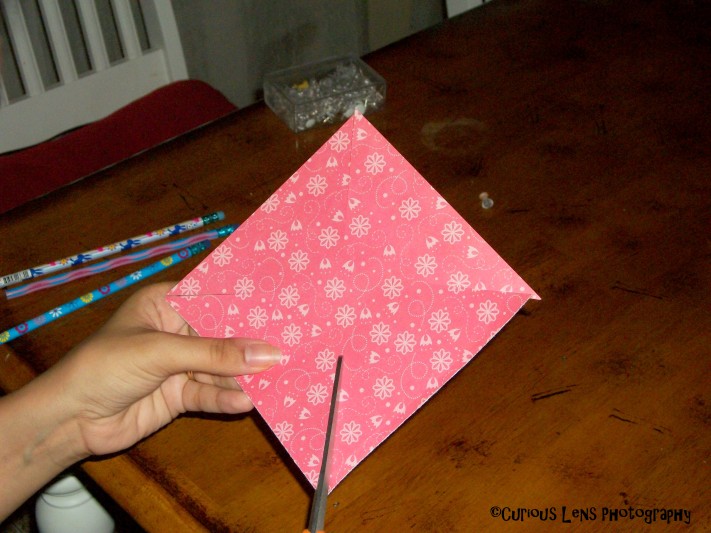
To get started, all you have to do is cut the paper into squares and then make a diagonal cut toward the center on each corner.

Actually, I didn’t even cut the paper into squares. I did the old school thing where you fold the paper in fourths and then tear it. (I know I’m not the only person who does that, am I?)

DIY Pinwheel Craft: Look! We're Learning!

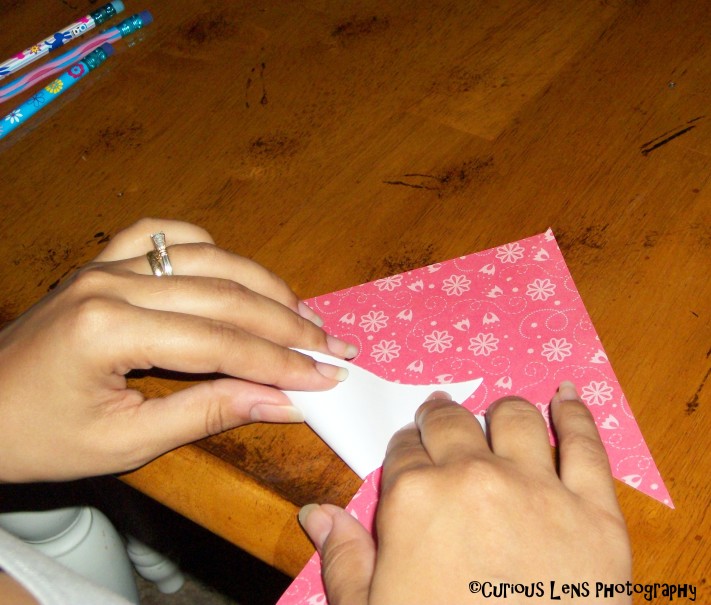
After you’ve made the diagonal cuts, take each cut and fold the right corner toward the left so that the end lands in the center of the paper.

You don’t want to actually “fold” by making a crease in the paper, because you need the paper to remain curved in order for the air to move through it. So you’re really just pulling the corners toward the middle here.

DIY Pinwheel Craft: Look! We're Learning!

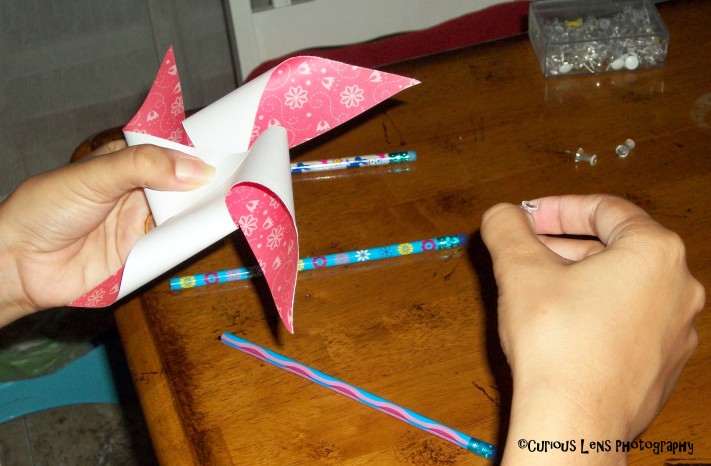
Once you have all the corners folded toward the center, just hold them down with one hand and then stick the push pin through with the other.

Make sure you catch all the corner ends and don’t stick yourself! I pushed the pin through first and then stuck the end into the pencil eraser.

DIY Pinwheel Craft: Look! We're Learning!

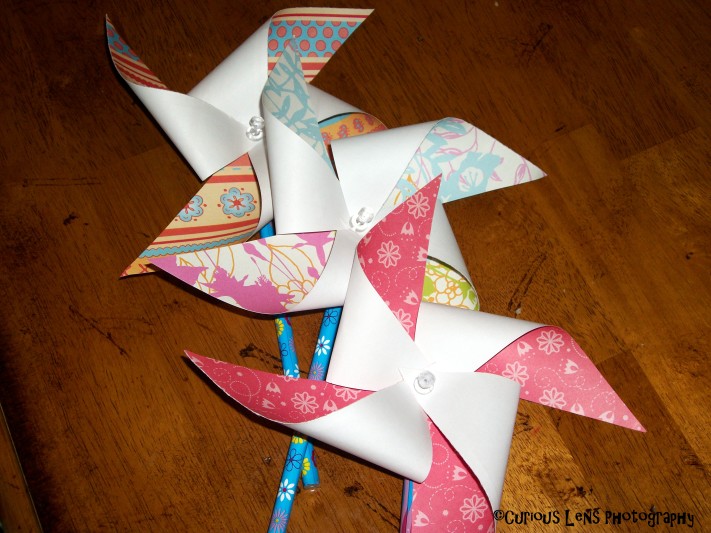
And we’re done! The kids were so excited to try them out that they sat at the table trying to perfect how to blow across the sails to move them properly for about 20 minutes afterward.

Easy DIY Pinwheel Craft for Kids

I will say that these are not the most permanent pinwheels you can make, so if your kids get a little rough with them (like ours did), you’ll have to put them back together. But you just have to push the paper corners back down and re-pin. Easy peasy!

DIY Pinwheel Craft: Look! We're Learning!

If you enjoyed this spring activity, check out our other spring learning ideas!

Get ready to welcome warmer weather with these fun spring crafts for kids to make!

50 Spring Books for Kids

50 Free Spring Printables for Kids @ Look! We're Learning!

And get more ideas on my Spring Activities for Kids Pinterest board!

Our 2013-14 Homeschool Room

August 12, 2013 by Selena Robinson 14 Comments

Good morning! It’s another new week here at Look! We’re Learning! and we’re ready to get started!

I’m fully engulfed in the “back to school” spirit and I’ve been sharing our homeschool plans for this year recently. Last week, we featured our homeschool curriculum choices for 3rd, K, and PK. Today we’re sharing pictures of our homeschool room for this year.

Our Homeschool Room: Look! We're Learning!

 Our Homeschool Room

We don’t really have a dedicated homeschool room (as much as I wish we did). So we have to make do with what we have, right? 🙂

Our Homeschool Room: Look! We're Learning!

As you can see, our homeschool room doubles as our dining room. If you’ve seen our previous post about homeschooling in a small space, then you already know our basic setup. We did make a few changes this year, though.

Our Homeschool Room: Look! We're Learning!

We’re keeping our reward coupon system this year, but we’re going to make a few changes to it. We’re not exactly sure what our basis for handing our Play Bucks will be yet. I’m leaning toward adapting it to their schoolwork, but we’re undecided for now.

One thing we did decide on was the need for a better daily schedule. We’ll be sharing our detailed schedule in a couple of weeks, but we’ve already instituted a simple picture schedule to give the kids a heads-up on what we’re doing each day.

To make it, I just downloaded the free workbox tags from Homeschool Creations and then laminated them and added velcro. That way, we can just add and remove subjects based on what we’re doing that day.

Our Homeschool Room: Look! We're Learning!

The long wall in the room houses our picture world map, our chalkboard, our fruitage of the spirit “tree”, and a beautiful piece of artwork we picked up recently.

Our Homeschool Room: Look! We're Learning!

Isn’t that beautiful? We bought it at the Liberated Minds Homeschool Expo. The title is “Plant Da Seeds And They Will Grow” and it’s by an artist named Jah Peeps. I love how the “tree of knowledge” is supplemented with books about topics such as love, wisdom, and truth.

Those are several of the core values we try to instill in our children. It was very moving to me that, when the children receive that kind of foundation, they feel comfortable in life – just like the picture shows.

Our Homeschool Room: Look! We're Learning!

Here’s a close-up view of our picture world map. We love this map because it’s full of pictures that automatically capture the kids’ interest. They ask questions on their own: “What’s that animal?” “What’s that building?” It gives us a simple way to stir up enthusiasm for geography.

Our Homeschool Room: Look! We're Learning!

I still keep all of our books for the year in a crate next to the bookshelf. These are the same books we featured in our homeschool curriculum post for last week, along with our first read-aloud. Can you guess what it is by looking at the author? (We’ll be sharing our reading list soon.)

Our Homeschool Room: Look! We're Learning!

One change we made was to designate one wall as our themed chart space. We’ll be rotating out charts through the year that relate to the topics we cover.

Our Homeschool Room: Look! We're Learning!

Fractions are coming up soon.

Our Homeschool Room: Look! We're Learning!

As is a discussion on the properties of light.

Our Homeschool Room: Look! We're Learning!

We still keep most of our supplies in our bookcase. Our basic homeschool tools (binding machine, laminator, and pencil sharpener) are right on top.

Our Homeschool Room: Look! We're Learning!

The top shelf holds dry erase markers, chalkboard erasers, pencils, pens, and some art supplies. We also have most of the books in the Core Knowledge Series and my trusty homeschool binder. The second row is where we keep individual workboxes that we’ll be using off and on during the year and a basket with several of the Children’s Busy Books. (Look for us to share some of our activities from those in the future.)

Our Homeschool Room: Look! We're Learning!

The last shelf is where we keep more art supplies: paints, crayons, brushes, etc. On the right side, I keep our homeschool records in a portable filing box. We’ve never been visited by any truancy officers or school district representatives, but I like to have our documents ready in case that happens.

And that’s our homeschool space! It’s small but we make it work! We’d love to see pictures of your homeschooling rooms! Feel free to tell us about them in the comments!

This post is part of the iHomeschool Network “Not Back to School” Blog Hop! Visit our fellow bloggers and link up your own posts by clicking the image below!

NBTS Blog Hop Calendar: Look! We're Learning!

Big Book of Homeschool Ideas

This easy textured sponge painting craft is a perfect preschool art activity! It only takes a few minutes!

Textured Sponge Painting Preschool Craft

August 9, 2013 by Selena Robinson Leave a Comment

Art is one my favorite subjects to teach in our homeschool lessons. But when you’re starting with young children, I’ve found it best to keep the projects as simple as possible. After all, they’re not quite ready to study post-modernism. 🙂

So we tried this easy textured sponge painting preschool craft with our kids and they absolutely loved it! It was a simple way to study color and painting while giving them a bit of sensory input at the same time.

Read on to see how to do this simple art project with your kids! And if you love this craft, try our list of super easy preschool crafts you can make in 10 minutes!

This easy textured sponge painting craft is a perfect preschool art activity! It only takes a few minutes!

Textured Sponge Painting Preschool Craft

To do this craft, you’ll need the following:

  • Large kitchen sponge
  • Scissors
  • Fingerpaint
  • Painting paper
  • Paint cups
  • Newspaper
  • Sketching pencil (optional)

To set up this craft, we cut a large kitchen sponge into four pieces and handed them out. (This step should be done by an adult.)

Then we added a bit more texture by having the kids crumple up their paper before beginning. We found some super old fingerpaint (I mean, from when Tigger was a toddler) and added a bit of water to thin it out and then it was time to get started!

Textured Sponge Painting: Look! We're Learning!

When we asked Roo if he wanted me to sketch his design for him, he said “I want to make whatever I want to make.” Got it.

Textured Sponge Painting: Look! We're Learning!

Tigger wanted to paint a picture of a tree, so I sketched it for her to give her a little guide since the sponge tips are so large.

Textured Sponge Painting: Look! We're Learning!

Pooh wanted to paint a train and it ended up not going as well as he would have liked. But the experience of painting was so fun that he was all smiles anyway at the end. I think that’s what art should be like for kids!

Textured Sponge Painting: Look! We're Learning!

Here’s everyone’s work. Mine is at top left, Tigger’s is at top right, Pooh’s train is bottom right, and Roo’s unique individualist expression is at bottom left.

To give the pictures a bit more flair, we sprinkled glitter and colored salt on them before they dried. A simple introduction to Impressionism, perhaps?

Have you tried this textured sponge painting preschool craft with your kids? Let me know how it went in the comments!

Textured Sponge Painting Preschool Art Activity

Like this post? Try these other ideas for preschoolers!

These super easy preschool crafts are so simple you can make them in just 10 minutes!

Ten Minute Preschool Activities

Help your preschooler love reading with this preschool homeschool reading list!

And get more ideas for preschool learning on my Learning for Little Ones Pinterest board!

Our 2013-14 Homeschool Curriculum

August 5, 2013 by Selena Robinson 17 Comments

It’s the most wonderful time of the year – back to school season! When I was young, back to school time was the best part of the year for me. (I am an unabashed nerd, by the way.) We’re trying to create a similar atmosphere in our home so that our kids grow to love school and learning in general.

I found this year to be one of the easiest planning years so far, since we’re using more pre-planned curriculum. Typically, we’ve been the grab-and-go type of homeschoolers, meaning that I would grab several resources and just use what I like to put together our lessons.

In 2013-14, we’ll have a 3rd grader, a kindergartner, and a preschooler, though, so time is at a premium this time around. And packaged curriculum has been a wonderful planning timesaver.

Our 2013-14 Curriculum: Look! We're Learning!
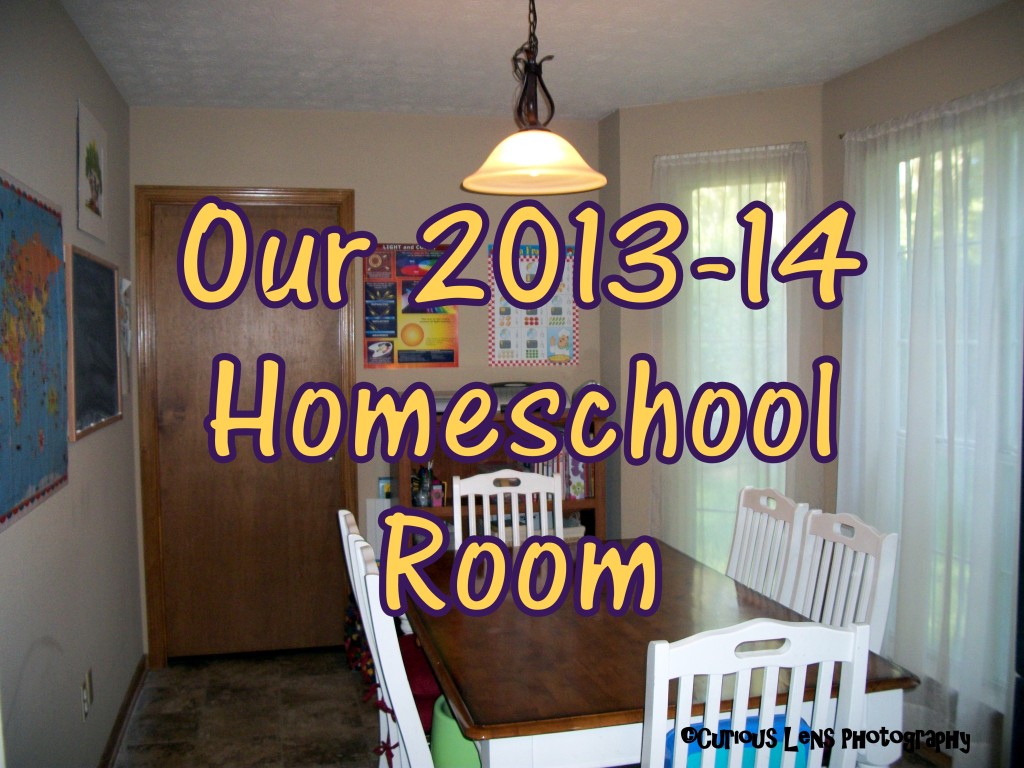
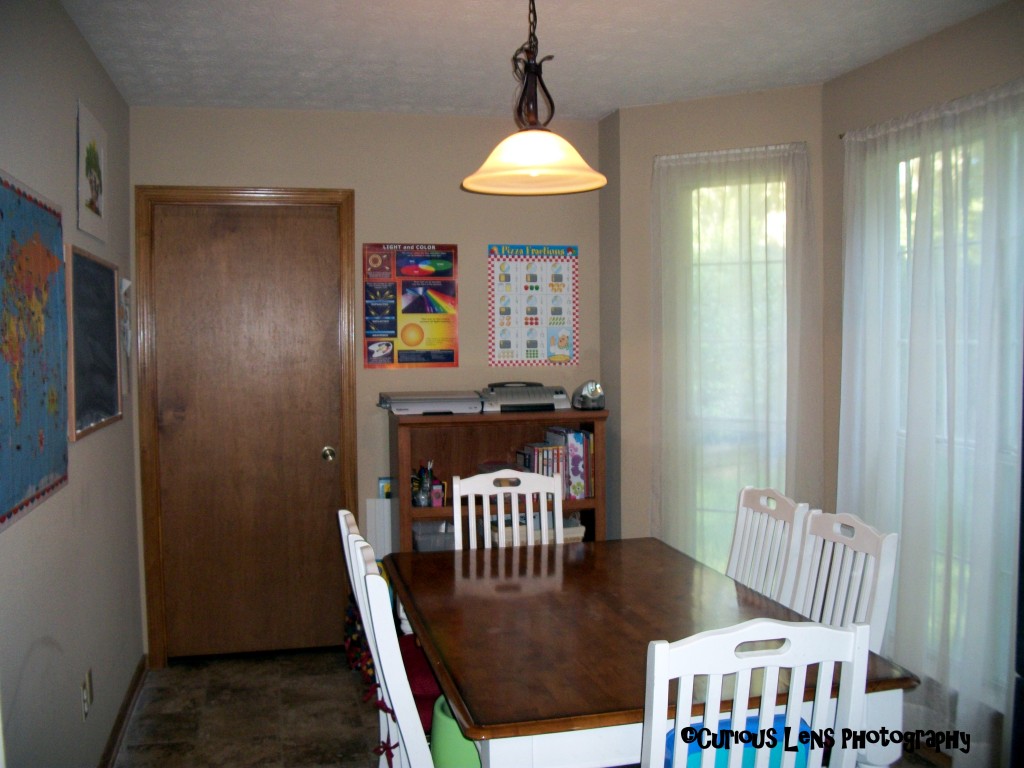
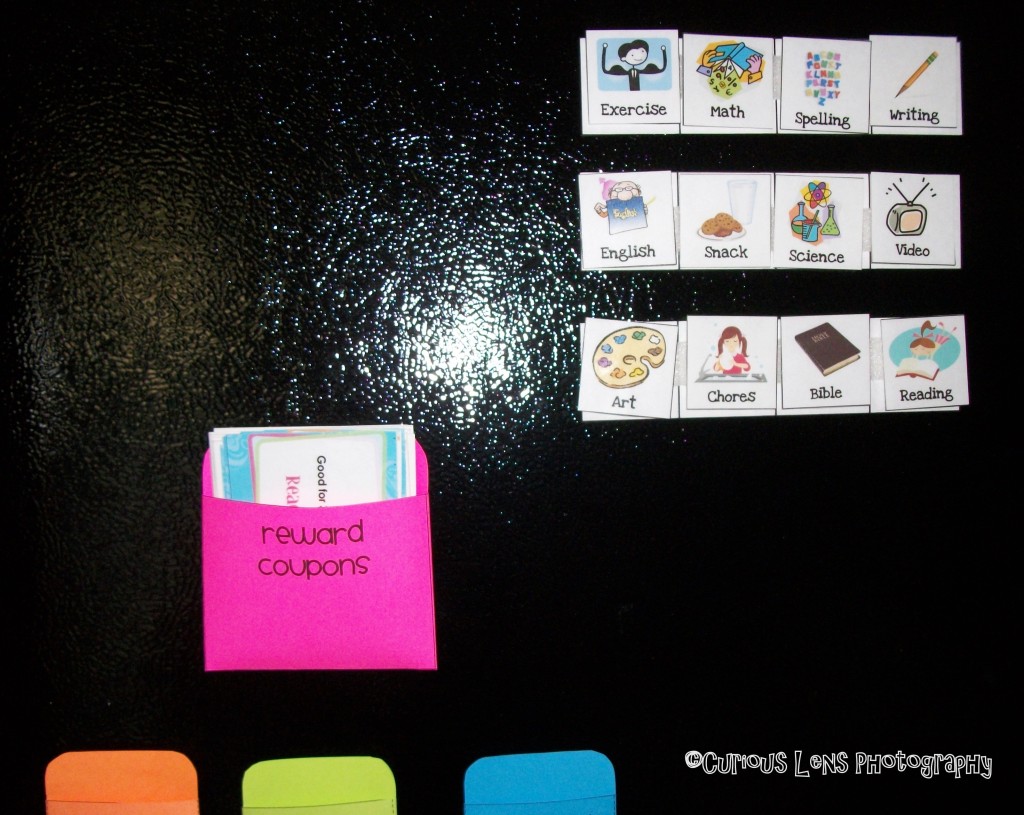
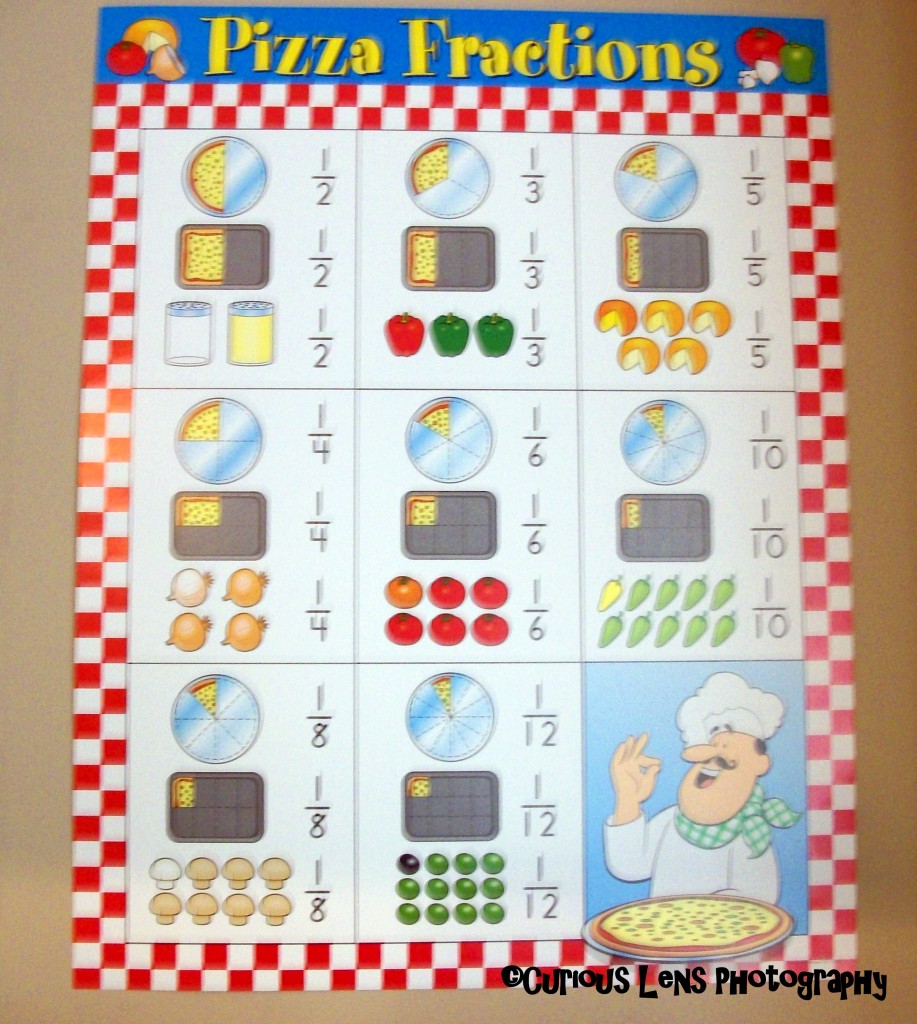
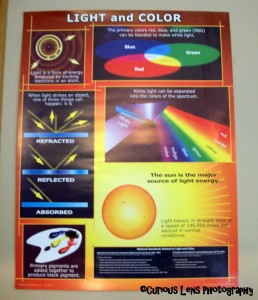
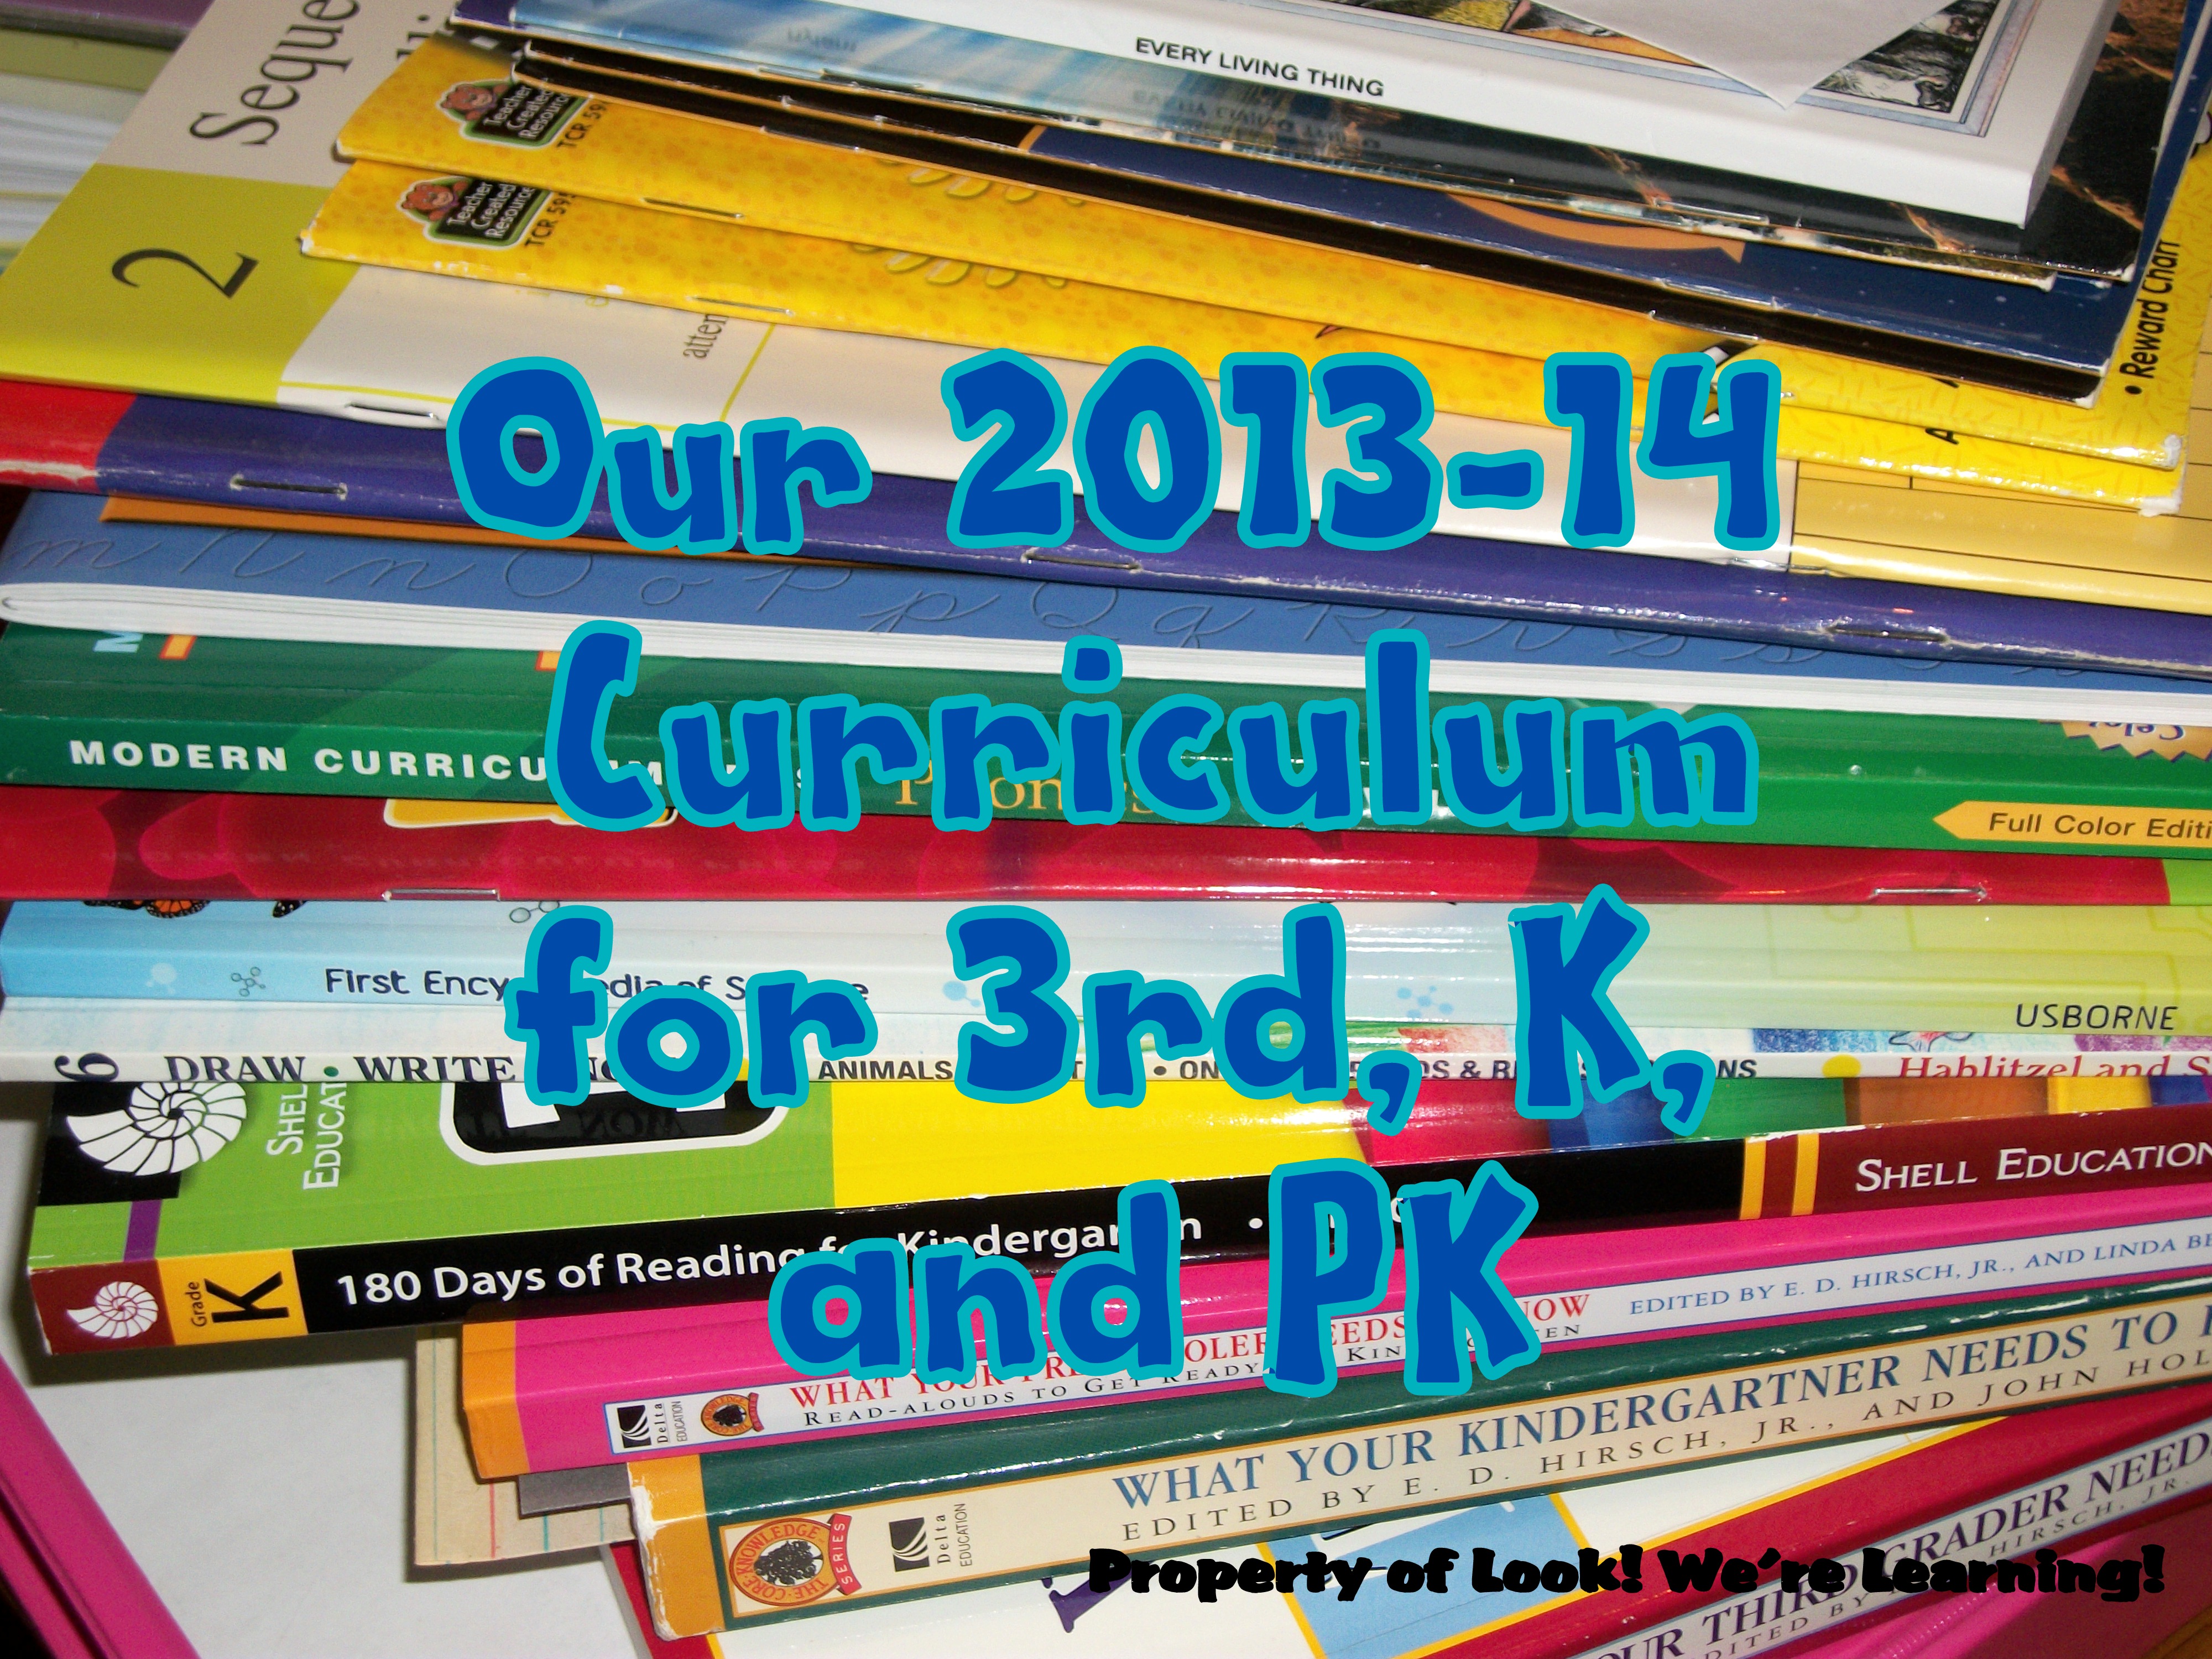
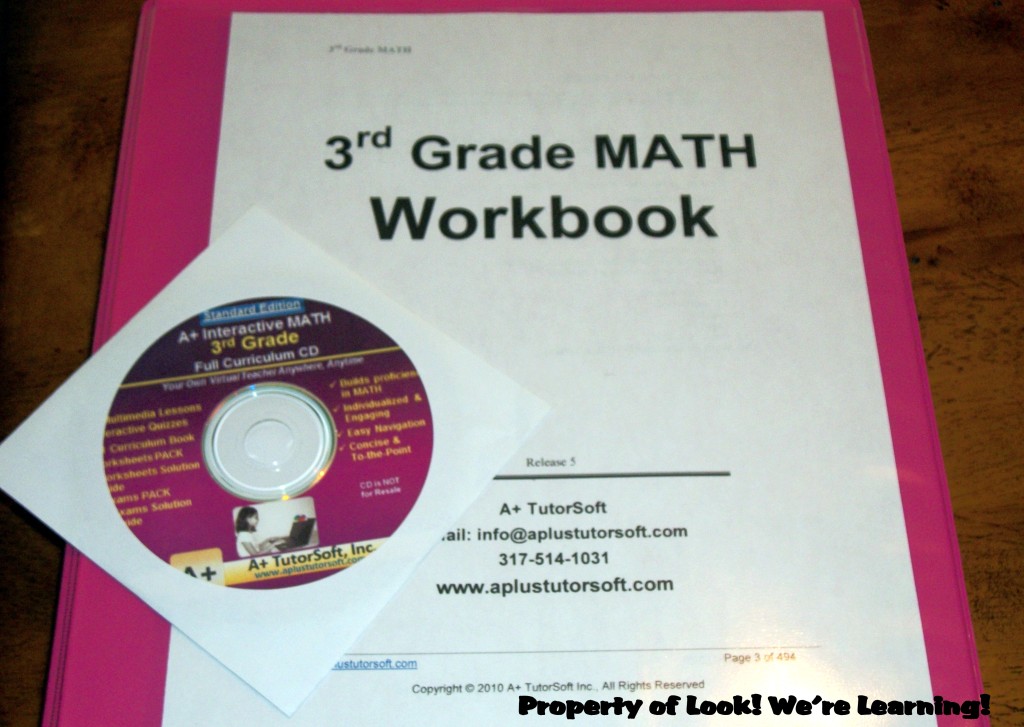
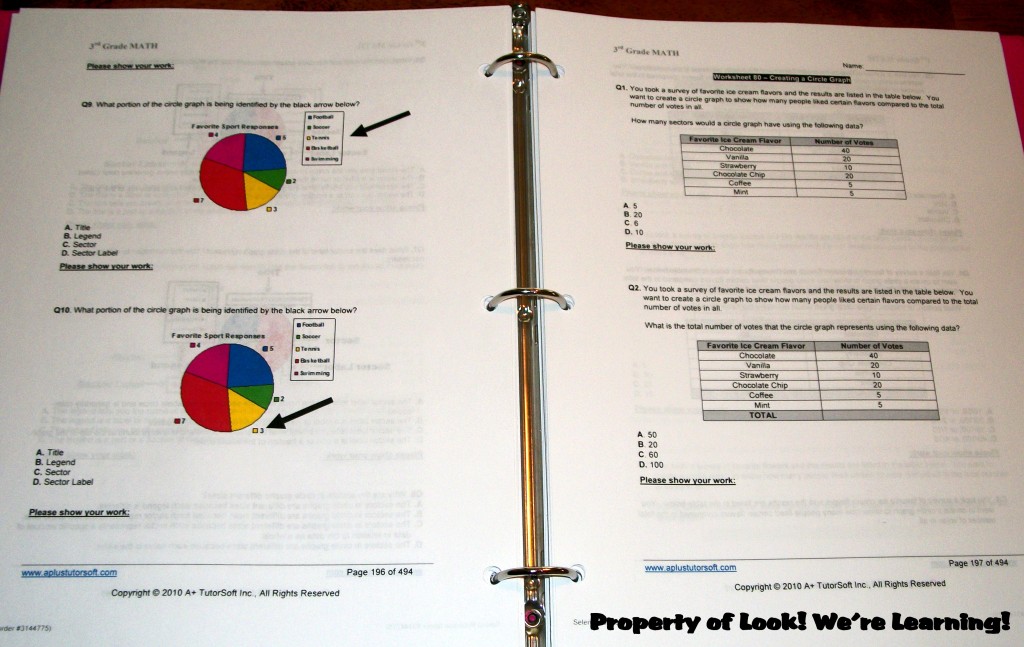
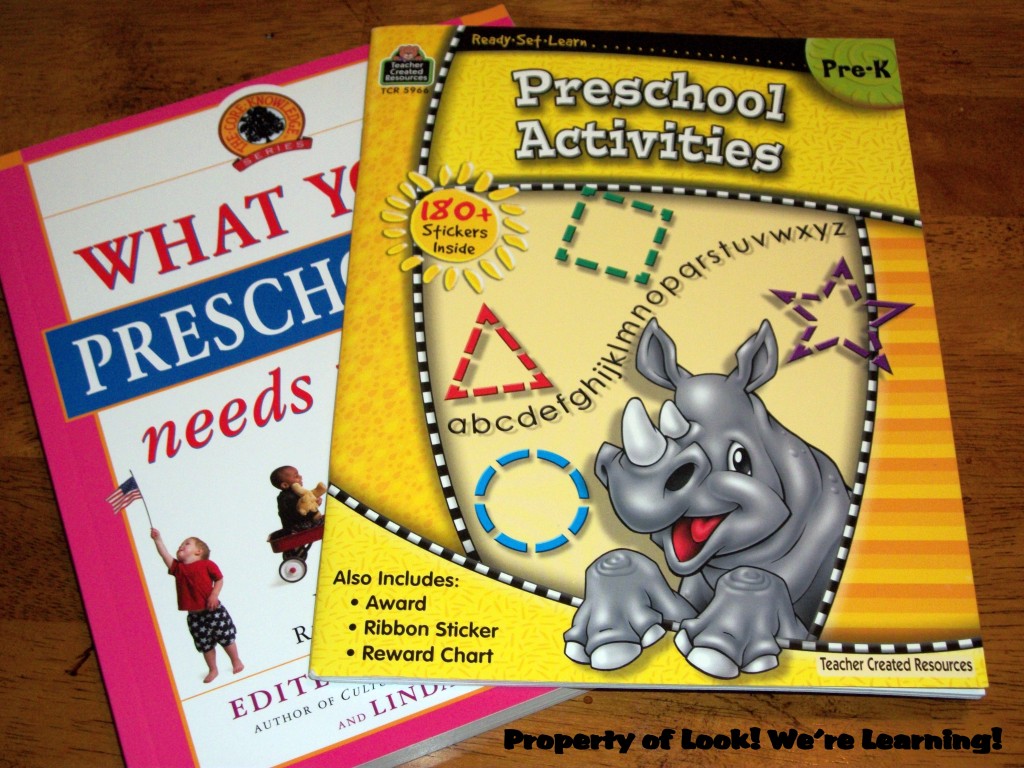
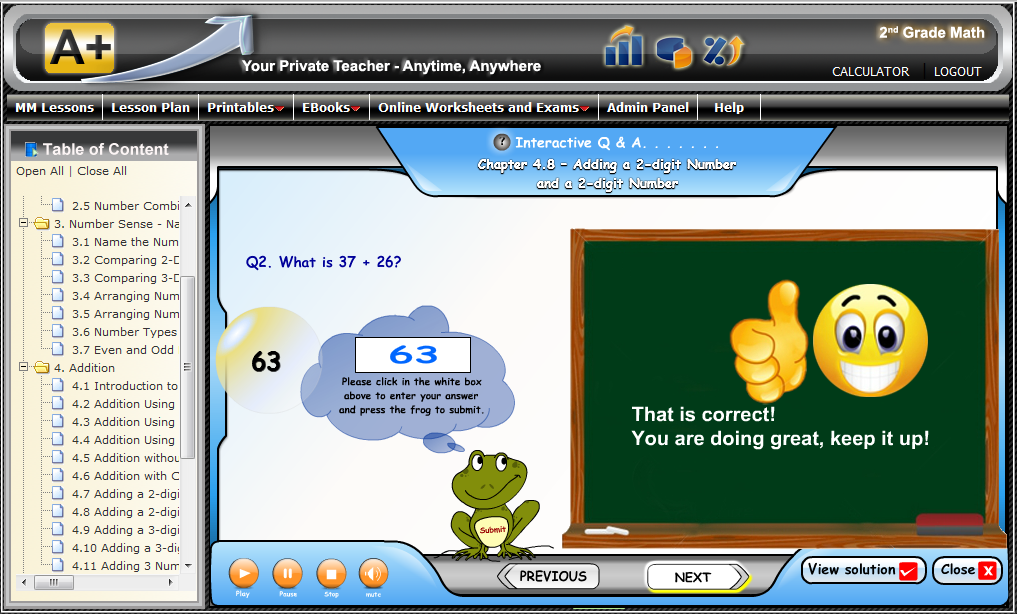
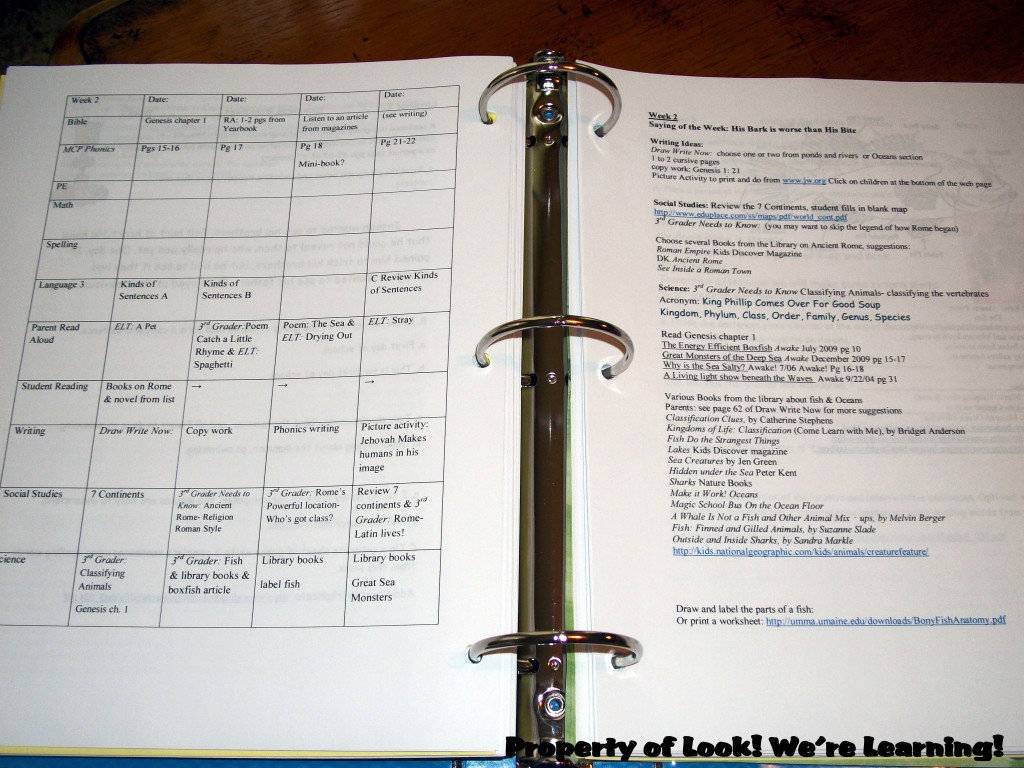
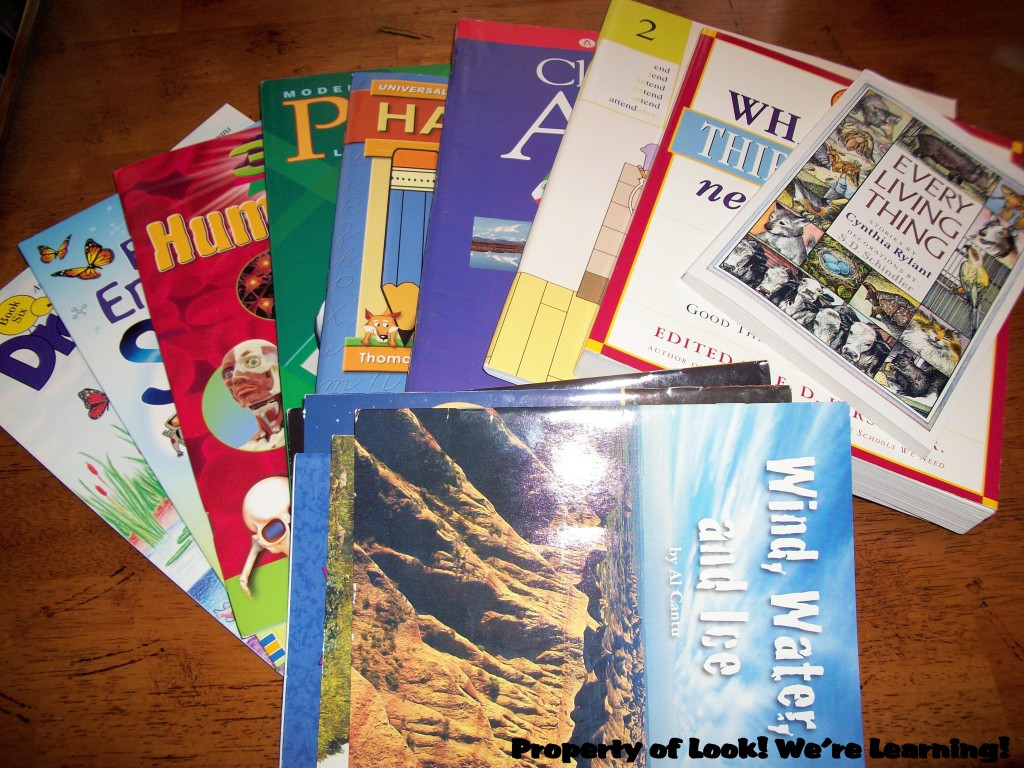
So, without further ado, our curriculum for 2013-14 is as follows: *drumroll*

Third Grade Homeschool Curriculum

Our 2013-14 Curriculum: Look! We're Learning!

We’re using West Brooke Curriculum as the core foundation of our school year with Tigger. It’s a very affordable program (around $100 for the lesson plans and books) that is based on the Core Knowledge series “What Your ____ Grader Needs to Know” and the publications from JW.org. As Christians, it’s our goal to keep the Bible before our children everyday and West Brooke Curriculum does that by including a daily lesson from the Bible.

Our 2013-14 Curriculum: Look! We're Learning!

For example, Week 1 features a lesson that includes use of the Bible Character card for Joseph and Potiphar, the Picture Activity “Joseph is Sold Into Slavery”, and Teach Your Children: “Are You Ever Jealous? Joseph’s Brothers Were”.

Our 2013-14 Curriculum: Look! We're Learning!

Here are the West Brooke Curriculum books for third grade, including the Usborne Encyclopedia of Science
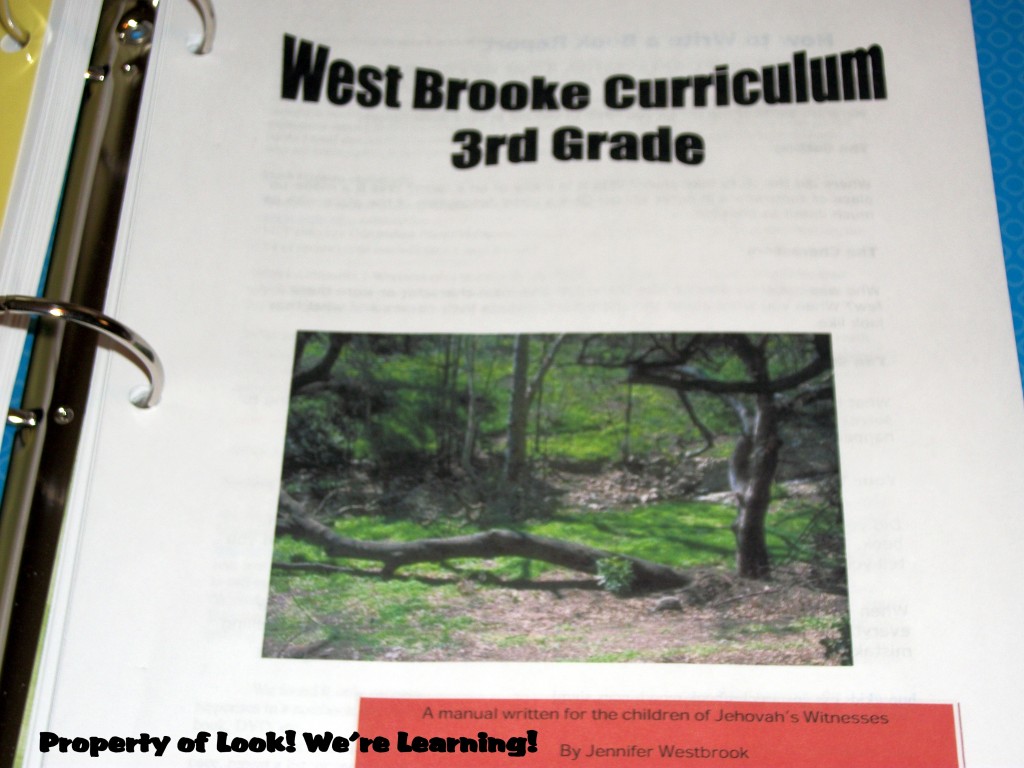
, Modern Day Phonics, Sequential Spelling, and Draw Write Now Book 6.

With West Brooke, you can choose your own math program. I decided to go with A+ TutorSoft Math and use the 3rd grade computer program along with the downloadable curriculum and workbook I got from Currclick.

Our 2013-14 Curriculum: Look! We're Learning!

The workbooks make it easy to just print what you need as you go, but I’m the kind of person that will put that off until the last minute if I don’t do it all at once. So I printed the entire workbook and put it in a binder.

Our 2013-14 Curriculum: Look! We're Learning!

P.E. is a bit of concern for us this year as well. I’ve been resistant to structured physical education for a long time, because I felt that daily playing would be enough. But our kids, especially Tigger, need a lot of work on their balance, coordination, and stamina. We got a chance to try the program Family Time Fitness a while back and we absolutely loved it!

So that’s going to be our daily P.E. Our plan is to do it four days a week before breakfast and then go on with schoolwork. We’ll be posting about our progress and hopefully we’ll all get into better shape together!

Family Time Fitness

Kindergarten Homeschool Curriculum

Our 2013-14 Curriculum: Look! We're Learning!

I’m not the kind of person to worry too much about structured work in kindergarten beyond basic math, reading, and writing. We’ll be reading lots of history as a family and performing basic science experiments, but as far as daily work with Pooh goes, it’ll be the three Rs. We picked up a couple of kindergarten workbooks, including Practice, Assess, Diagnose: 180 Days of Reading for Kindergarten, and we’ll be supplementing with lots of art and storybooks.

Preschool Homeschool Curriculum

Our 2013-14 Curriculum: Look! We're Learning!

We’re even less structured with preschool, but we will try to focus on reading skills. Roo has gone over phonics and he has a basic understanding of them, but he’s not confident enough to read just yet. As a result, we’ll be trying out the program Reading the Alphabet with him to boost his confidence in his decoding skills. (Look for our review of the program in two weeks!)

*A quick note: This curriculum post does NOT include our reading list for all three grades. I’ll be sharing that in a couple of weeks.*

Have you finished planning your school year? Have you made any adjustments in our approach this year? Let us know in the comments! Keep on learning!

This post is part of the iHomeschool Network “Not Back to School” Blog Hop! Visit our fellow bloggers and link up your own posts by clicking the image below!

NBTS Blog Hop Calendar: Look! We're Learning!

Art for All Ages Bundle - 3 ebooks!

Our Math Program for 2013-14: A+ TutorSoft

July 31, 2013 by Selena Robinson 8 Comments

Update: Our A+ TutorSoft Math giveaway winner is Sara Marti! Congratulations, Sara!

Good morning! Today I’m very excited to be hosting our first-ever giveaway on Look! We’re Learning! But more on that in a bit.

It’s back to school planning time and we’ve decided to go with A+ TutorSoft as our math program this year. As I mentioned last week, Tigger needs more help with her math this year, especially since she has so much trouble concentrating on her work. I’m a traditional learning type, so I kept insisting on workbooks and quizzes and we’ll use those as part of our program this year. But she responds much better to bright and engaging visuals, so it was time to pick up a computer program for math.

We stopped by the A+ TutorSoft booth at the Southeast Homeschool Expo last weekend and bought the complete 3rd grade curriculum on CD.

Our Math for 2013-14: A+ TutorSoft

Since the expo was running, we got the program for nearly 40 percent off the regular price, which was a welcome relief for our checkbook. I also bought the PDF version of the 3rd grade curriculum and 3rd grade workbook from Currclick, so I could print off the worksheets and refer to the written lesson whenever I needed.

Here’s what I like about A+ TutorSoft:

  • The program is simple enough for kids to use on their own, so I can work with Tigger through a lesson plan and then let her complete the exercises herself.
  • The lessons are interactive, which reduces the likelihood that she’ll get bored.
  • The program allows me to skip lessons, so she doesn’t have to sit through concepts she’s already mastered.

I’ll be posting about our progress going forward with the program this year. While we’ll be using the CD software and workbooks, A+ TutorSoft also offers an online monthly subscription program for homeschoolers. The online program is a good option for parents who aren’t sure if they’ll like the curriculum and prefer to try it on a month-by-month basis. If you’d like to purchase either the online subscription or the software for yourself, you can use coupon code LOOKWERE to save 20 percent off the current website sale price!

Even better, A+ TutorSoft has agreed to offer a giveaway for a three-month subscription to its online program for grades 1-4 (a $30 value)! Full details are posted below and the giveaway will be open for seven days! You can come back and enter once per day and earn additional entries through social media.

If you’d like to have even more chances to win great prizes from A+ TutorSoft, stop by their “Back to Homeschool” Facebook party on August 16 at 8 pm Eastern!

a Rafflecopter giveaway

Our New Project: The Living History Series

July 30, 2013 by Selena Robinson 7 Comments


Hi everyone! We’re getting ready for a new school year here in our household and one of the areas I’m most concerned with is history. I’ve been hesitant to use traditional history books with our children so far, because many of them choose to ignore or downplay important events. I’m not interested in teaching our children fairy tales disguised as history nor am I interested in teaching them a version that conveniently glosses over unflattering truths. As a result, putting together an honest, all-inclusive history curriculum is an ongoing project of mine.

Of course, if I were to wait until I finished this before I taught history to my kids, we’d never get started. So this year, we’re going to begin a project called “The Living History Series”, because one good way to learn history is to start by examining the lives of notable figures. As we sat down to talk about this, Jay and I realized that there were individuals that we didn’t know much about either and those are the people we’re starting with.

Our Living History figure for August is Nelson Mandela.

I’m currently reading his autobiography “Long Walk to Freedom” and we’re going to read the children’s version with our kids. I also grabbed several great online resources to put together a lesson plan and I’ve included the links below:

Kid World Citizen – Nelson Mandela Autobiography

BBC – Famous People: Nelson Mandela

MacMillan – Teacher’s Guide: Long Walk to Freedom

Oxfam Education – Nelson Mandela

PBS Frontline – Viewer’s and Teacher’s Guide: Nelson Mandela

Stop back by on August 29 to see what we learned about Nelson Mandela this month!


Bee Crafty Kids #15: Clothespin Crafting

July 26, 2013 by Selena Robinson 2 Comments

Bee Crafty Kids Button

Happy Friday everyone! It’s time for another Bee Crafty Kids Link Up! Every Friday, I get to co-host this roundup with Dusty from To The Moon and Back, Jolene from Monsters Ed Academy, and Melanie from Our Crafts N Things! You can find out more about all four of us here.

This week we decided to finally put our old clothespins to use. I grabbed several great clothespin crafts on Pinterest and simplified them for a quick art activity.

Bee Crafty Kids: Clothespin Crafting

I handed out markers for everyone to color their clothespins. Piglet knew just what to do with that marker. That girl is smart, I tell ya!

Bee Crafty Kids: Clothespin Crafting

Roo wanted to make an airplane. We used a clothespin with colored popsicle sticks. I asked him if he wanted to put googly eyes on his. He said, “No. I want it to be a real airplane.” I guess he told me!

Bee Crafty Kids: Clothespin Crafting

Jay got in on the crafting by making a butterfly out of a clothespin and some chenille sticks.

Bee Crafty Kids: Clothespin Crafting

What happens when you allow the kids to make crafts based on things that fly? You get a picture full of flailing arms!

Bee Crafty Kids: Clothespin Crafting

All done! Tigger and I made dragonflies, Pooh and Roo made airplanes, and Jay made a colorful butterfly. I think the kids actually had more fun playing with these afterward than making them!

Link up your kid-approved craft activities below! And be sure to visit the other posts in the link up this week!

Rules are simple:
~Enter the direct link to one or more of your own posts that showcase a craft or hands on activity for children.

~A link back with the above button is appreciated, but not required

~Try to at least comment on one or two of the other blogs that took the time to share and join!


Why I’m Holding My Child Back This Year

July 25, 2013 by Selena Robinson 20 Comments

Why I'm Holding My Child Back This Year

Yep, I said it. I’m holding my child back a grade this year. And I don’t feel bad in the least for doing it. The interesting thing is – I’m not required to do this. She didn’t fail a test that resulted in her having to repeat a grade. She’s not exceptionally behind on anything. In fact, she’s probably ahead on several subjects, especially reading and language. So, why am I choosing to repeat a grade with her?

It’s mostly because of me. Last year was a very trying one in our homeschool. My husband’s employer suddenly became extremely demanding, requiring him to work 12-hour swing shifts five or six days a week. For about three or four months straight, he actually worked more than 70 hours weekly. To make things more difficult, I was also working full-time from home. To complicate matters further, we found out we were pregnant with Piglet, who was a wonderful gift but also a completely unexpected one.

As a result, I wasn’t as prepared for the school year as I would liked to have been. Third grade is a pretty important year for kids. It’s a marked transition from the seatwork of early grades to the critical thinking requirements of upper elementary grades. I don’t feel that Tigger is as prepared as she could be to move on beyond that and I have no desire to thrust her into that situation simply to follow a certain timeline. On this matter, I’m speaking from personal experience.

When I was 11, my mom decided that it would probably be best for me to be homeschooled. I liked elementary school, but I was excited about the opportunity to learn at home on my own schedule so I was looking forward to it. I took the placement test for Calvert School and the teachers suggested that I skip sixth grade and possibly even seventh, because it appeared that I was advanced enough to do so. My mom agreed but decided that I should go ahead and take seventh grade.

That’s when I found out that a lot of important math and English skills are taught in sixth grade.  I know this because when the curriculum asked me to complete a basic pre-algebra equation or to diagram a sentence, I had no idea what those concepts meant. I struggled through seventh grade and eventually finished it, but it took me two years, completely erasing any “gains” I had made by skipping sixth grade.

The good thing for Tigger is that we started her in school a year early. Based on her birthday, she would just now be going into third grade in public school as well, so she’s technically not going to be “behind.” The truth is, though, I wouldn’t mind if she was. My concern is making sure my child is prepared for what is expected of her, not turning her into a case study for gifted homeschoolers.

Have you ever thought about having your child repeat a grade? Do you even bother teaching by grades at all? I’ve love to hear what you think in the comments. Keep on learning!

Bee Crafty Kids Link Up #14: Tissue Paper Mosaic

July 19, 2013 by Selena Robinson Leave a Comment

Bee Crafty Kids Button

Happy Friday everyone! It’s time for another Bee Crafty Kids Link Up! Every Friday, I get to co-host this roundup with Dusty from To The Moon and Back, Jolene from Monsters Ed Academy, and Melanie from Our Crafts N Things! You can find out more about all four of us here.

This week, we decided to try out a tissue paper mosaic project. It’s another simple one, so it’s perfect if you’re in a time crunch! I started by drawing very simple shapes on construction paper. Pooh picked the house, Roo picked the flower, and Tigger got the goldfish. Then I handed out contrasting colored tissue paper to each child.

Then came the part they liked the most: tearing the tissue paper into little pieces!

Since Tigger didn’t get the picture she wanted (the flower), I let her choose her own color of paper. It was only right.

After we had the ideal sized paper pieces, everyone traced their picture with a glue stick and stuck the pieces on the drawings. Since the project was so easy, it was very hands off for me, which was a nice change from some of our more intensive art activities.

Ta-da! The kids really liked this activity and it only required four supplies: construction paper, glue, colored tissue paper, and black marker. Great for a fast time-filler!

To share the button for this linkup, grab the code below!

Look! We're Learning!
<div align="center"><a href="https://www.lookwerelearning.com" title="Look! We're Learning!"><img src="http://i1165.photobucket.com/albums/q594/dustybug83/BeeCraftyKids3_zps44074ad6.png" alt="Look! We're Learning!" style="border:none;" /></a></div>


Link up your kid-approved craft activities below! And be sure to visit the other posts in the link up this week!

Rules are simple:
~Enter the direct link to one or more of your own posts that showcase a craft or hands on activity for children.

~A link back with the above button is appreciated, but not required

~Try to at least comment on one or two of the other blogs that took the time to share and join!


Review: Family Time Fitness

July 17, 2013 by Selena Robinson 6 Comments

I received a copy of this program in exchange for this review. My opinions are my own. See our Disclosure Policy here.

Happy Wednesday all! I’m very excited for today’s post, because I get to share a review for Family Time Fitness, a complete physical education curriculum for families and homeschoolers! We had the chance to try out the Core Homeschool PE Curriculum with our kids and we had a blast! 

At first, I was imagining that the curriculum would consist of a few basic activities for kids a week. Wrong! This is truly a full P.E. program. I remember doing less in a day of public school P.E. than we did in one day of this curriculum.

There are indoor activities and an outdoor activity scheduled for each day, which is great because you can use the program in any weather. We decided to head out to the driveway to try some of the Week 1 jump rope activities.

One of the first activities we did was called “Jumping the River”. You lay two jump ropes on the ground side by side and have everyone jump over the space in between. As the kids go across, you gradually increase the distance to challenge their abilities.

I think Roo may have a future as a long jumper.

After everyone “jumped the river” a few times, we took one of the jump ropes away and practiced jumping side to side over one rope on one foot. Turns out the kids need some practice on their balance and coordination. Jay jumped in to give Pooh a little coaching.

He’s got it!

And the crowd goes wild!

Along with the fun activities, the program explains how to warm up, how to cool down, how many repetitions of each exercise to perform, how many sets to do, and how long to rest in between sets. There are even demonstration videos linked within the daily plans to give parents a visual of how to perform each exercise. And the program has 220 lessons, which means it can serve as a full year’s physical fitness curriculum for kids of all ages!

This month is a special one for Family Time Fitness, because the company is participating in the Ultimate Homeschool Giveaway – a free sweepstakes featuring more than 500 prizes from leading homeschooling organizations and companies! Along with an entry for the grand prize, every single entrant receives $25 worth of free gift certificates and qualifies for discounts on select purchases!

To grab your free gift certificates and get a chance to win the grand prize, click the image to enter the Ultimate Homeschool Giveaway!

Family Time Fitness Ultimate Homeschool Giveaway

Poppins Book Nook: July’s Theme is Beach and the Ocean!

July 2, 2013 by Selena Robinson Leave a Comment

*This post contains affiliate links.*

Hi everyone! Once again, we’re joining up with the monthly virtual book club Poppins Book Nook! Every month, we’re sharing our favorite books on a specific topic and a few activities we plan around the theme. Our Poppins Book Nook activity will always post on the last Monday of the month. This month’s theme is Beach and the Ocean, so look for our new post on July 29!

If you’d like to follow along for the next few months, here are the upcoming themes:

July – Beach and Ocean

August – Fairy Tales

September – School

October – Seasons

November – Animals and Pets

December – No Book Club

January – Greek Myths

February – Presidents

We’re busy planning our beach and ocean activities for this month, but in the meantime, check out some of the books we’ll be highlighting!

Here’s a list of all the bloggers participating in June’s Poppins Book Nook. Stop by and show them some love in the meantime and then come back on July 29 for all the ocean and beach fun we’ll be sharing!

Enchanted Homeschooling Mom – Royal Baloo – 3 Dinosaurs – Monsters Ed – Chestnut Grove Academy – Growing in God’s Grace – Royal Little Lambs – Life with Moore Babies – Teach Beside Me – The Usual Mayhem – Mum Central – Fantastic Fun and Learning – Kathys Cluttered Mind – Play Create Explore – Toddler Approved – Growing Book by Book – Adventures in Mommydom – B-Inspired Mama – The Fairy and The Frog – Edventures with Kids – Learning & Growing the Piwi way – A Gluten Free Journey – Mom to Crazy Monkeys – No Doubt Learning – Preschool Powol Packets – To The Moon and Back – Our Craft ~N~ Things – Farm Fresh Adventures – Proverbial Homemaker –  Look! We’re Learning!

Poppins Book Nook: Making Helicopters!

June 25, 2013 by Selena Robinson 5 Comments

*Disclosure: This post contains affiliate ads.*

It’s our first time joining the Poppins Book Nook blog hop and we’re extra excited to show you a couple of our transportation-themed activities! First we got started by reading a couple of Anne Rockwell books:

In both books, our kids took to the helicopters and trains. That’s actually pretty natural, since until a few months ago, they were Thomas and Friends addicts. Naturally, we followed up our reading by watching Go-Go Thomas.

As we watched the show, the kids called out the different vehicles they saw: trains, helicopters, boats, front loaders, buses, and more. (Of course, they called them all by name.) Afterwards, we decided to make our own helicopters. I stuck a push pin through a popsicle stick and then stuck the pin tip into a pencil eraser to make DIY helicopters.

Now the trick with these is to rub them back and forth between your palms and then roll it once all the way through to make them fly. It takes quite a bit of practice, but the kids were up to it!

Look at the determination and intensity on Pooh’s face!

Success!

Piglet was rather bored by it all, but we had a great time!

Be sure to visit the other blogs participating in the Poppins Book Nook fun this month!

Enchanted Homeschooling Mom – Royal Baloo – 3 Dinosaurs – Monsters Ed – Chestnut Grove Academy – Growing in God’s Grace – Royal Little Lambs – Life with Moore Babies – Teach Beside Me – The Usual Mayhem – Mum Central – Fantastic Fun and Learning – Kathys Cluttered Mind – Play Create Explore – Toddler Approved – Growing Book by Book – Adventures in Mommydom – B-Inspired Mama – The Fairy and The Frog – Edventures with Kids – Learning & Growing the Piwi way – A Gluten Free Journey – Mom to Crazy Monkeys – No Doubt Learning – Preschool Powol Packets – To The Moon and Back – Our Craft ~N~ Things – Farm Fresh Adventures – Proverbial Homemaker

And stop by tomorrow to see another one of our transportation activities from June! Keep on learning!

Homeschooling with ADHD: Adapting as a Teacher - Look! We're Learning!

Homeschooling with ADHD – Adapting as a Teacher

June 17, 2013 by Selena Robinson Leave a Comment

Happy Monday all! Welcome to the second installment of our series “Homeschooling with ADHD!” Last week, we discussed why it’s important that we manage our expectations of our children and ourselves. Today we’ll be talking about adapting as teachers.

When we accept the responsibility of homeschooling our kids, we’re accepting a special privilege, especially when working with kids who have special needs.

The good news is that we can adapt the schoolwork to suit our children, instead of forcing them to adapt to the curriculum. The bad news is that doing this successfully may require that we completely overhaul our teaching styles to suit their learning styles.

Keep Reading…

Poppins Book Nook: June’s Theme is Travel and Transportation!

June 12, 2013 by Selena Robinson Leave a Comment

*This post contains affiliate links.*

Hi everyone! Big news today! We’re joining up with the monthly virtual book club Poppins Book Nook. Every month, we’ll be sharing our favorite books on a specific topic and a few activities we plan around the theme. Our Poppins Book Nook activity will always post on the last Monday of the month and this month’s theme is Travel and Transportation, so look for our new book club post on June 24th!

If you’d like to follow along for the next few months, here are the upcoming themes:

June – Travel and Transportation

July – Beach and Ocean

August – Fairy Tales

September – School

October – Seasons

November – Animals and Pets

December – No Book Club

January – Greek Myths

February – Presidents

We’re busy planning our travel and transportation activities for this month, but in the meantime, check out some of the books we’ll be highlighting!


Porker’s Taxi

Here’s a list of all the bloggers participating in June’s Poppins Book Nook. Stop by and show them some love in the meantime and then come back on June 24 for all the traveling fun we’ll be sharing!

Enchanted Homeschooling Mom – Royal Baloo – 3 Dinosaurs – Monsters Ed – Chestnut Grove Academy – Growing in God’s Grace – Royal Little Lambs – Life with Moore Babies – Teach Beside Me – The Usual Mayhem – Mum Central – Fantastic Fun and Learning – Kathys Cluttered Mind – Play Create Explore – Toddler Approved – Growing Book by Book – Adventures in Mommydom – B-Inspired Mama – The Fairy and The Frog – Edventures with Kids – Learning & Growing the Piwi way – A Gluten Free Journey – Mom to Crazy Monkeys – No Doubt Learning – Preschool Powol Packets – To The Moon and Back – Our Craft ~N~ Things – Farm Fresh Adventures – Proverbial Homemaker –  Look! We’re Learning!
Homeschooling with ADHD - Look! We're Learning!

Homeschooling with ADHD

June 3, 2013 by Selena Robinson 18 Comments

Good morning everyone! Thanks for stopping by to see us today! This week we’ll be starting off a new series called “Homeschooling with ADHD.”

Tigger was diagnosed with ADHD a few months back and we’ve made the decision (so far) to continue on without medication. Interestingly, her doctor actually said that the fact that we’re homeschoolers works in her favor. Since we don’t require her to sit still for several hours per day and we work with her on an individual basis, we may not need to use medication at all. Yet another win for homeschooling!

Keep Reading…

A Field Trip to Callaway Gardens!

May 22, 2013 by Selena Robinson 3 Comments

Hi everyone! Today we’re sharing pictures of our recent field trip to Callaway Gardens! On May 10, 2013, the gardens offered free admission to everyone in honor of National Public Gardens Day and we decided to pack up the Hundred Acre Wood crew to drive out to Pine Mountain, GA.

One of the things we loved the most was the free BINGO game that they hand out at the visitors’ center. The kids get to walk through the gardens looking for items on their bingo sheets and then marking them off. We ended up seeing almost everything on our list!

The gardens holds a live “Birds of Prey” show every day. During the show, they allow some of the birds to fly loose over the audience’s head, which was a huge hit with the kids. This is a Harris’s Hawk resting on the keeper’s glove.

This lovely bird is a Red-tailed Hawk. It was simply stunning.

After attending the bird show, we walked over to the Butterfly Center. It was an unforgettable experience. Inside the center, there are live butterflies and moths flying around everywhere!

This one landed right on my shoulder and Christopher Robin snapped a pic before it flew away.

We grabbed a snapshot of the kids in front of the center’s waterfall.

Piglet relaxes with Christopher Robin before leaving the center. She wasn’t too sure about the flying insects, as you can see.

Right before we left, we walked through the Azalea Bowl down to the Sibley Horticultural Center. We were so glad we did.

The kids got a kick out of the topiary.

Then we walked through an enclosed garden and it was truly breathtaking. We passed under a waterfall and down to this garden where we took a brief break on the benches before walking back.

On the way back to the car, Piglet perked up a bit. I guess she knew we were heading home!

We had a wonderful time at Callaway Gardens. Everyone was helpful and attentive and we got a chance to enjoy looking at the wonders of God’s creation and marveling at the “works of his hands”. (Psalm 19:1) We’ll definitely be back!

Have you visited a botanical garden with your family? How did you enjoy it? Let us know in the comments.

Keep on learning!

Visiting the High Museum of Art

May 13, 2013 by Selena Robinson 5 Comments

The High Museum of Art entrance

Good morning and happy Monday to you all! We’re beginning the week by sharing a recent field trip we went on as a family. Christopher Robin and I got a chance to visit the High Museum of Art in Atlanta last year before we had Piglet, but the kids had never been. So we decided to take them on their first trip to an art museum.

Pooh and Roo were excited to see the house cutout display. They insisted that it was Steve’s house from Blue’s Clues and they thought they could go inside, which was adorable. (It’s actually a work by Roy Lichtenstein.)

Roo pretends to trace the movement along the train tracks on this painting that was inspired by the Underground Railroad. (Don’t worry. He’s not actually touching it. We didn’t want their first art museum trip to be their last!)

When we visited, the High was just concluding a traveling exhibit called Frida and Diego, which showcased works by Frida Kahlo and Diego Rivera. At the museum’s Greene Family Learning Gallery, they displayed a few copies of her still lifes and set up an art circle for kids to work in.

Naturally, our three got to work drawing their own still lifes. (After we explained to them that the plastic fruit in the center was not for play.)

Tigger shows off her strawberry art.

We’re not exactly sure what Pooh was drawing here, but it’s still art!

Inside the Learning Gallery was a picture of this work by Tony Cragg called “New Figuration”. He used pieces of garbage and plastic to create it. This was easily one of the coolest things I’ve seen in a while.

Next to the picture, the museum installed an interactive magnetic wall so the kids could make art out of everyday objects such as alphabet letters, coat hangers, plastic dishware, and containers. They probably would have stayed at that wall all afternoon.

Even Piglet got in on the fun and held a plastic letter!

Of course, she then tried to put it in her mouth, but oh well.

All in all, we had a great time at the museum! The kids got their first real exposure to master artworks and we got a chance to stir up our artistic interest as a family. I’m calling this field trip a success.

Have you and your family enjoyed a visit to an art museum? How did you help your kids keep their interest in art after returning home? Let us know in the comments!

Keep on learning!

How to Afford Homeschooling: Avoiding Consumerism

April 24, 2013 by Selena Robinson 6 Comments

Hi everyone! Welcome to the final installment in our series “How to Afford Homeschooling”! We hope you’ve enjoyed our posts so far! Our last topic is “Avoiding Consumerism”.

We live in a country whose economy is based on consumerism. Everywhere we turn, there are commercials and advertisements that encourage us to buy, buy, buy. But for the homeschooling family on a budget, that kind of mentality can be damaging. If we want to afford homeschooling, it’s critical that we avoid consumerism.

How can we resist the temptation to buy more and more things? Here are a few suggestions:

Prioritize 

If homeschooling is the way we intend to teach our children, then it has to become an important part of our life plans. That means that homeschooling has to take precedence over other things we might also like to do. For example, I got a chance to go to England as a teenager and it was an incredible experience. I’d love to go back with my family so our kids can see it as well, but the cost of six airplane tickets is prohibitively expensive. Now that doesn’t mean we won’t EVER go, but it does mean that right now, it’s just not feasible. And that’s okay. If I have to choose between homeschooling or going to England now, I’ll choose homeschooling every time. England will always be there later. This opportunity to homeschool might not.

Recommit

We opened up this series about the need for couples to have “The Talk” when it comes to finances. But this can’t be a one-time discussion. We need to have ongoing conversations about budgeting, financial goals, and money management. When both spouses continue to commit themselves to living simply, it’s easier to avoid tempting purchases that could derail our homeschooling journey.

Focus

One of the main reasons we homeschool is so that we can spend more time with our children. Personally, I’ve found that when I’ve been drawn to buying something that we can’t afford, I’ve also been preoccupied with things other than my family. Of course, that’s going to happen at times, especially to a parent who works for a living. But, when I center my life around my family, I am far less interested in buying things. I also find that the more time I spend with my husband and our children, the more contented I feel with my life in general, which stops me from wanting more things.

Have you all dealt with the buy, buy, buy attitude? How do you keep it from invading your home and family? Let us know about it in the comments!

Keep on learning!

Related Posts:

How to Afford Homeschooling: Having “The Talk”

How to Afford Homeschooling: Finding Free Homeschool Resources

How to Afford Homeschooling: Making Friends with Your Local Library

How to Afford Homeschooling: Saving Money Around the House

How to Afford Homeschooling: Cooking Cheaply

How to Afford Homeschooling: Generating Income

How to Afford Homeschooling: Generating Income

April 17, 2013 by Selena Robinson 12 Comments

Hello again and welcome to this week’s installment in our series “How to Afford Homeschooling”! We’re coming down to the end of the series and I hope you all have found something that you can use in your homes! This week we’re discussing ways to generate income in the home.

Finding a way to bring in additional income to the household is always helpful, but the problem many homeschooling moms run into is finding legitimate work at home opportunities. There are work-at-home scams plastered all across the Internet. (I know this because I fell for a couple of them a few years ago.) So, I thought I’d share a few of the legitimate websites that I’m familiar with.

*Disclosure: I am currently employed by some of these companies. I do not, however, receive a commission for referrals, so you don’t have to worry about me making the job sound better than it is. 🙂

Freelance writing work at home jobs:

LME Guides – This is the company that I work for the most. The owner is a mother of three who started the business after leaving the corporate workforce and I’ve found her to be very understanding of the time demands of homeschooling moms. The company operates five websites about topics such as pharmaceutical drugs, career information, and valid coupons for travel attractions and restauarants, among others. Writers earn monthly revenue on their work, which means that you can write articles now and earn money on them from now on. You can apply here.

Content Current – This website often has articles available for writing, but it’s usually a feast or famine situation. So there are weeks where there’s more work than you can handle and there are weeks where there’s practically nothing at all. The good thing about this company, though, is that when there is work available, it’s very simple to do. Apply here.

Textbroker – I’ve been writing for Textbroker for the last three years off and on and they consistently have assignments available. The only caveat here is that you will be asked to take a writing test when you apply and the jobs that are available to you are based on how well you do. If you’re new to web content writing, I’d advise practicing extensively before signing up. Apply here.

Pure Content – Pure Content is a UK-based content company, which means that you’ll be asked to write in UK English on some assignments. If you write well, though, they’ll send you regular assignments. They also have openings for editors. Apply here.

Non-writing work at home jobs:

Leapforce – I worked for Leapforce a few years ago and I liked it a lot. Basically, you’re evaluating the quality of websites that appear in Google search rankings. The job itself was pretty easy, but it does require following a very detailed list of evaluation standards. When I worked for them, they were paying $13.50 per hour, but I don’t know if that’s still the pay rate today. Apply here.

Lionbridge – I’ve never worked for Lionbridge, but the work is essentially the same as Leapforce. (Generally, if you’ve worked for either of these, then you can’t work for the other one.) I don’t know about their pay rate, but the last time I checked, they were still accepting applications. Apply here.

I hope you all can use these websites to find work at home opportunities! If you have any other suggestions for valid work at home jobs, feel free to post them in the comments. Come back next week for our final series installment “Avoiding Consumerism”. Keep on learning!

Related Posts:

How to Afford Homeschooling: Having “The Talk”

How to Afford Homeschooling: Finding Free Homeschool Resources

How to Afford Homeschooling: Making Friends with Your Local Library

How to Afford Homeschooling: Saving Money Around the House

How to Afford Homeschooling: Cooking Cheaply

How to Afford Homeschooling: Cooking Cheaply

April 10, 2013 by Selena Robinson 6 Comments

Hi everyone! Welcome to this week’s installment in our series “How to Afford Homeschooling”! Today we’re talking about how we cook cheaply.

It’s no secret that feeding a family is really expensive, especially since prices continue to go up so often. And just when you think you’ve settled into a predictable grocery budget, the kids have a growth spurt and your food costs double. (I shudder to think how much we’ll be spending when Pooh and Roo are teenagers.) For now, though, we manage to keep our food budget at about $300 a month for two adults, one elementary-aged child, and two preschoolers. Here are some of the ways we make that happen:

Stick to a shopping list.

The night before we go shopping, I sit down with the store sale paper and base all of our meals around what meats are on sale. I write those items down and then I fill in the rest of our week’s menu with meals that I know I can make for about $5. Stir fry, spaghetti, and split pea soup are some of our regulars for dinner. Once I make the list, I total up the expected cost. At the store, I stick to exactly what’s on the list. Period.

Choose generic brands.

I grew up eating name brand foods and I was actually afraid to try generic brands for years. Surprise! They don’t kill you! Unlike what I heard from others, I can taste a difference. But, it’s certainly not a big enough difference to pay two or three times more for the same product. Naturally, buying generic means I can’t use coupons, but I end up saving more this way than I did in my couponing days.

Eat at home.

Okay, this one’s a suggestion you hear all the time, but it deserves repeating here. We used to frequent the drive thru window at a couple of fast food spots near home, because I was just too tired to cook. But, now that we plan our meals ahead of time, I know what we’re supposed to eat each day as soon as I get up. Christopher Robin is a HUGE help in this regard as well, because he’ll jump in the kitchen and cook dinner often. Which brings me to my last tip…

Involve the whole family.

We do almost all of the things on this list together. I ask for family input on the shopping list and if the kids want something we can’t afford, we tell them that it’s too expensive but we’ll find a way to make it ourselves. Now they’ve pretty much stopped asking for sweets altogether, because they know we’ll always have something they like on the menu. (They’re partial to Daddy’s chocolate chip pancakes.) We also shop for groceries as a family. A lot of times family food budgets go out the window, because spouses shop independently. But when we all go to the store together, it helps us stick with what’s on the list and get some ideas for the next trip.

These are just a few ways we save on our cooking each week. In a future post, I’ll share one of our weekly menus so you all can get a detailed look at how we feed our family on $75 per week. If you have any suggestions of your own, please share them in the comments.

Come back next week for our next post in the series: “Generating Income”! Keep on learning!

Related Posts:

How to Afford Homeschooling: Having “The Talk”

How to Afford Homeschooling: Finding Free Homeschool Resources

How to Afford Homeschooling: Making Friends with Your Local Library

How to Afford Homeschooling: Saving Money Around the House

How to Afford Homeschooling: Saving Money Around the House

April 3, 2013 by Selena Robinson 3 Comments

Good morning everyone! Welcome to this week’s post in our ongoing series “How to Afford Homeschooling”. The topic for today is Saving Money Around the House.

If you’re struggling to manage a home while teaching your kids all day, I don’t have to tell you that staying on a budget is difficult. Kids always want and need new things and somehow you have to find room in the finances to get those things, pay the bills, eat, and eventually get around to buying something that you need. Here are a few tips that we’ve found to be useful when it comes to cutting costs at home.

Household Care

  • Use homemade cleaners and detergent: Fun fact – I have not purchased laundry detergent in three years. Instead, I use a homemade detergent mix made from Ivory soap, washing soda (or baking soda), and Borax. Tipnut has a great list of homemade laundry detergent recipes. Personally, I prefer the powdered version because it’s much faster to put together and I make a smaller batch as well. I just grate an entire bar of Ivory soap and mix it with 2 cups of Borax and 2 cups of either washing soda or baking soda. Then I use 2 tablespoons per load. The really great thing about this recipe is that it’s very mild, so I can use it on Piglet’s diapers and Christopher Robin’s work clothes. I also make use of homemade household cleaners whenever I can.
  • Get rid of cable: Most homeschooling families I know personally have gotten rid of cable a long time ago, so this is probably a no-brainer. We have a Netflix streaming-only subscription and I use that plus a regular TV antenna to get our local channels and plenty of TV shows and movies for us to watch. I was surprised at how much our weekly TV consumption went down when we got rid of cable. There are actually days when we don’t turn it on at all and we don’t miss it either.

Bringing Up Baby

  • Breastfeed (if you can): Breastfeeding is undeniably the best way to feed a baby and all pregnant women are strongly encouraged to do it, unless there’s a reason why they absolutely cannot. One advantage people don’t discuss often, though, is that breastfeeding is so much more affordable than buying formula! I formula-fed Tigger after an unsuccessful attempt at nursing her and I’m here to tell you that buying cans of formula on a regular basis will easily put you in the poorhouse. 
  • Use cloth diapers wisely: Cloth diapering has come back into vogue in recent years, which is great! Disposable diapers are terrible for the environment and may even contain toxic chemicals. However, some people I know who tout the money-saving benefits of cloth diapers will spend $35 or $40 on one diaper without blinking an eye. Maybe they can afford that. I, however, cannot. A good supply of Chinese or Indian unbleached prefolds and a few covers will take you most of the way when it comes to diapering your baby. For Piglet’s overnight diapers, I bought used or second-quality diapers from other mamas at DiaperSwappers.

Keeping Up Appearances

  • Do your own hair – Both Tigger and I have dreadlocks, which I love because it means no more combs! Combing out hair was truly a traumatic experience in our house. However, natural (that is, un-permed) hair can be rather expensive, especially if you don’t know how to care for it yourself. And that’s where I learned that YouTube was my friend. I have learned how to style, retwist, and wash my hair from watching YouTube tutorials. Which is good, because our budget was not going to survive me spending $75 a month at the salon.
  • Shop for clothes smartly – I actually have skirts from when I was a teenager. (I can’t fit into them right now, but that’s another story.) I don’t buy clothes often and, when I do, I try to pick items that I know I’ll still like in a few years. Naturally, that means I’m not usually up-to-date on the latest trends, but when is a floor-length circle skirt going to go out of style? The answer is never.  

I could go on, but I don’t want you guys to have to endure an entire wall of text, so I’ll save some for another post. What are your tips for saving money around the home? Let us know in the comments!

And come back next week for our next installment “Cooking Cheaply”! Keep on learning!

Related Posts:

How to Afford Homeschooling: Having “The Talk”

How to Afford Homeschooling: Finding Free Homeschool Resources

How to Afford Homeschooling: Making Friends with Your Local Library

  • « Previous Page
  • 1
  • …
  • 35
  • 36
  • 37
  • 38
  • Next Page »
Hi! I'm Selena, a veteran teacher and homeschool mom to four. I'm so glad you're here!
About Me Contact Terms of Use Privacy Policy Places I Share
Facebook Pinterest Instagram
Homeschool Printables Unit Studies Shop the Store
Copyright ©2026, Look! We're Learning!. All Rights Reserved. Design by Pixel Me Designs