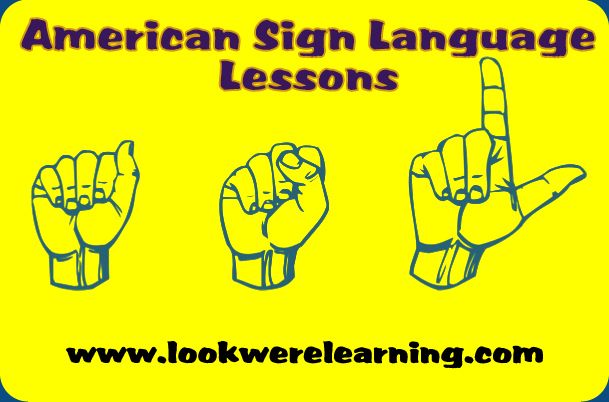
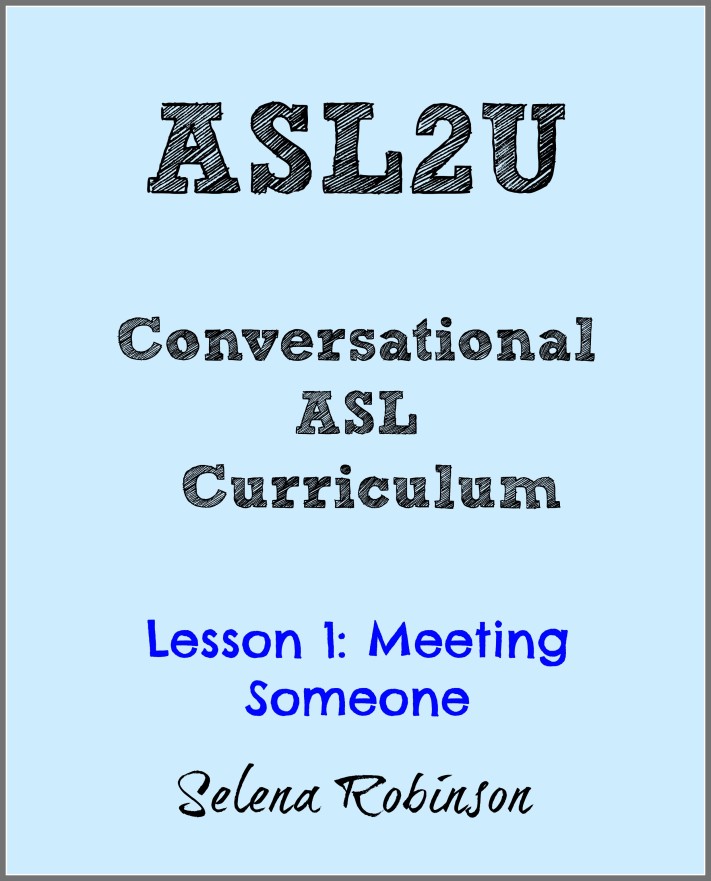
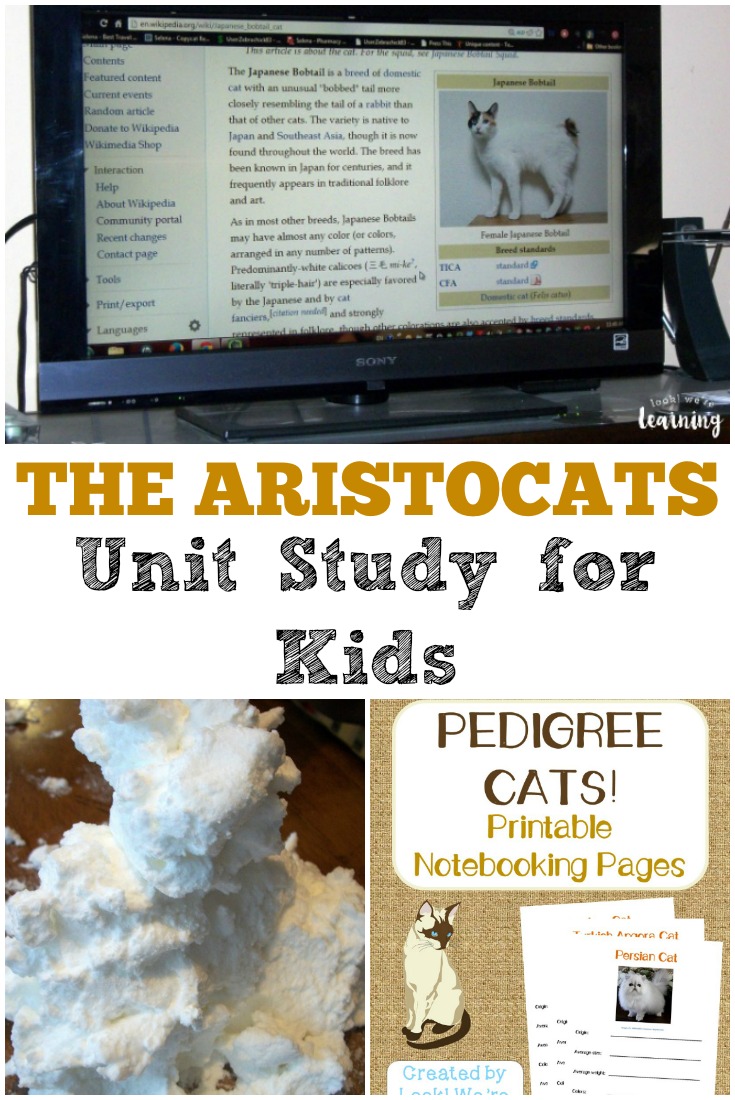
Hey everyone! It’s time for American Sign Language Lesson 2 here at Look! We’re Learning! Last time, we learned letters in ASL and numbers in ASL. Today we’re sharing some basic greetings in ASL, including:
Early Learning. Happy Teaching.
Hey everyone! It’s time for American Sign Language Lesson 2 here at Look! We’re Learning! Last time, we learned letters in ASL and numbers in ASL. Today we’re sharing some basic greetings in ASL, including:

Image: Wikimedia Commons
Hey everyone! Finals are nearly over and I can finally breathe again, so I’m back! 🙂 It’s a new month and that means it’s time for a new Living History figure! This month, we’ll be learning about jazz great Ella Fitzgerald.
When I was young, I remember hearing my mom speak about Ella a few times and I remember seeing her on television during the 80s. I’d never seen her name written out, so I always thought her name was “Elephants Gerald”…lol.
A few years back, Jay and I were watching PBS and we came across a live performance of Ella singing with Frank Sinatra. I was stunned at how powerful her voice was and how she could just sit down and sing without looking like she was even trying.
Here she is with Sinatra performing “Goin’ Out of My Head”:
See what I mean? She’s just sitting there and yet her voice is wayyyy up in that high octave! Not many singers today could hit those notes even if they strained.
Unfortunately, I don’t know much about Ella other than what I saw on TV, so it’s time to get to know her better. Here are a few of the books about Ella Fitzgerald we’ll be using this month:

![]()
Ella Fitzgerald: The Tale of a Vocal Virtuosa![]()

![]()
Skit-Scat Raggedy Cat: Ella Fitzgerald![]()

![]()

![]()
Ella Fitzgerald: A Biography Of The First Lady Of Jazz![]()

![]()
Ella Fitzgerald: The Complete Biography of First Lady of Jazz, Updated Edition![]()
Be sure to stop back by on December 30 to see what we learned about Ella Fitzgerald’s life and career this month!
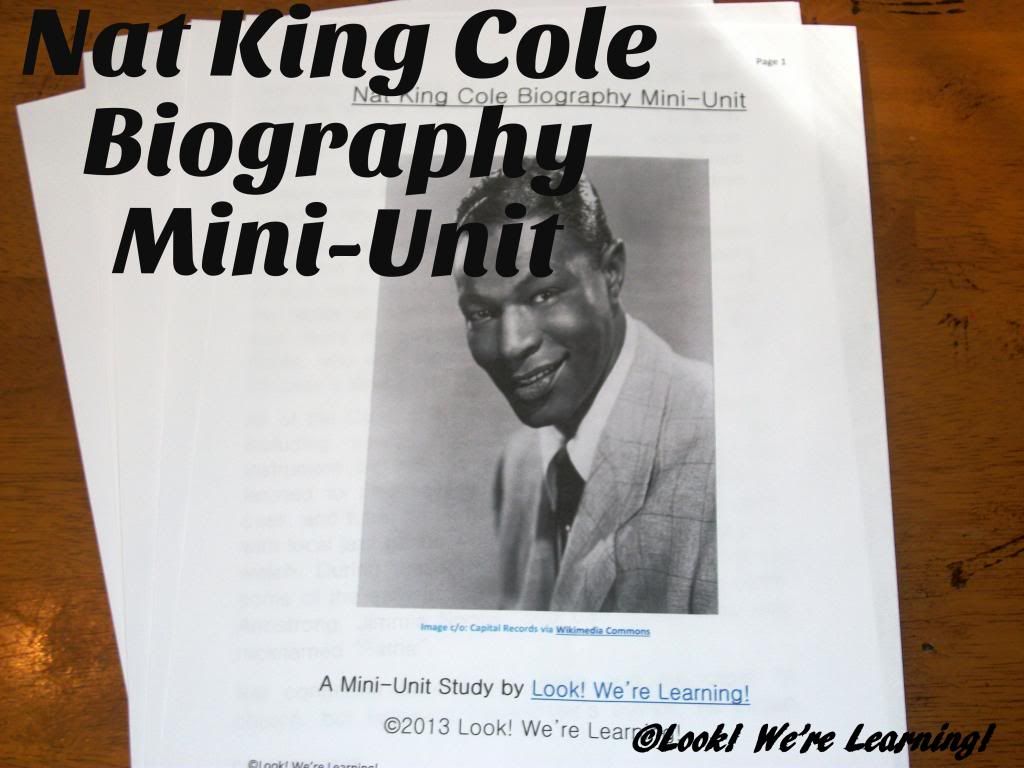
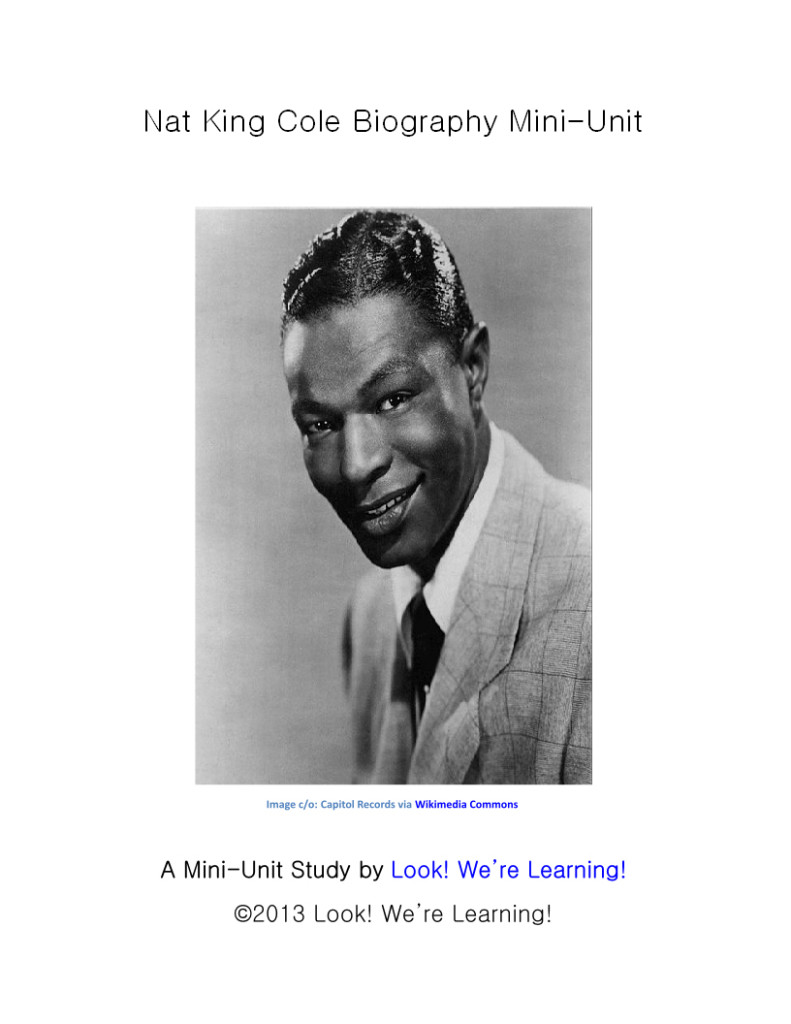
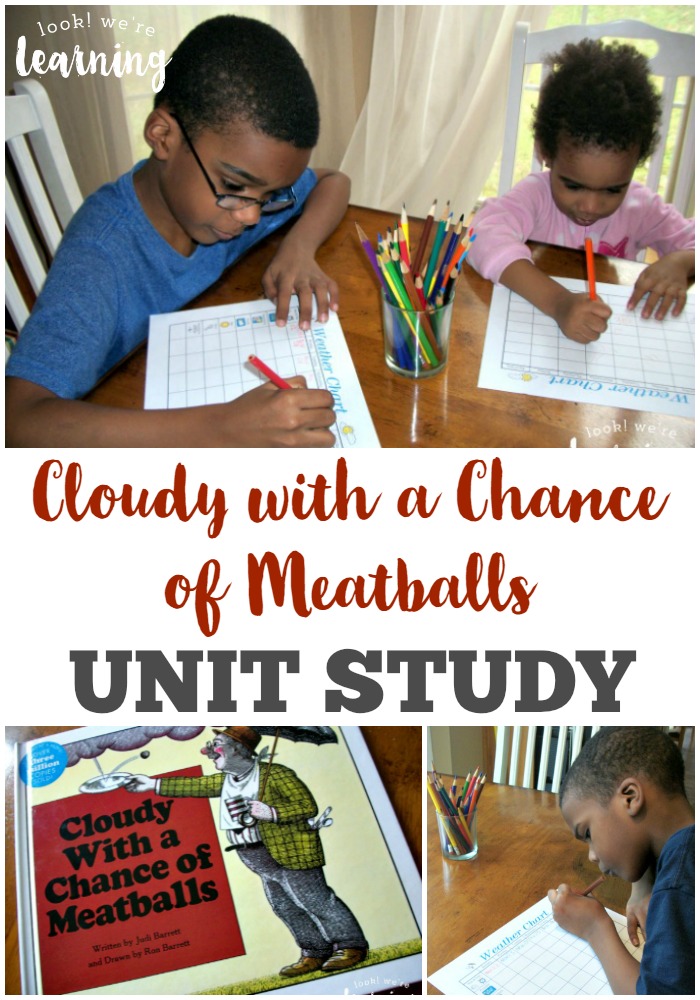
Hey everyone! It’s November and we’re sharing our latest Living History series mini-unit! This month we learned about the life and legacy of Nat King Cole. We put together a biography mini-unit about Nat King Cole’s career, along with a few exercises, and shared it with the kids.
We learned quite a bit about Nat’s life this month. For example, we learned that he learned to play the piano by ear and that he didn’t begin professional piano lessons until his pre-teen years. We were also interested to learn about Nat’s experiences with racism and how he refused to let those events make him angry or bitter.
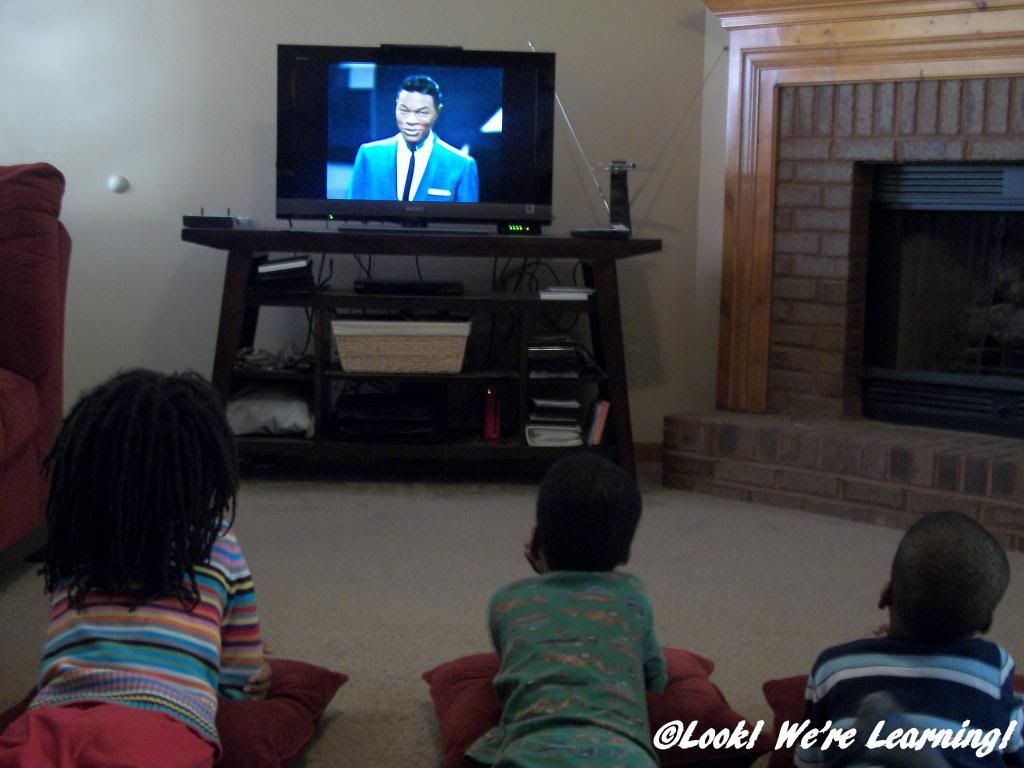
After we completed the unit, we watched “An Evening with Nat King Cole”. All of us ended up singing his songs the rest of the day.
To use this unit with your family, feel free to download it by clicking the link below! And be sure to stop by next week to see who we’re learning about during the month of December!
Hey everyone! I’m super excited today because we’re starting a new ASL lesson video series here at Look! We’re Learning! Our first ASL video lesson is up on YouTube and it’s a review of the letters A through Z, as well as numbers 0 through a quadrillion! (Really.)
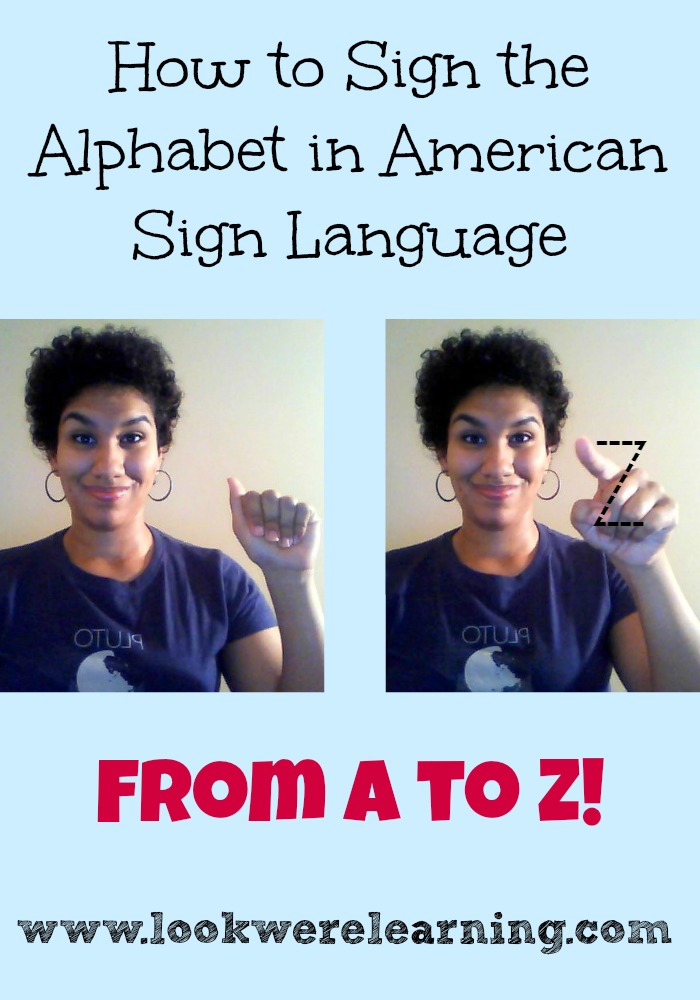
We’ve shared some great resources that feature how to sign the alphabet in sign language! Check them out below:
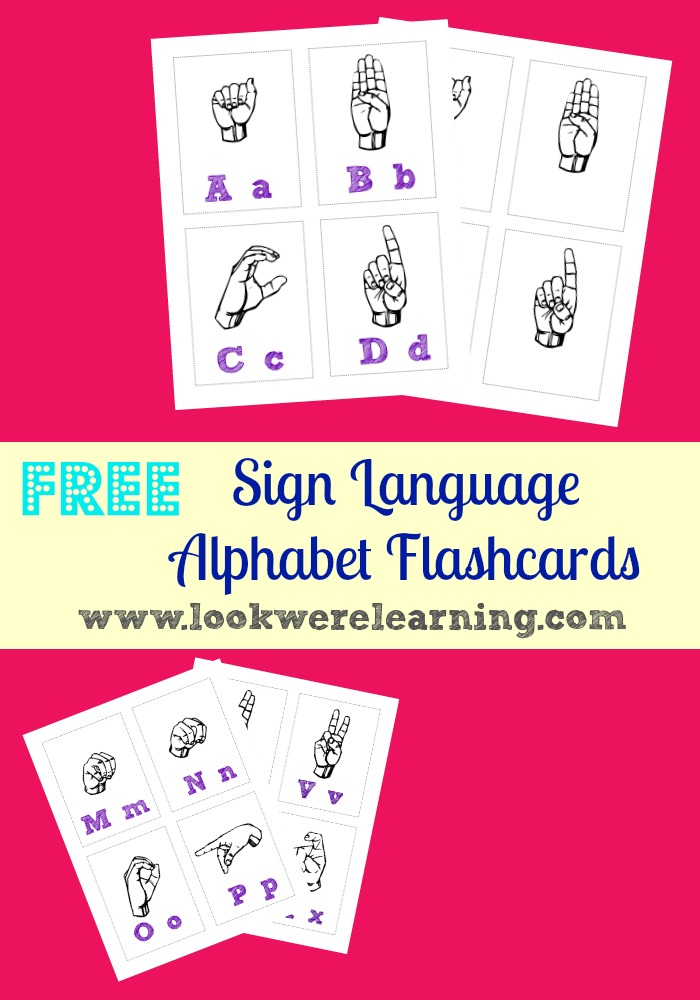
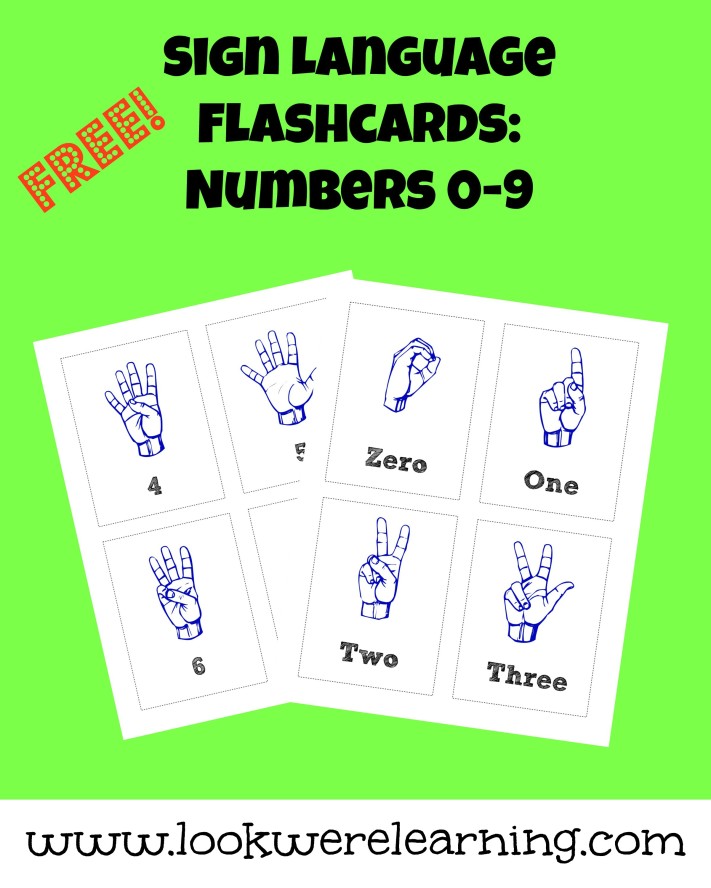
To get a look at the alphabet and numbers in ASL, watch the video lesson below! You might want to print the flashcards to refer to as you watch.
We’d love to know what you think! By the way, if there are any topics in particular, you’d like us to cover, feel free to let me know here! You can subscribe to our future videos by clicking here.
Get more ideas for learning ASL on my American Sign Language Lessons board on Pinterest!
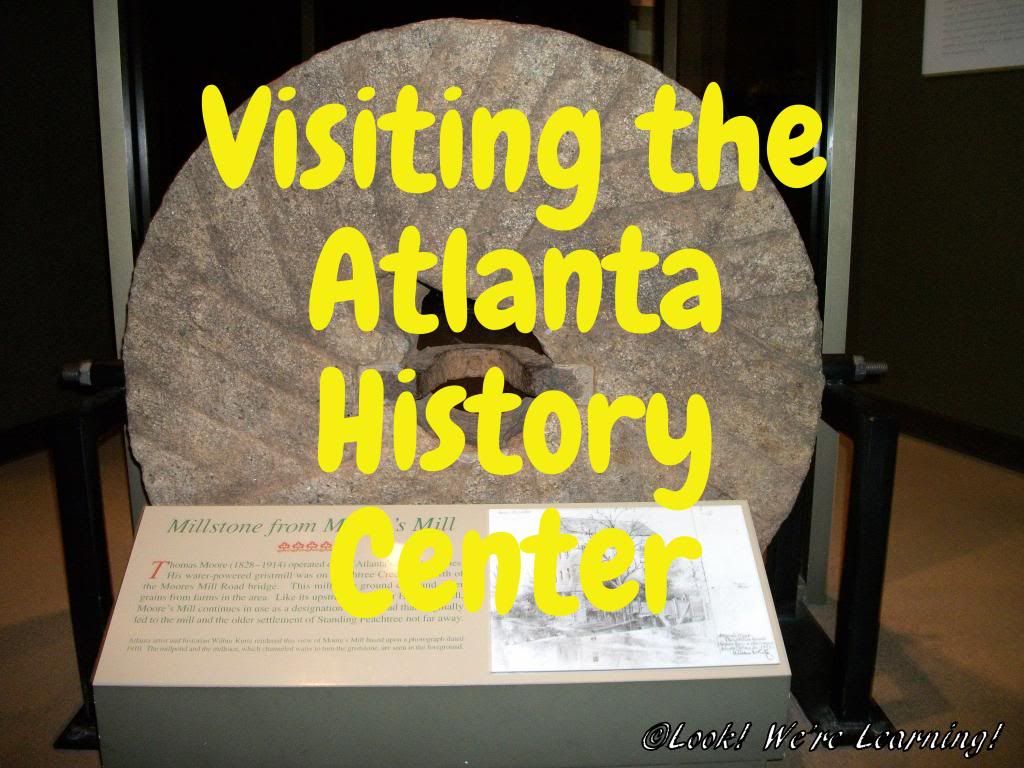
Good morning! We got a chance to visit the Atlanta History Center a few weeks back and we’re sharing pictures from our trip with you all today!
Every year, there are special Atlanta History Center homeschool days where homeschooling families can enter for a discounted rate. To begin the year, though, the museum held a Homeschool Open House day when admission was absolutely free! This was the first year that we were able to attend and we thoroughly enjoyed our visit!
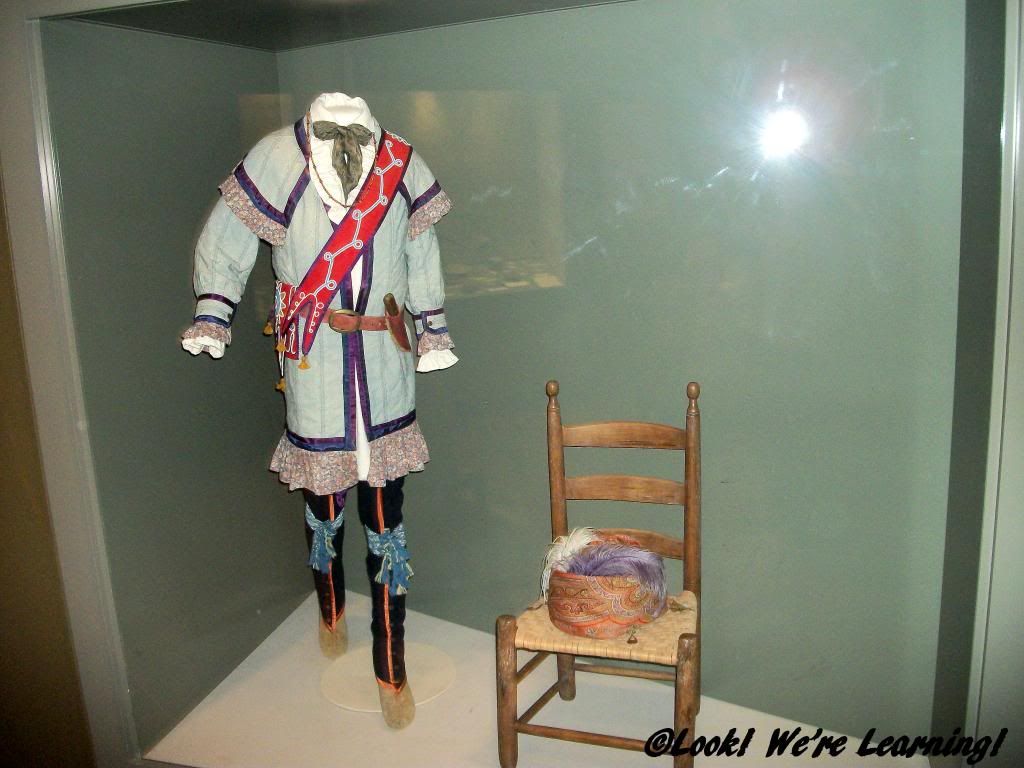
Since the museum is in Georgia, a lot of the historical exhibits relate directly to Georgia history and the development of the city of Atlanta. This display shows the typical dress of a Cherokee Indian during the 1830s. I had no idea that many Cherokees had assimilated colonial styles of dress in those days.
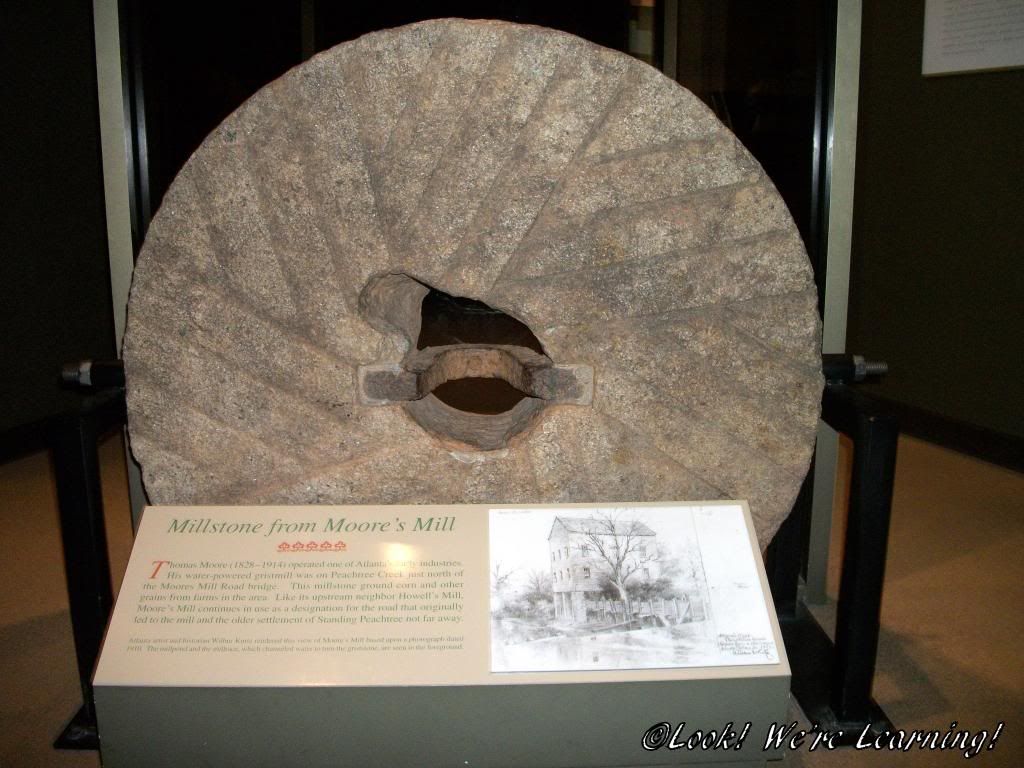
An actual millstone from an 1800s flour mill. That thing was enormous.
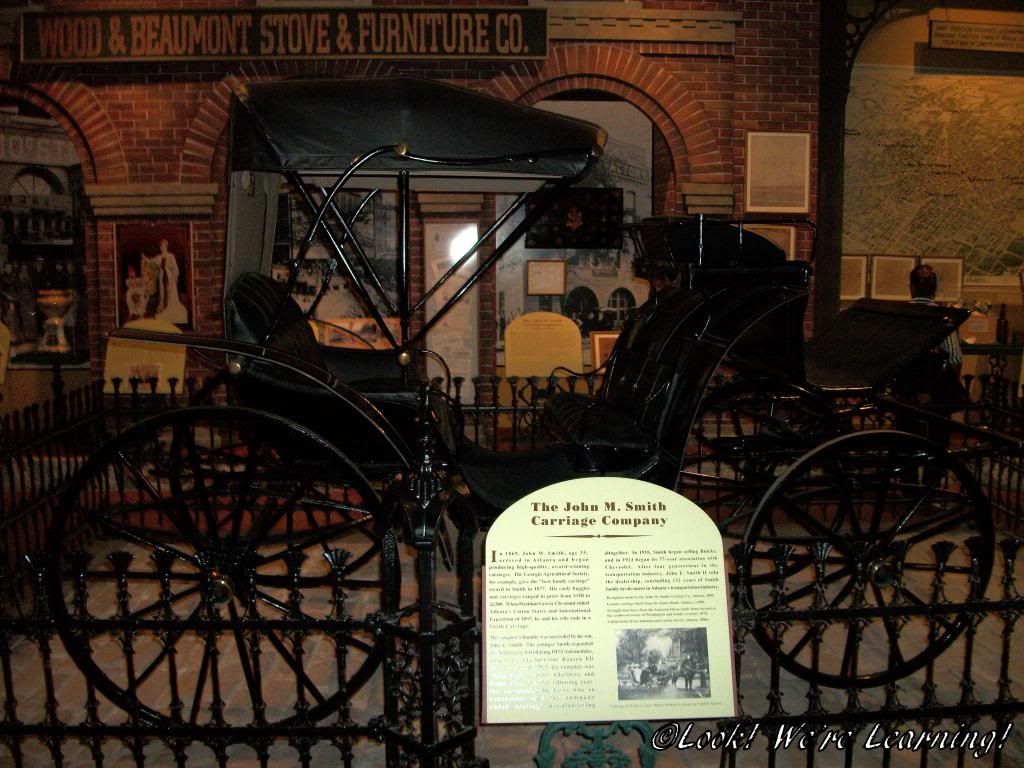
There were a lot of carriage and automotive companies in and around Atlanta in the 19th and 20th centuries. Here’s a life-sized reconstruction of a carriage from the John M. Smith Carriage Company.
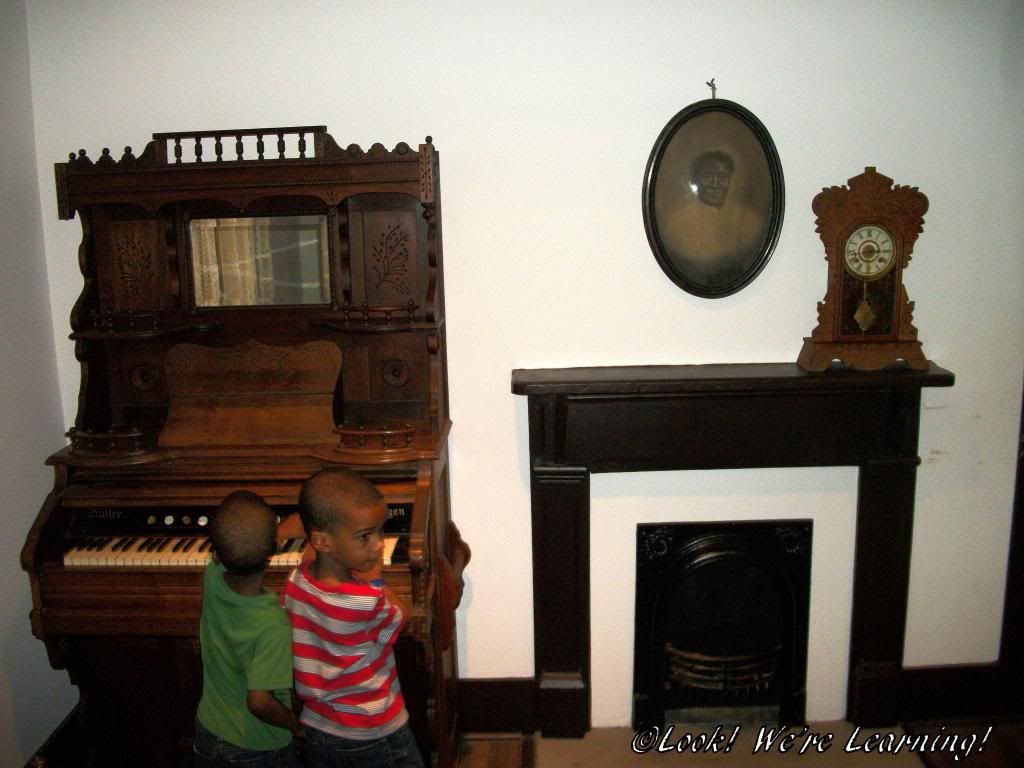
One of the coolest things in the center, to me, was the Dixon-King Shotgun House. It’s an actual 1800s house that has been relocated and reassembled within the history center. They kept the original furniture and restored the interior.
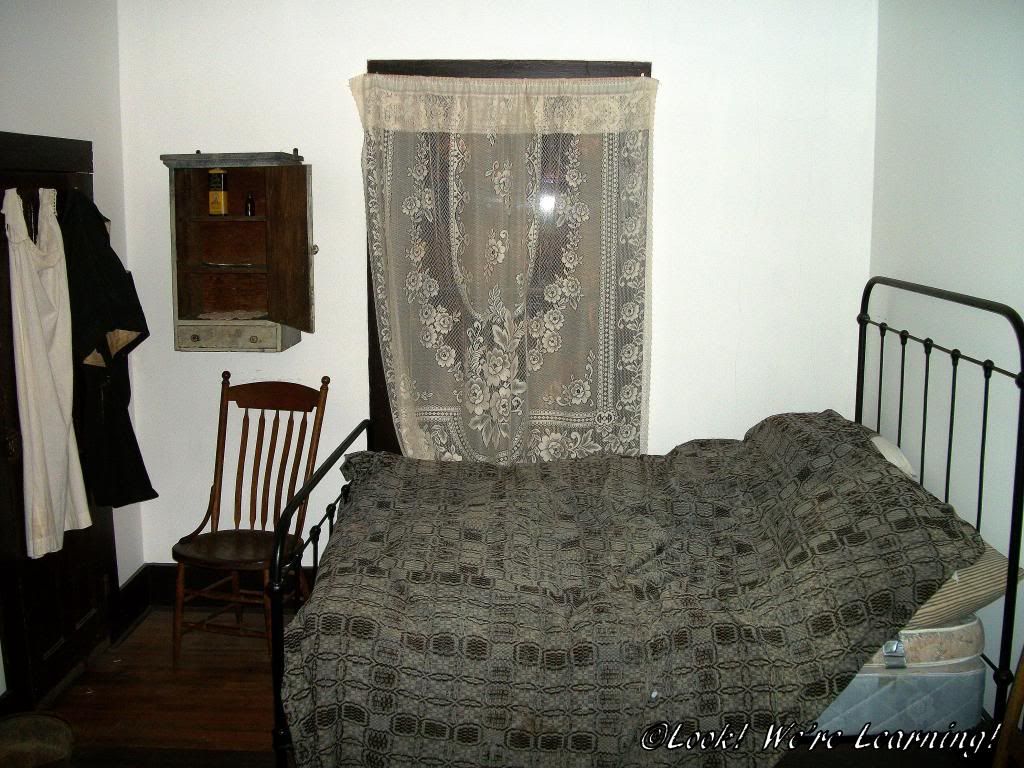
A look at the house’s bedroom.
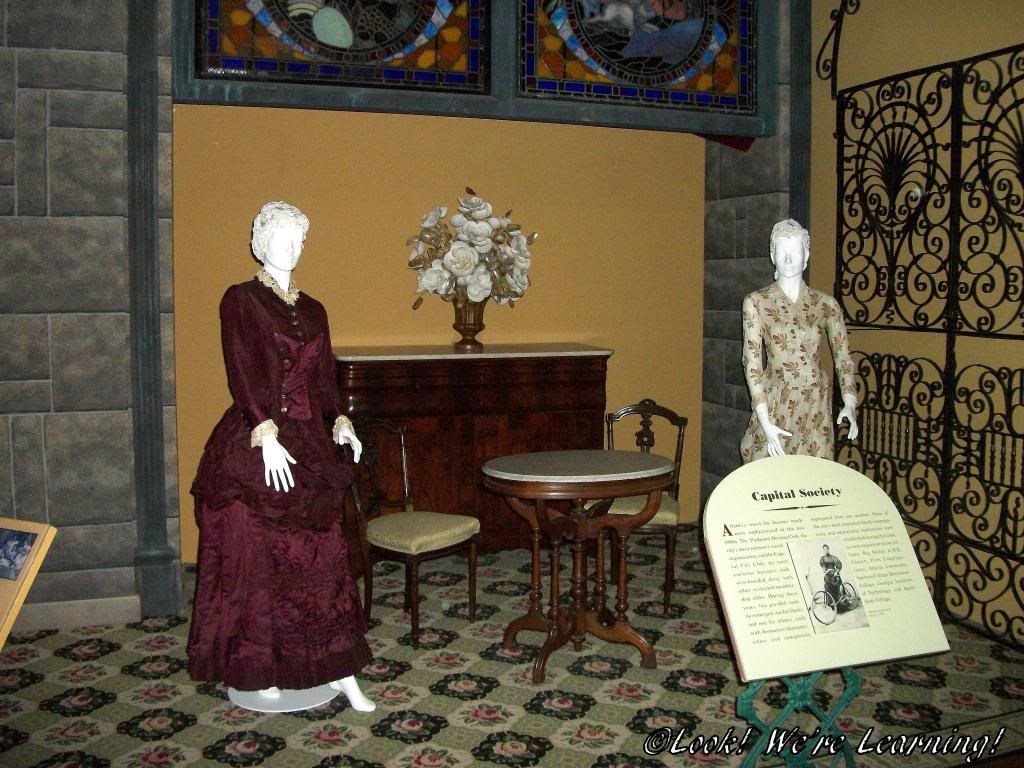
Typical Georgian high society fashion from the 1800s. I think I’d wear that floral dress today.
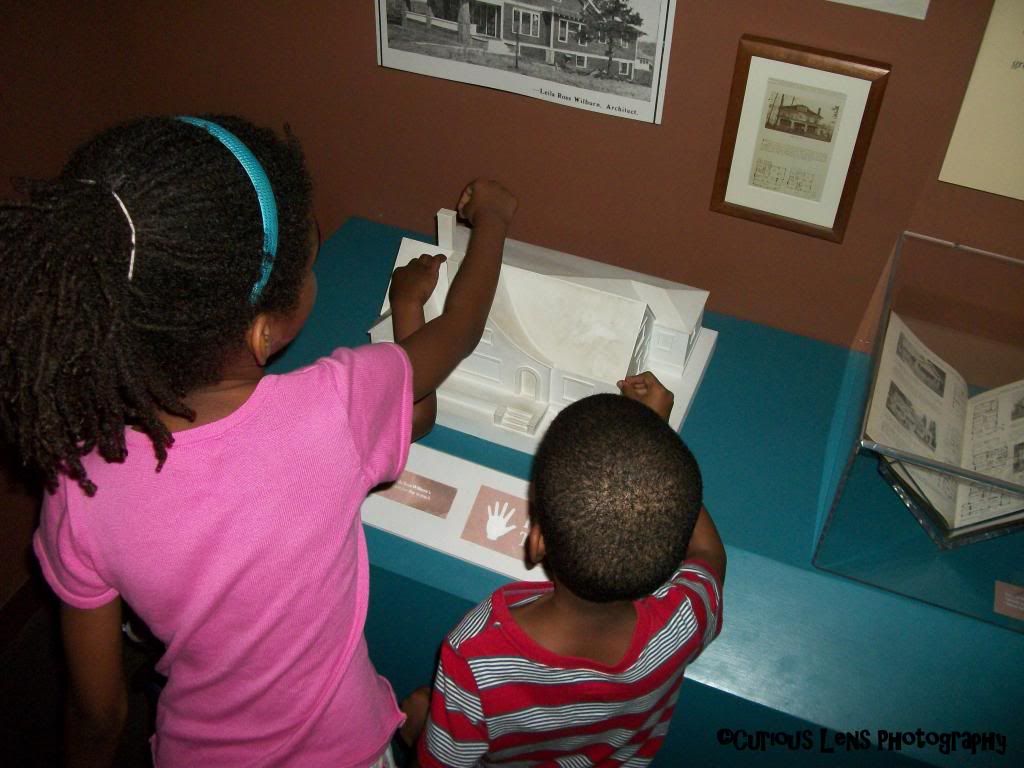
The biggest issue when you visit a museum with kids is keeping their hands off the exhibits. I really appreciated that the Atlanta History Center has specific items that are clearly marked for kids to touch. It gives them a chance to interact with the exhibits and it allows them to touch something, so that they won’t be tempted to grab everything they see.
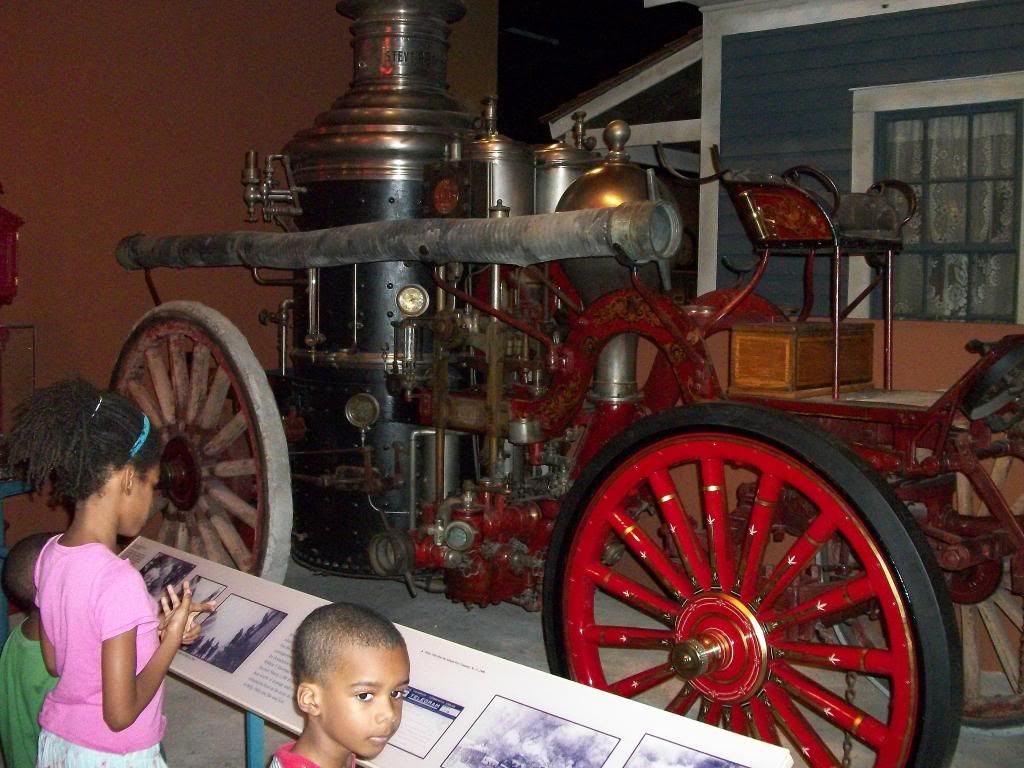
An actual fire engine from the 1800s.
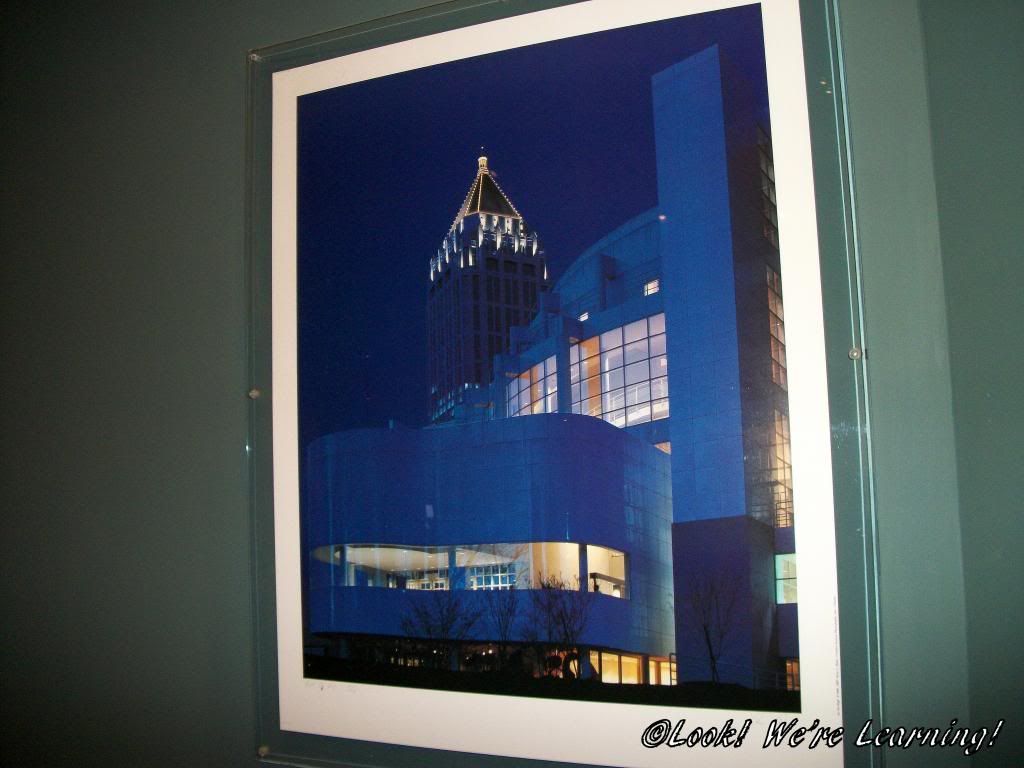
An entire exhibit at the center focused on the modern development of the city of Atlanta. There were pictures and models of several city landmarks. This is a picture of the High Museum of Art at night.
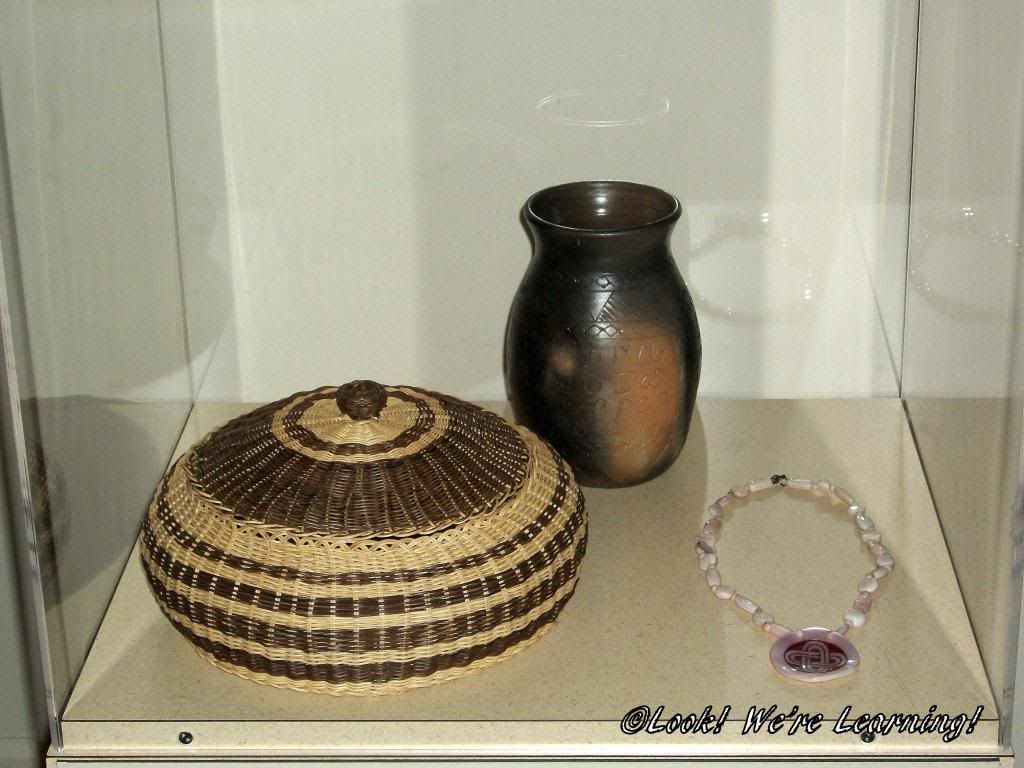
Replicas of native Indian handiwork from the 1800s. Northern Georgia was home to both the Cherokee and the Creek Indian tribes – both of which were forcibly removed along the Trail of Tears.
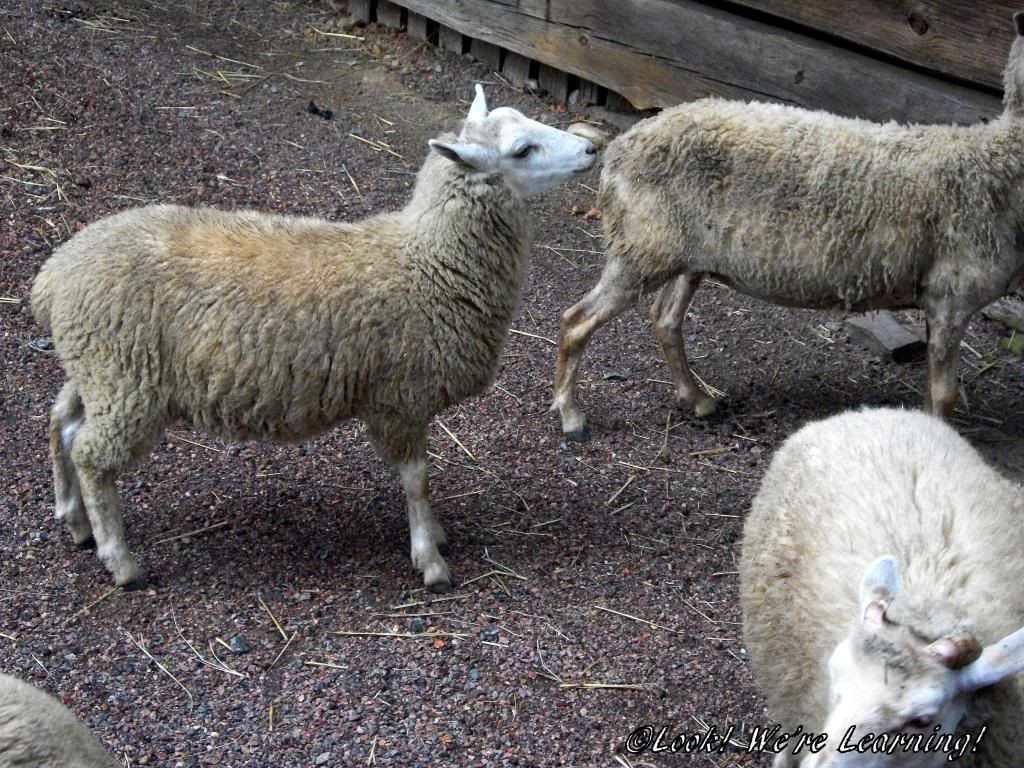
Outside the center, there are a couple of historical houses that have been restored. They keep sheep at one of them, just the way that farmers would have done in the 1800s.
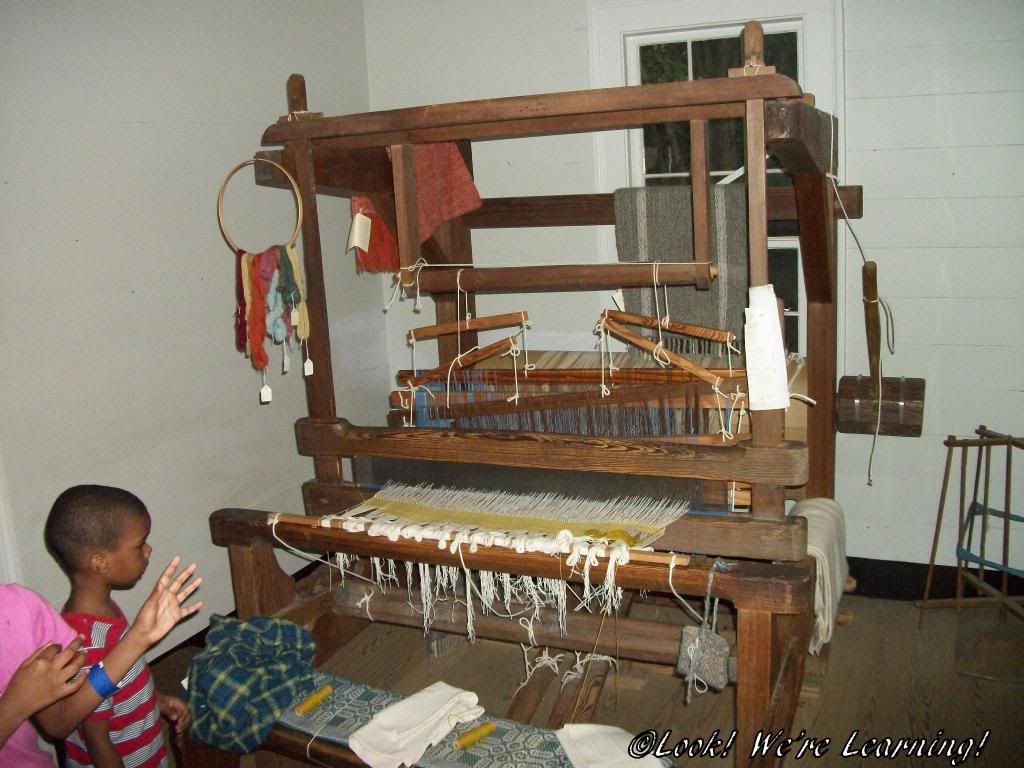
We got the chance to examine this loom inside the Smith Family Farm house. (My inner crafter gave a little shout for joy at seeing an actual loom in person.)
After spending several hours at the center, we still didn’t see everything that was on display. We’ll definitely have to make another visit soon!
Happy Friday everyone! It’s time for another Bee Crafty Kids Link Up! Every Friday, I get to co-host this roundup with Dusty from To The Moon and Back and Melanie from Our Crafts N Things! You can find out more about all of us here.
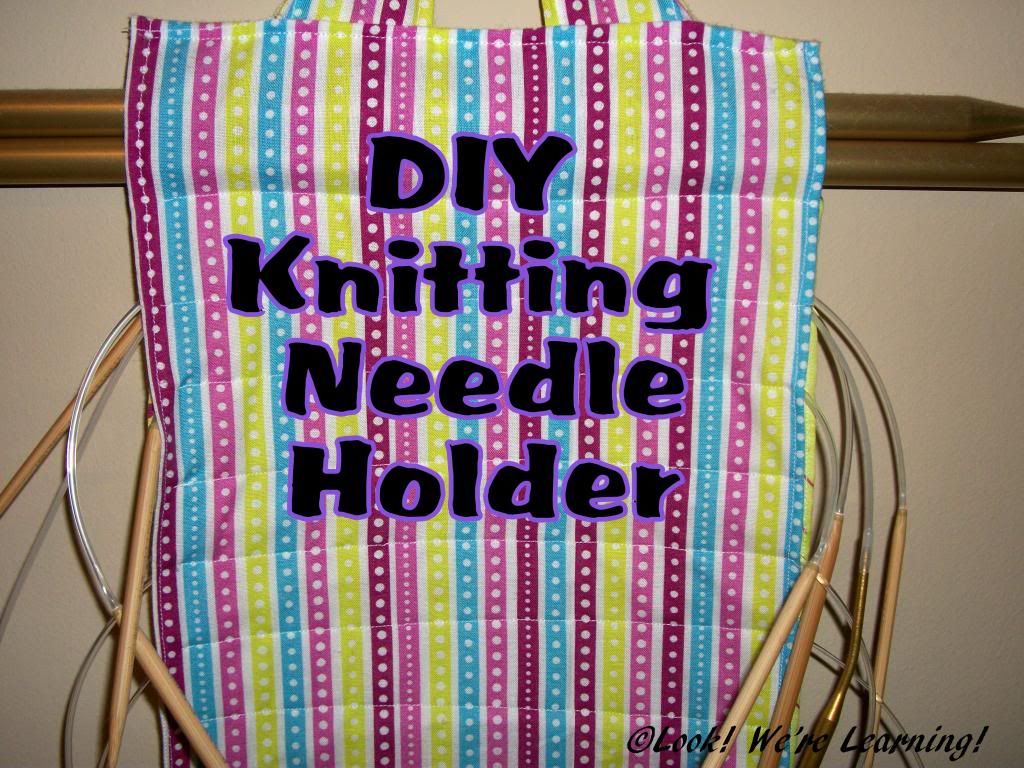
This week, I’m sharing a couple of DIY knitting needle holders that are super easy to sew.
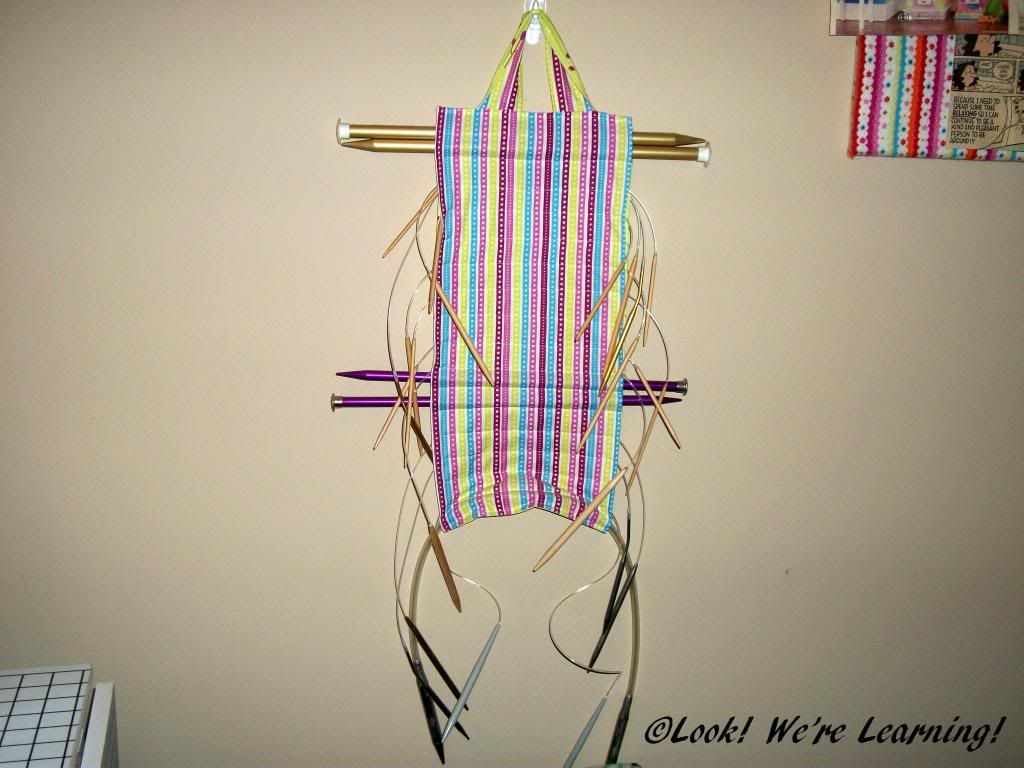
If you have circular knitting needles in your house, then I don’t have to tell you that it’s a pain keeping them organized. They roll up in funny ways and get tangled in your straight needles and it can quickly become a mess. The solution: A hanging knitting needle organizer!
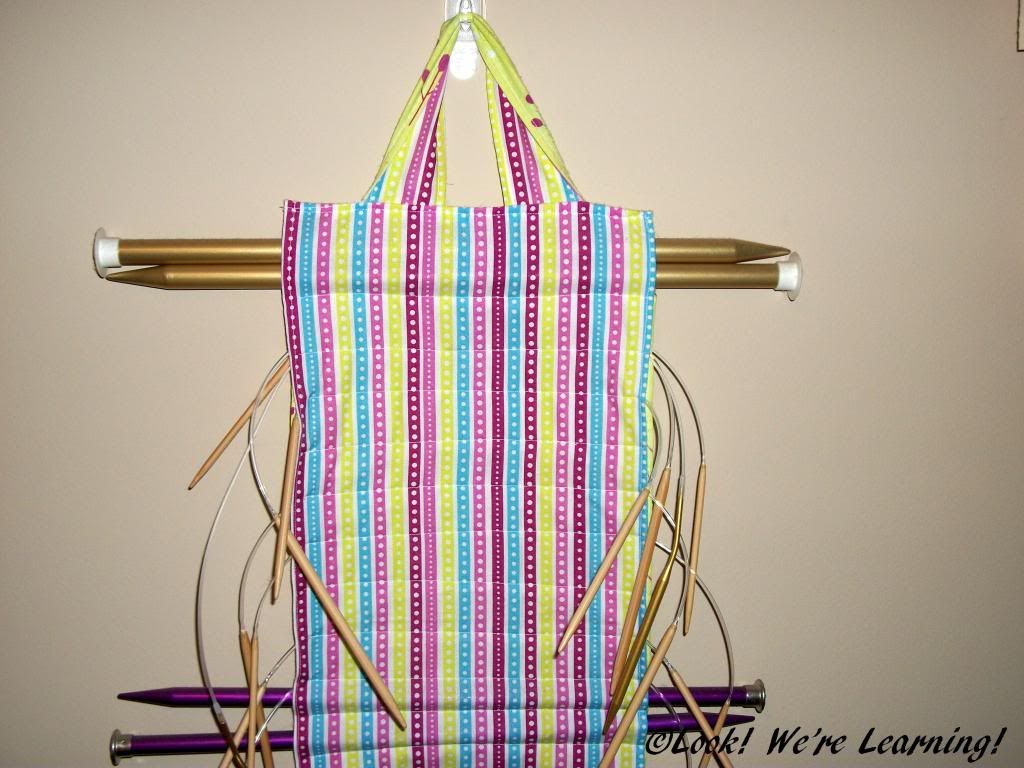
Now you can buy these already made, but where’s the fun in that? All it takes to make your own is a couple fat quarters of fabric and some thread. To make this one, I followed the tutorial from Pin and Paper. You only need to sew straight lines to stitch it together, so it’s a perfect beginner’s sewing project. In fact, I plan to help Tigger sew one for her budding knitting needle collection.
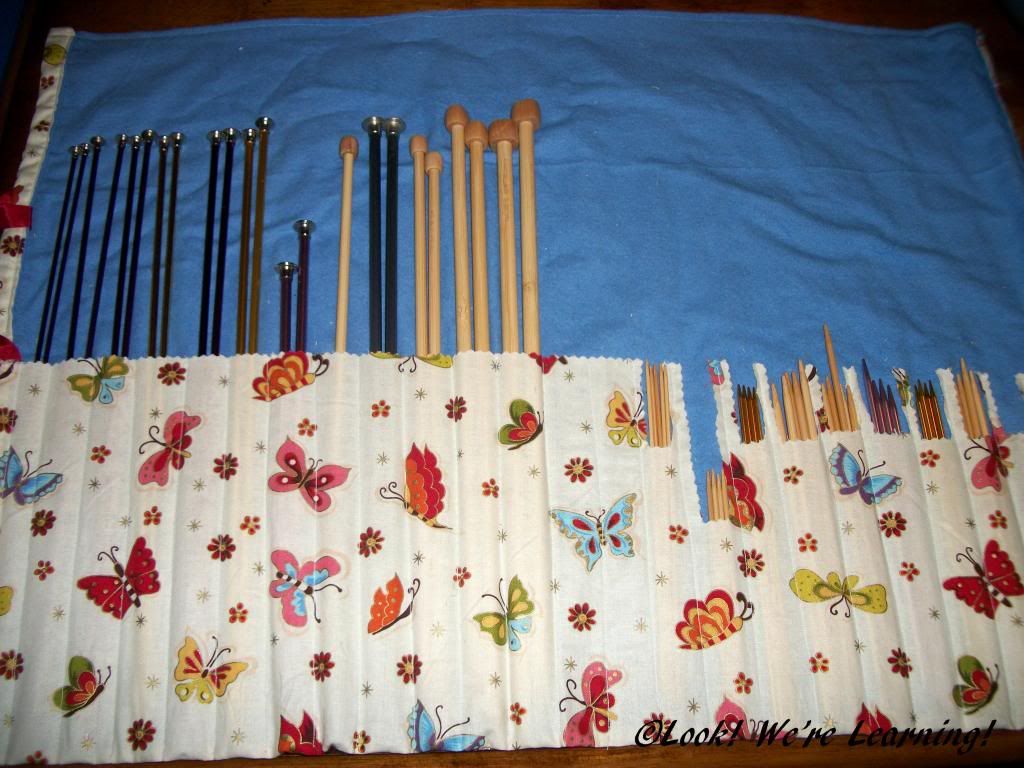
For straight needles, you can make a simple DIY knitting needle roll. This is pretty much the same design as the hanging organizer but without the loop at the top. WikiHow has a great picture tutorial on how to make this one. It just requires two pieces of fabric and a string of ribbon.
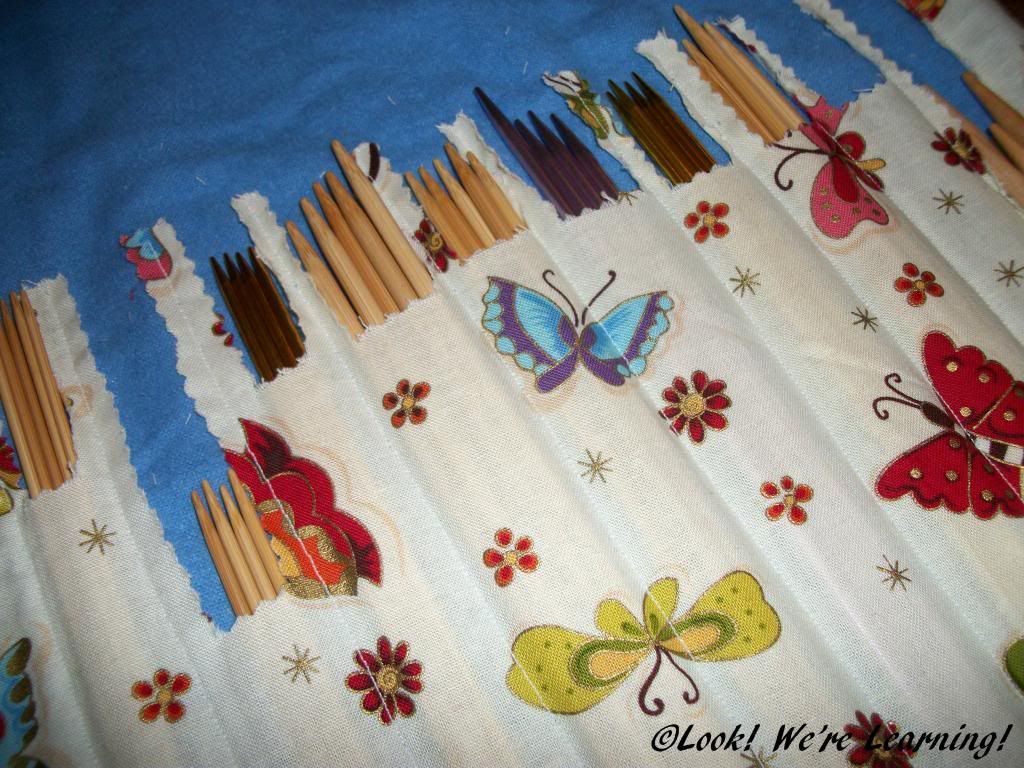
To make room for my shorter double pointed knitting needles, I just used pinking shears to cut the pockets down so that I could reach them.
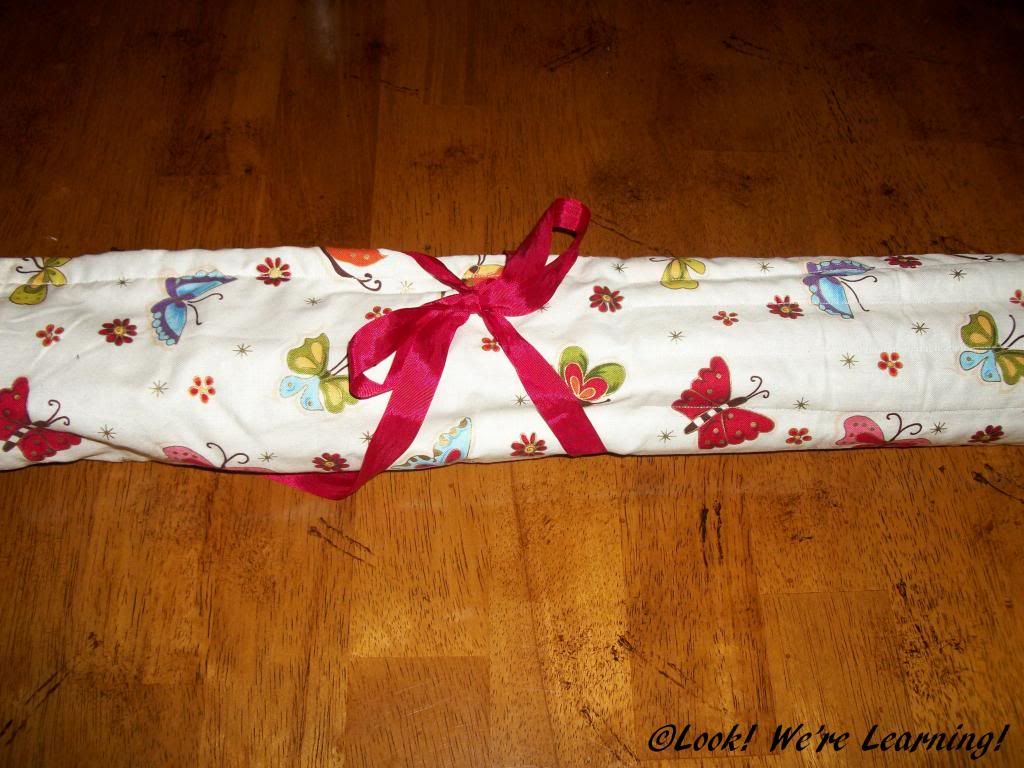
All tied up! These make great gifts for the crafters in your life, so you might want to encourage your kids to make them for homemade gift giving.
We’d love to see the crafts you and your family cooked up this week! To share the button for this linkup, grab the code below!

<div align="center"><a href="https://www.lookwerelearning.com" title="Look! We're Learning!"><img src="http://i1165.photobucket.com/albums/q594/dustybug83/BeeCraftyKids3_zps44074ad6.png" alt="Look! We're Learning!" style="border:none;" /></a></div>
Link up your kid-approved craft activities below! And be sure to visit the other posts in the link up this week!
Rules are simple:
~Enter the direct link to one or more of your own posts that showcase a craft or hands on activity for children.
~A link back with the above button is appreciated, but not required
~Try to at least comment on one or two of the other blogs that took the time to share and join!
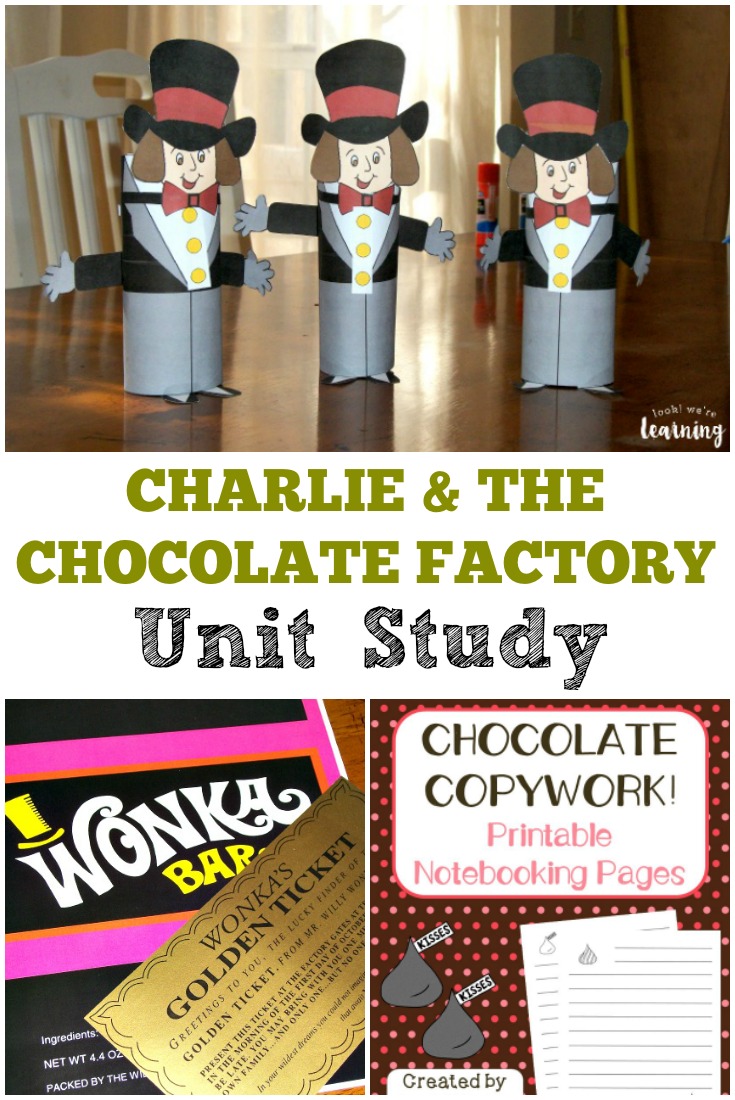
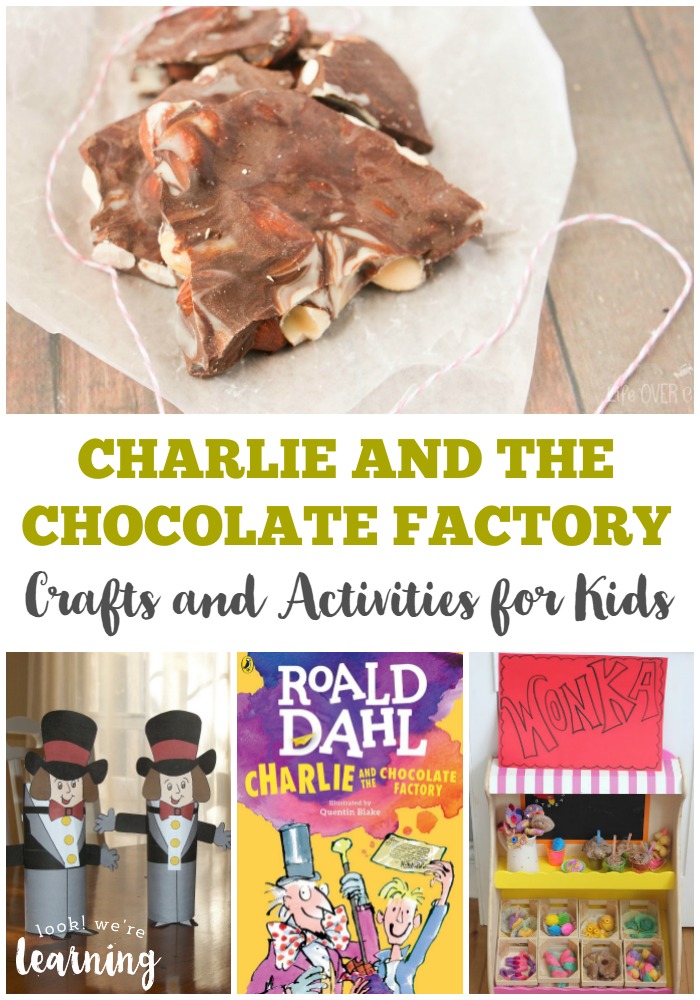
Remember the first time you read the book Charlie and the Chocolate Factory? Or the first time you saw the movie Willy Wonka and the Chocolate Factory? Those were basically life-changing experiences for me. So when it was time to introduce our kids to Charlie Bucket, Willy Wonka, Veruca Salt, and all the others, I wanted to make it memorable for them too.
And that’s why we put together this Charlie and the Chocolate Factory unit study! There are crafts, printables, and activities here that relate to both the story and the movie. If you love this one, don’t miss our other homeschool unit studies, including our Cloudy with a Chance of Meatballs unit!
This post contains affiliate links. For details, see our Disclosure Policy.
We began by reading the book Charlie and the Chocolate Factory by Roald Dahl. We split the reading up into three chapters per school day and both Jay and I took turns reading it aloud. The kids were fascinated with it right from the beginning. Probably because of all the talk about candy. 🙂
Tigger looked up some of the unusual vocabulary words along the way and she completed a character map all about Charlie – what kind of personality he had, his family’s living situation, and the way he looked. Charlie is probably one of the most sympathetic characters in all of children’s literature. You really root for him through the whole book.
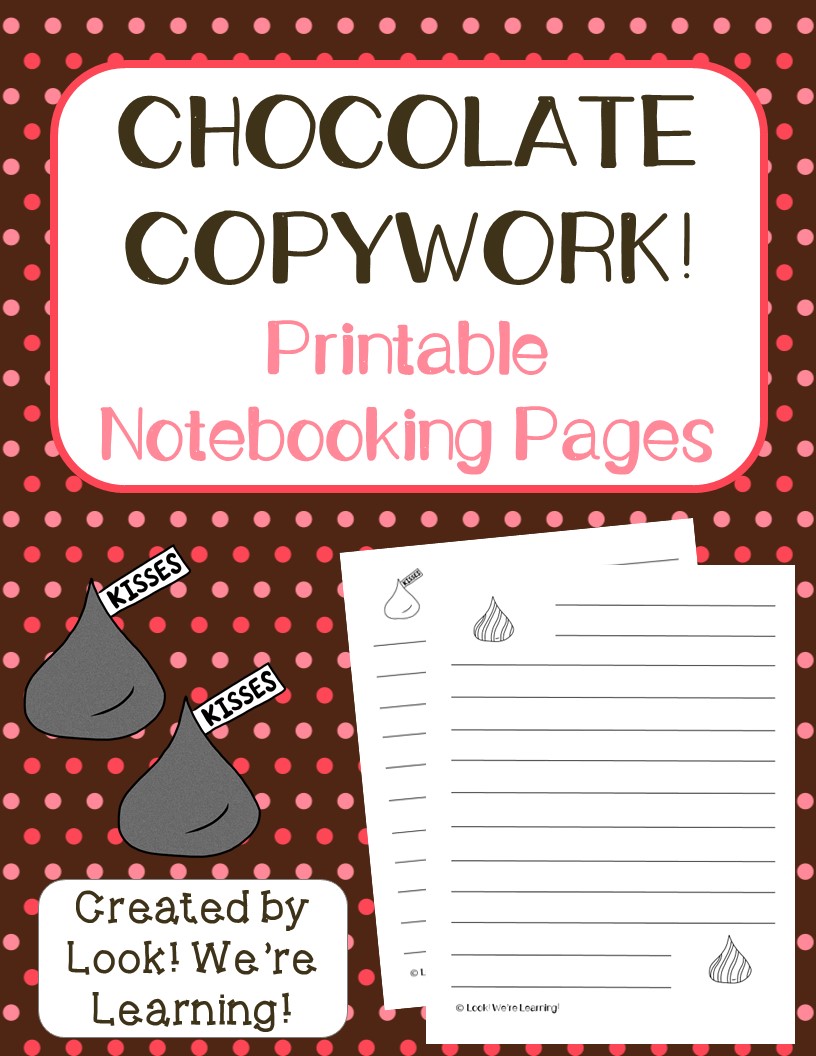
These free chocolate notebooking pages are a fun way to help kids keep track of their vocabulary words through the book! To get your copy, just click the image or the link below.
Once we finished the book, we did a Willy Wonka toilet paper roll craft using a circusmaster toilet roll craft from DLTK Crafts.
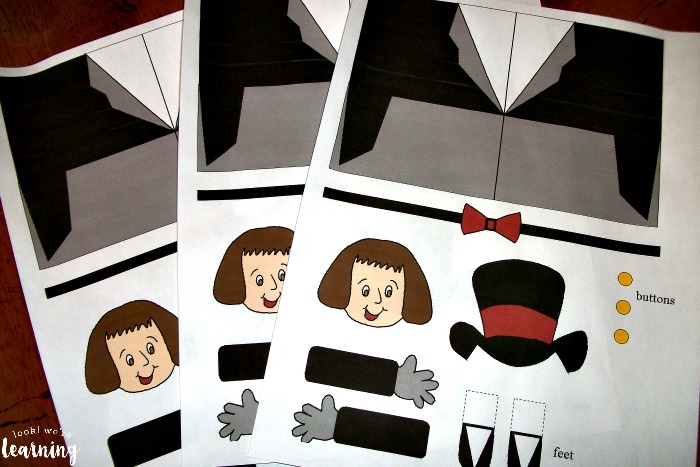
We just printed out three copies – one for each child.
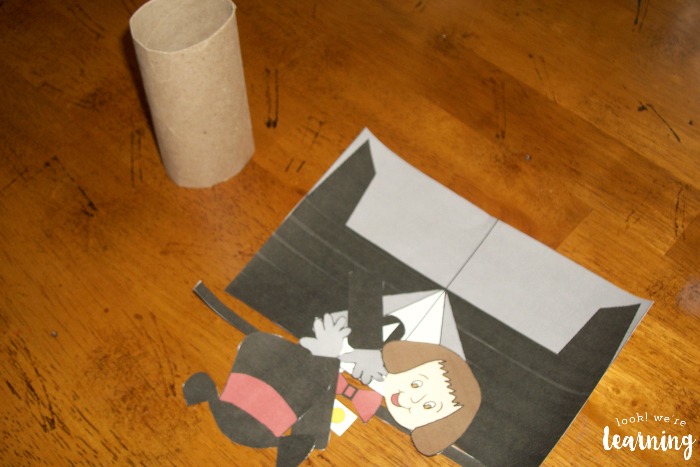
Then we cut out the pieces and slowly began assembling them. I liked this project because there weren’t a lot of pieces and the kids only had to glue a few of them together.
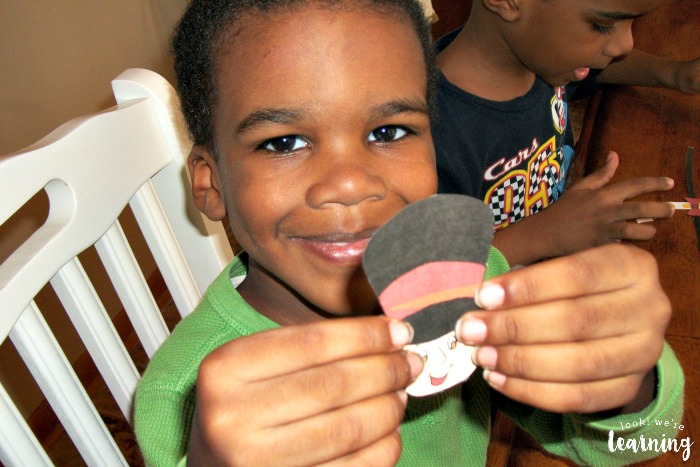
We also found out that liquid glue is much better for this than glue sticks. Just so you know.
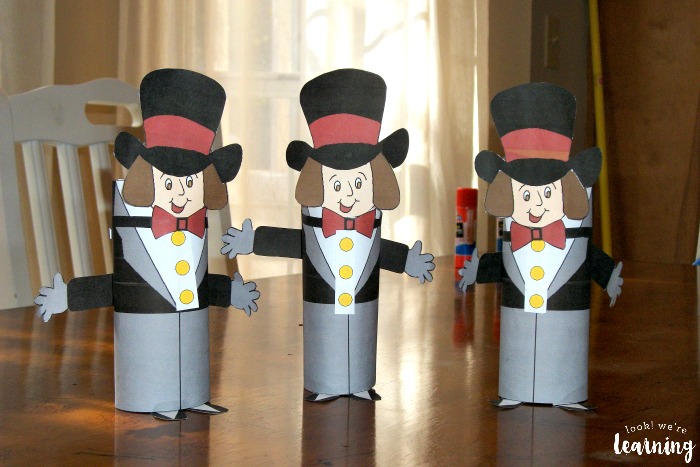
Three Wonkas!
We decided to finish the unit by watching the original movie Willy Wonka and the Chocolate Factory. Of course, we couldn’t enter the factory without finding a golden ticket in a Wonka bar.
The problem is that we couldn’t find any Wonka bars for sale. (I remember seeing them when I was younger, but I guess they stopped making them.) Amazon.com to the rescue!

We bought a super cute Willy Wonka Chocolate Bar wrapper with a copy of the Golden Ticket and used a regular 4.3 ounce chocolate bar as the candy.
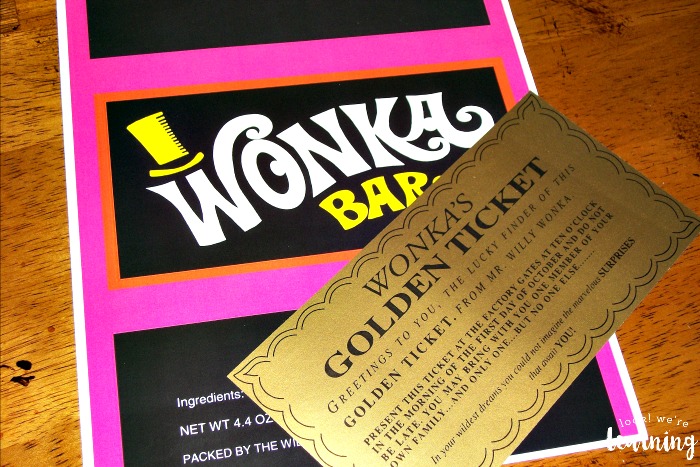
The golden ticket actually uses the exact wording from the story. Awww…

We wrapped the chocolate bar and placed the golden ticket inside. Then we opened it as a family and shared the chocolate. The kids don’t eat a lot of candy, so that was a real treat for them.
Time to watch the movie! We rented it through Amazon Instant Video. Took about 30 seconds.
I literally get nostalgic whenever I see Willy Wonka and the Chocolate Factory. I watched it along with my third grade class and it just instantly transports me back to my childhood when imagination was truly the most important thing I had.

And be sure to try some of these super Charlie and the Chocolate Factory activities to round out your unit!
Don’t miss these other fun unit studies for children!
Plus, see more awesome unit studies for homeschoolers on my Unit Studies Pinterest board!
This post is part of the Movie and a Big Idea linkup from iHomeschool Network! Click over to read more great movie-themed learning ideas for kids!


Good morning everyone! A couple of weeks ago, we shared our 10-day series on African history and featured a few pictures from our trip to the APEX Museum in our post about colonization. So…we’re sharing the rest of our pics from that field trip today!
The APEX (African Panoramic Experience) Museum is located on Auburn Avenue in Atlanta, GA. The museum is dedicated to preserving African-American history, especially in the South. Naturally, you can’t begin a look at the history of African-Americans without beginning with African slavery and colonization.

We got a look at the tribal settlements of Africa prior to colonization. As we shared in our African history series, the major kingdoms of Africa were scattered across the continent.

As you can see, all of that changed dramatically after the Scramble for Africa.

A primary part of colonization was the Trans-Atlantic Slave Trade. We got to see a mock-up of how slaves were transported along the Middle Passage. They were carried just like cargo and often shared space with other trade exports such as molasses and gold.

After a new shipment of slaves arrived in America, there would be an announcement posted in the community so that traders and buyers could come and bid on them. Some of these slave auctions actually took place on board the ships.

Slaves were often bound at the neck and the feet to prevent escape during the auctions. Single young males, in particular, were bound because they were more likely to run away than families.

One of the fascinating things we learned during our trip was that many slaves devised ingenious ways of escaping from bondage. This is a replica of the wooden crate that Henry “Box” Brown used to mail himself to freedom. After he made it from the South to the free North, he actually wrote a book about his adventure.

Along with featuring the history of African slavery, the APEX Museum also highlights many of the accomplishments of African-Americans in the South during the early 20th century. Auburn Avenue during the 1920s and 30s was a center of black high society in Atlanta. One of the prominent black-owned businesses at the time was Yates and Milton drugstore. Inside the museum, we got to see a mock-up of the drugstore parlor, where customers could sit and read a copy of “Hue”, which later became “Jet” magazine.

Along one of the museum hallways, there are several posters depicting notable African-Americans who played roles in the overturning of Jim Crow legislation and the accomplishments of the Civil Rights Movement. A lot of important civil rights marches and events took place in Atlanta, which is why so many of the city streets carry the names of people like John Wesley Dobbs, Andrew Young, and Ralph David Abernathy.
We thoroughly enjoyed our trip to the APEX Museum! Instead of leaving with a sense of discouragement, we left thinking about the incredible resilience of people who are able to take a horrible situation and turn it into the foundation of a better life.

Hey everyone! It’s a new month and that means it’s time for another living history figure! We’re loving our study of popular 20th century musicians and we’re keeping it going with a look at the life and career of Nat King Cole.
Jay is a big fan of Nat King Cole’s work. We’ve watched a few of his classic television specials on PBS as a family and we have always been impressed at his grace as a performer. But outside of his work and the fact that he was Natalie Cole’s father, we don’t know a lot about his life. So we’re delving into his background with the kids this month.
Here are a few of the books we’ll be using in our unit:

![]()
Nat King Cole (Melrose Square Black American Series)![]()

![]()
Nat King Cole by Daniel Mark Epstein![]()

![]()
Unforgettable. The Life And Mystique Of Nat King Cole![]()

![]()
Nat King Cole by James Haskins![]()
And, for your enjoyment, one of our favorite Nat King Cole TV specials:
Stop back by on November 26 to see what we learned about Nat King Cole!
Happy Friday everyone! It’s time for another Bee Crafty Kids Link Up! Every Friday, I get to co-host this roundup with Dusty from To The Moon and Back, Jolene from Monsters Ed Academy, and Melanie from Our Crafts N Things! You can find out more about all four of us here.
One of the recurring problems with homeschooling is keeping track of all the papers you accumulate during the week. But, I found a really cute and simple project on Pinterest to help: a cereal box organizer! Like most of our projects, this one is really easy. You just need two cereal boxes, some masking tape, scrapbook paper, and glue.
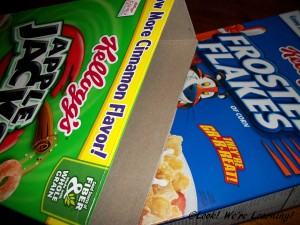
Cut the top flaps off of both boxes.
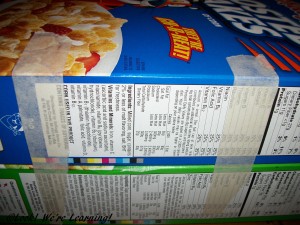 Stack them on top of each other and add a little masking tape to hold them steady.
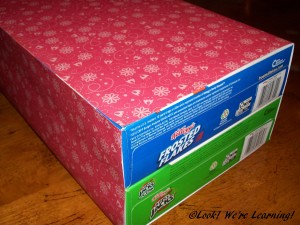
In the original tutorial from Wilde Designs, Elizabeth Howard uses colored duct tape, which makes for a neater and sturdier finish. I didn’t have duct tape, though, so scrapbook paper it is!
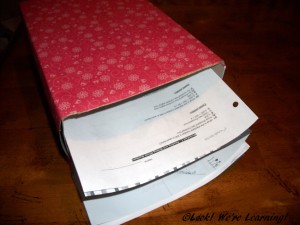
All done! The top box serves as the “in” box and the bottom box serves as the “out” box. Since we only have one child who completes regular homework assignments, I just made the small version. But for multiple kids, you can just stack several boxes on top of each other and add labels with their names inside. Super simple!
We’d love to see what you made with your family this week! To share the button for this linkup, grab the code below!
<div align="center"><a href="https://www.lookwerelearning.com" title="Look! We're Learning!"><img src="http://i1165.photobucket.com/albums/q594/dustybug83/BeeCraftyKids3_zps44074ad6.png" alt="Look! We're Learning!" style="border:none;" /></a></div>
Link up your kid-approved craft activities below! And be sure to visit the other posts in the link up this week!
Rules are simple:
~Enter the direct link to one or more of your own posts that showcase a craft or hands on activity for children.
~A link back with the above button is appreciated, but not required
~Try to at least comment on one or two of the other blogs that took the time to share and join!
