Look! We're Learning!

Early Learning. Happy Teaching.

  • Shop
  • Printables
  • Homeschool
  • Crafts
  • Parenting
  • Blog
Learning to Use a Microscope with Real Science-4-Kids

Learning How to Use a Microscope in Middle School with Real Science-4-Kids

August 30, 2016 by Selena Robinson Leave a Comment

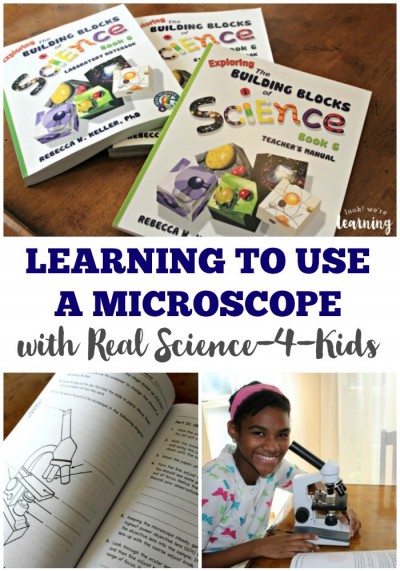
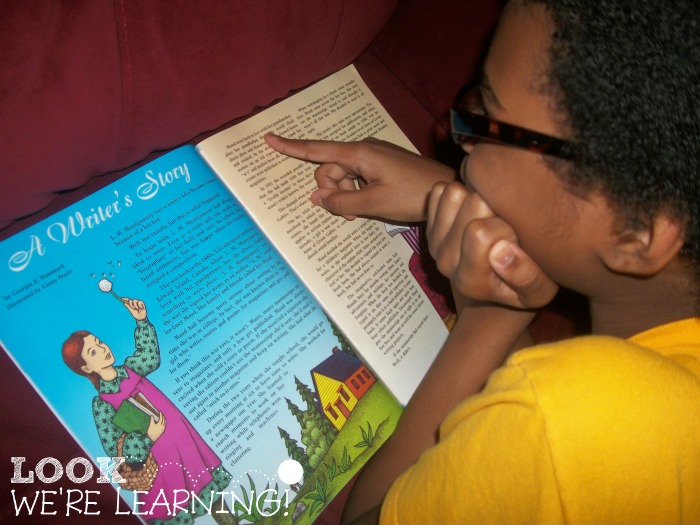
My new middle schooler has always been interested in science. She loves examining nature and conducting basic experiments. One thing we had yet to introduce her to, though, was the microscope.

When I took college biology last year, I had my very first experience with a light microscope and it was awesome. So I was excited to show her how to use it as well.

But I wasn’t quite sure how to teach her microscope basics. After all, my college textbook was a little too advanced. I still wanted her to have a chance to learn it without me hovering somewhere nearby.

Enter Real Science-4-Kids! This homeschool science program for grade 6 offers plenty of hands-on biology lessons and experiments!

Read on to see how we used Real Science-4-Kids to teach our child how to use a microscope in middle school!

Disclosure: I received this product in exchange for this post and I was compensated for my time. All opinions are my own and I was not required to post a positive review.

Learning to Use a Microscope with Real Science-4-Kids

What’s Included in the Real Science-4-Kids Grade 6 Curriculum?

Real Science-4-Kids offers its science program, Exploring the Building Blocks of Science, in several grades, including grade 6.

The Grade 6 program includes the following materials:

  • Exploring the Building Blocks of Science: Book 6 Teacher’s Manual
  • Exploring the Building Blocks of Science: Book 6 Student Textbook
  • Exploring the Building Blocks of Science: Book 6 Laboratory Notebook

Need a higher grade level? Exploring the Building Blocks of Science Book 7 will be released just in time for the new school year!

Exploring the Building Blocks of Science Grade 6 Curriculum

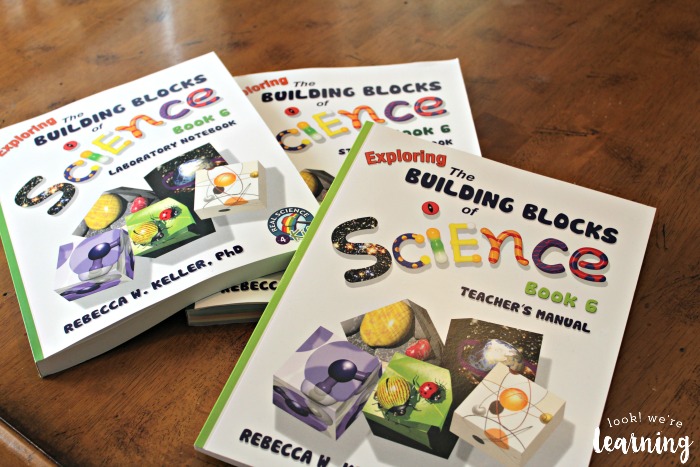
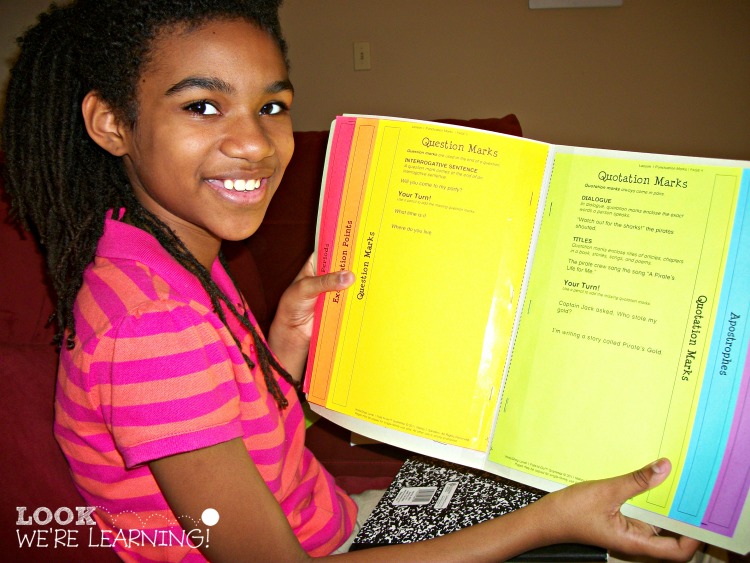
Initially, I didn’t think that I would need all three books. But as I examined them, I was extremely impressed at how clearly everything is written and how thorough (but not overwhelming) the program is.

The teacher’s manual is a sort of guideline for which lessons and resources to use and when. The student textbook is written directly to the student, so I was able to give the book to my daughter and let her read the lessons, define the terms, and follow the instructions herself. It’s a really great way to reinforce independent learning at this level.

The laboratory notebook is for students to write down and draw their observations as they conduct the experiments in the book. After all, the goal here is to raise scientists. 🙂

Want to learn more about Real Science-4-Kids? Listen to the program author, Dr. Keller, explain more about how the program works!

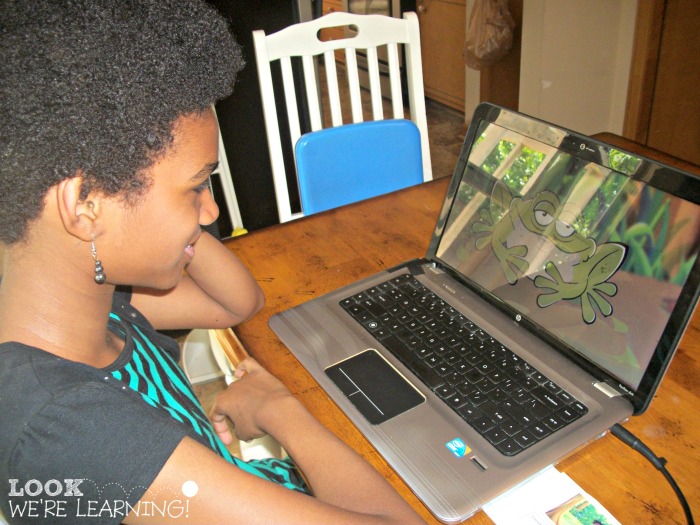
Learning How to Use a Light Microscope

Okay. Microscope time!

Choosing a Microscope for Middle Schoolers

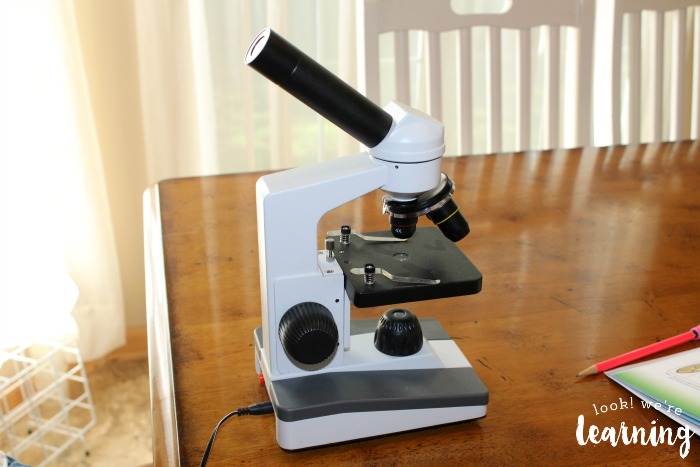
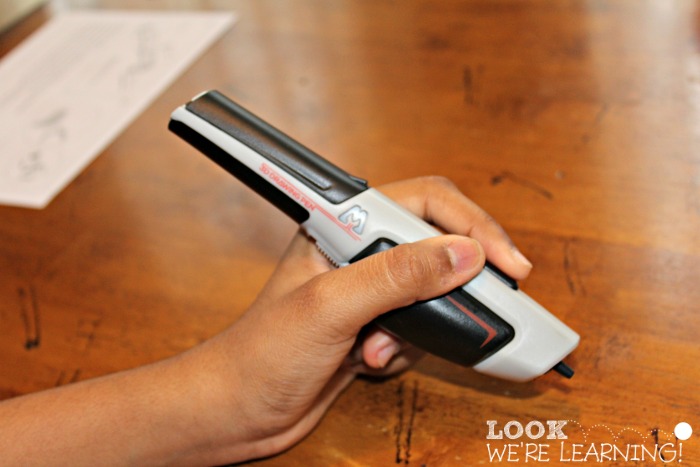
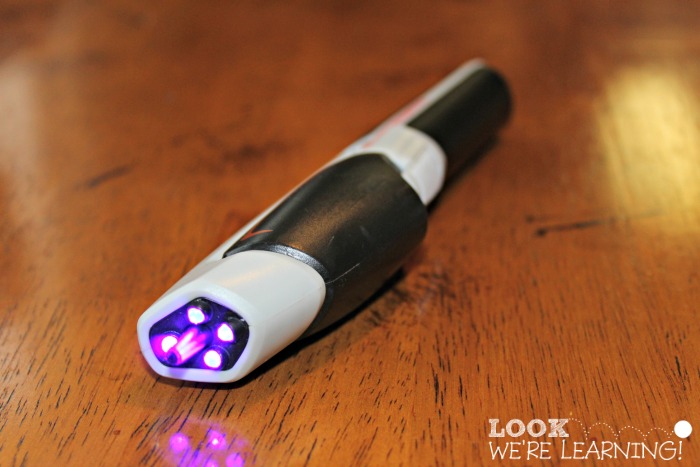
Ours is the My First Lab Ultimate Digital Microscope, which is monocular. But if you’d like a binocular model, the OMAX Binocular Compound Microscope looks pretty good as well. The student textbook contains a nice summary of the features to look for when choosing a good light microscope.

Parts of the Light Microscope

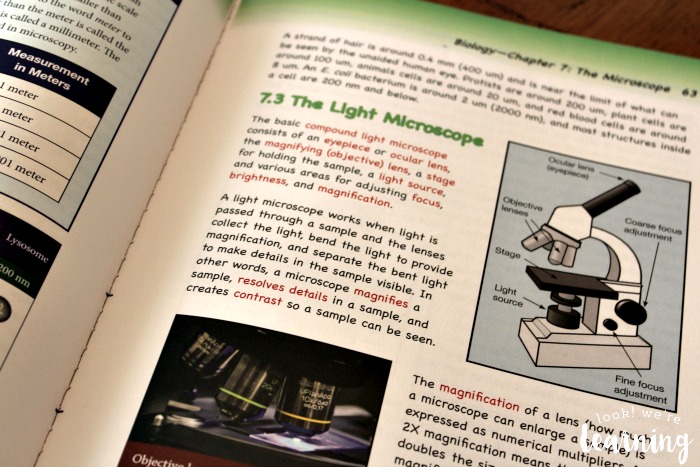
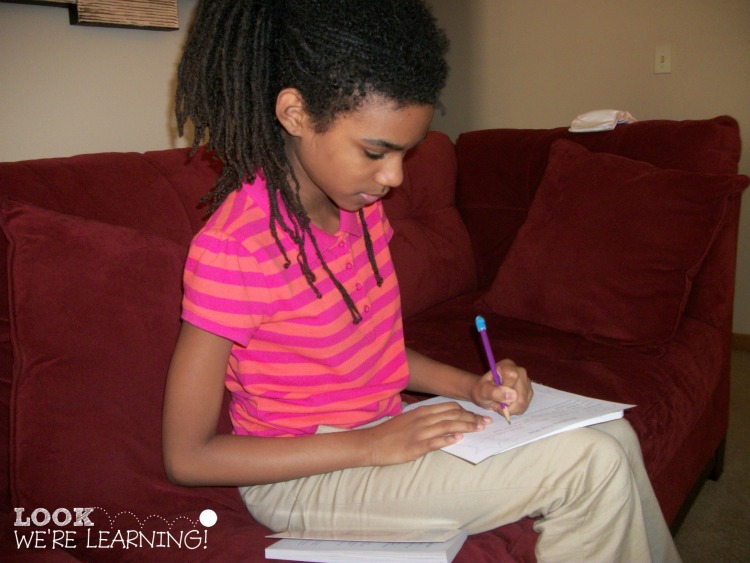
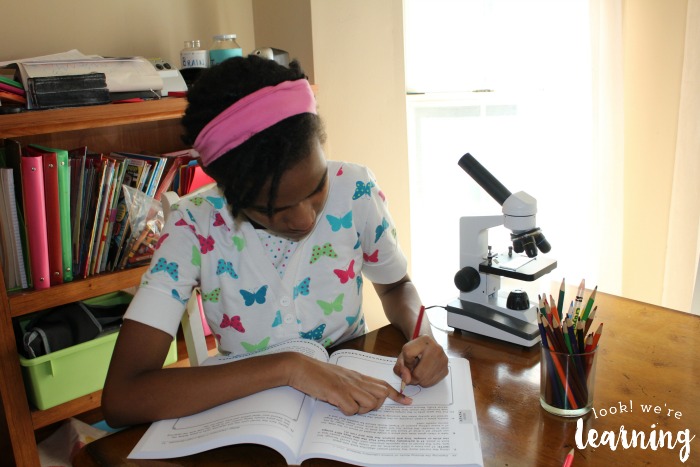
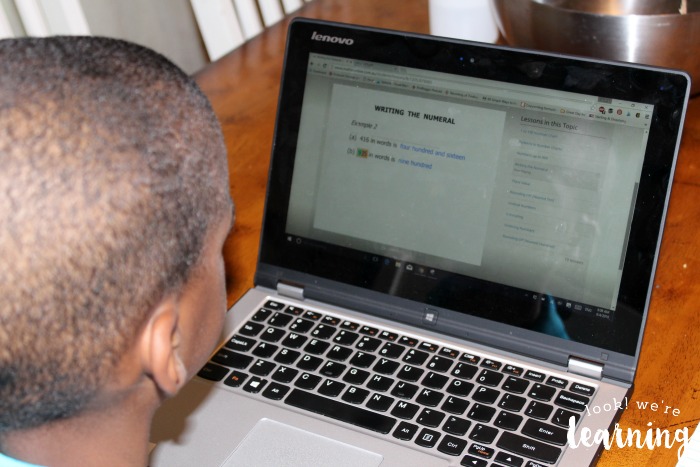
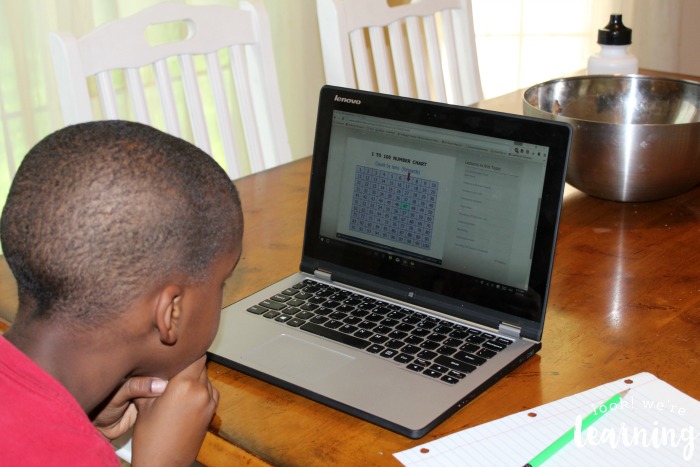
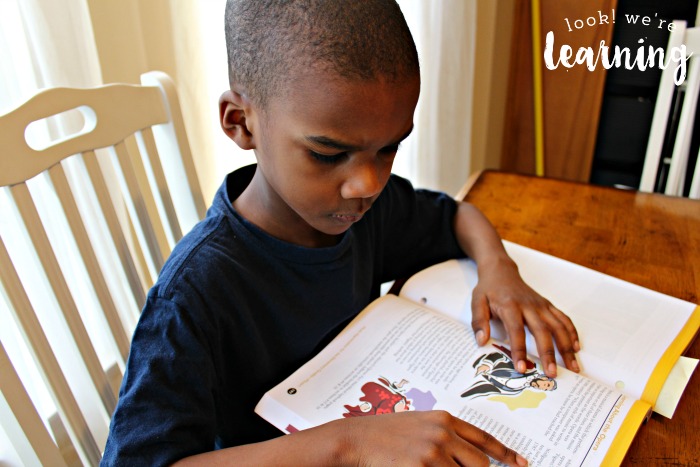
Unit 7 in the program deals with microscope basics. I assigned section 7.1 through 7.3 as reading. Then we started working with our microscope.

Introducing Middle Schoolers to the Light Microscope

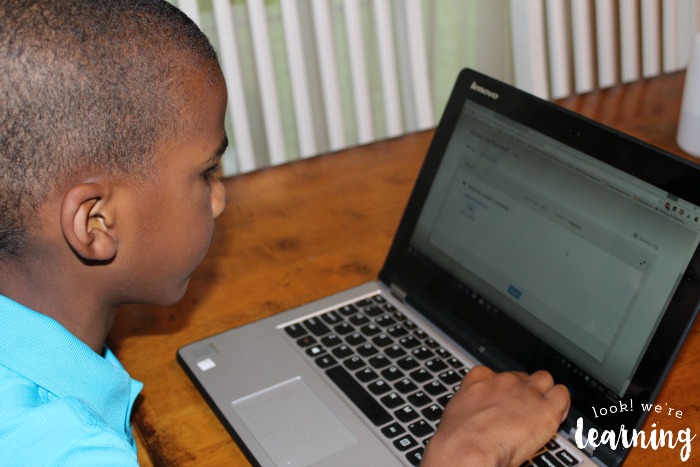
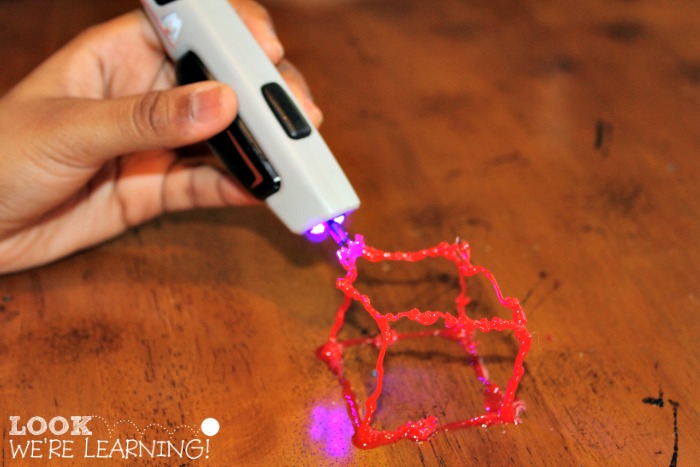
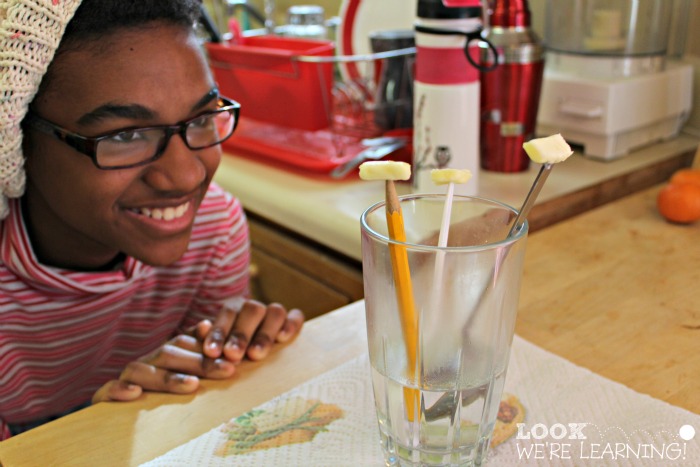
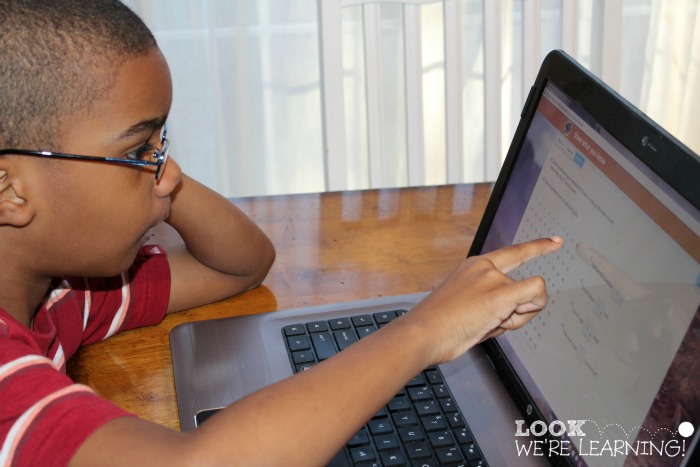
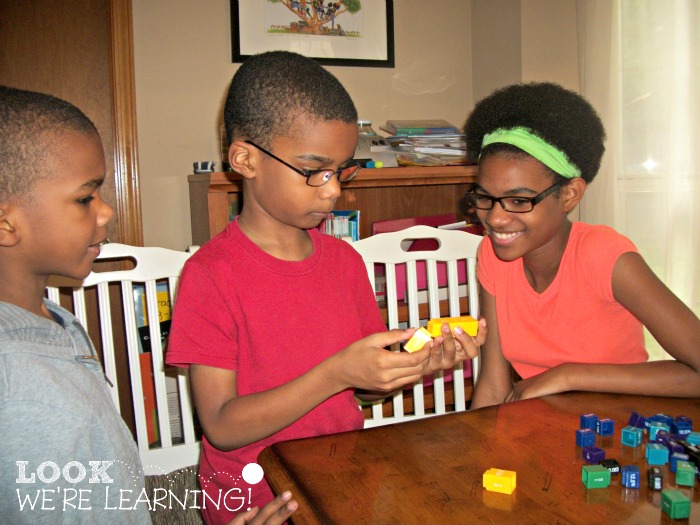
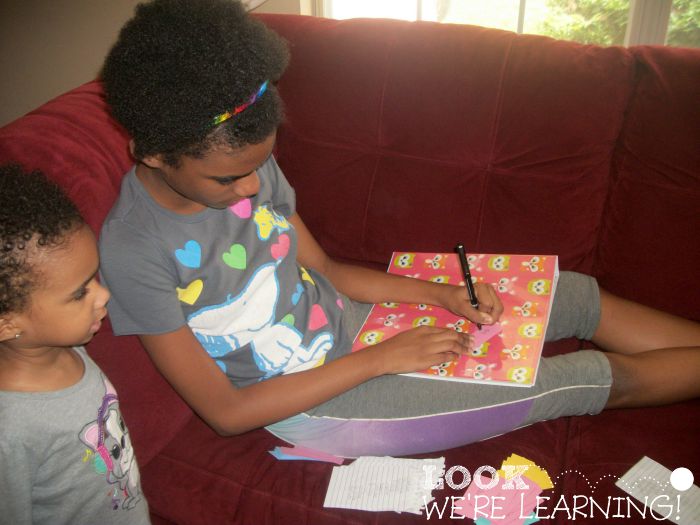
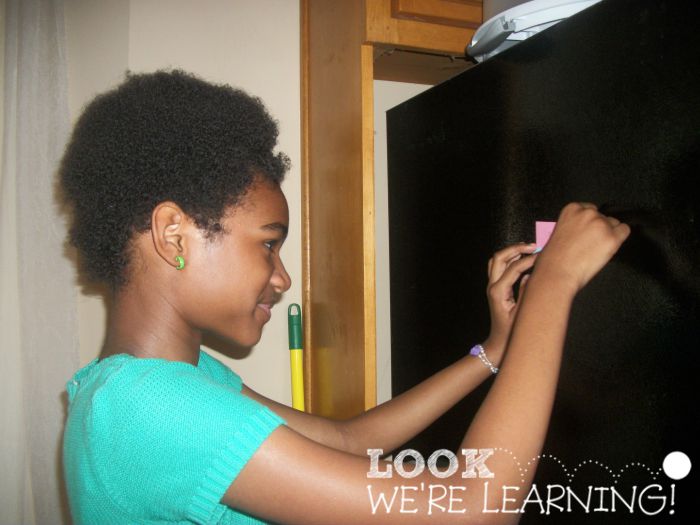
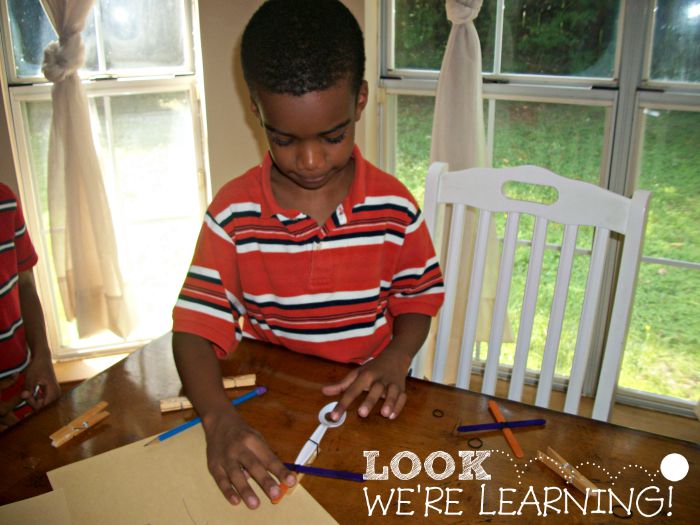
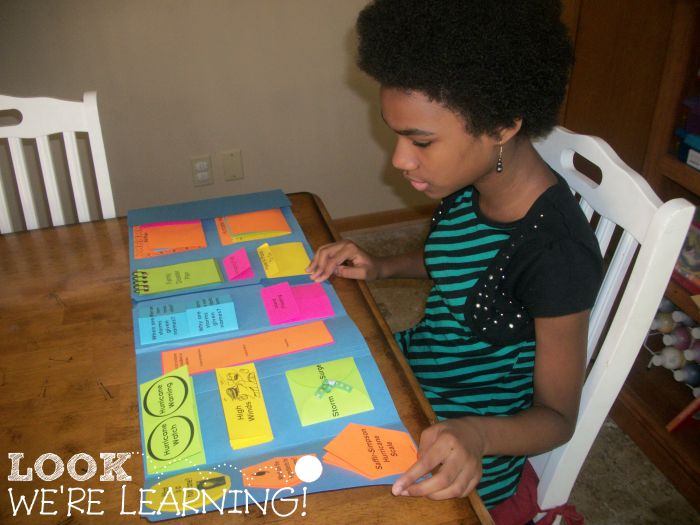
As you can see, my child was basically waiting for me to shut up so she could get her hands on the microscope.

Labeling Parts of a Light Microscope

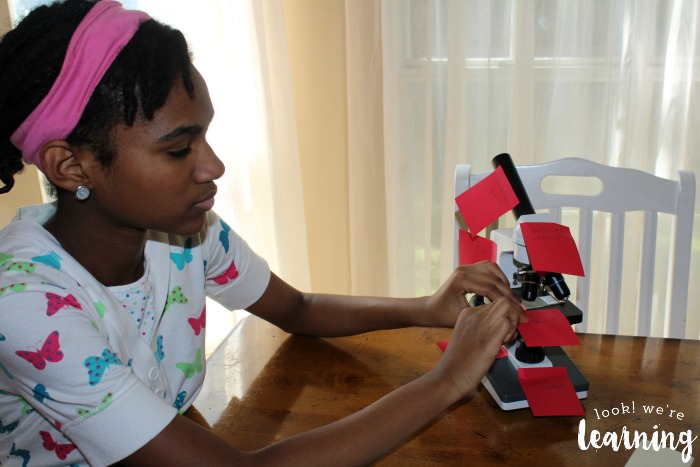
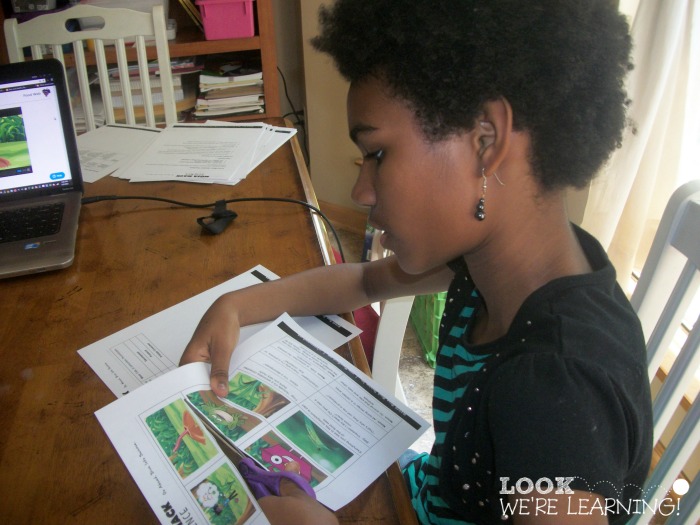
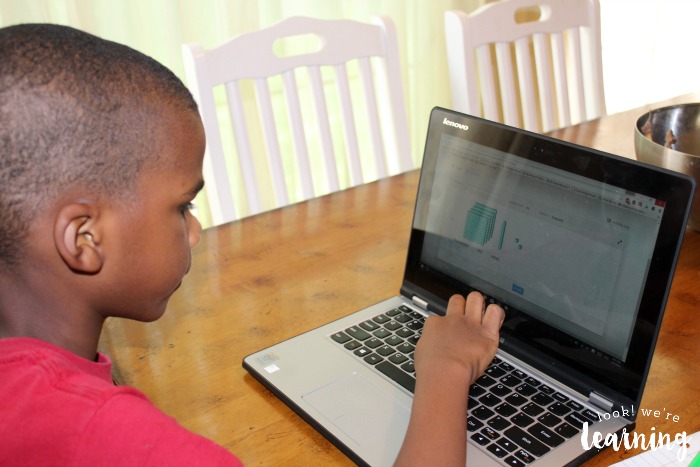
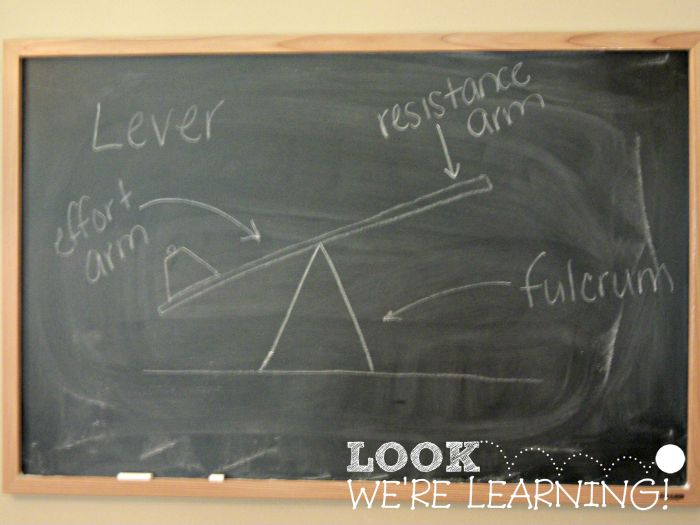
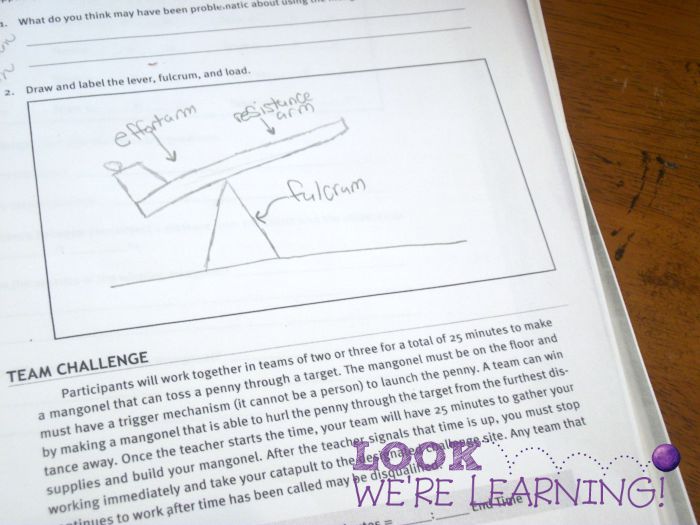
To help her identify the parts of the device, we grabbed a few Post-Its and wrote the name of each part (corresponding to the diagram in the textbook) and then labeled them.

Learning the Parts of a Microscope

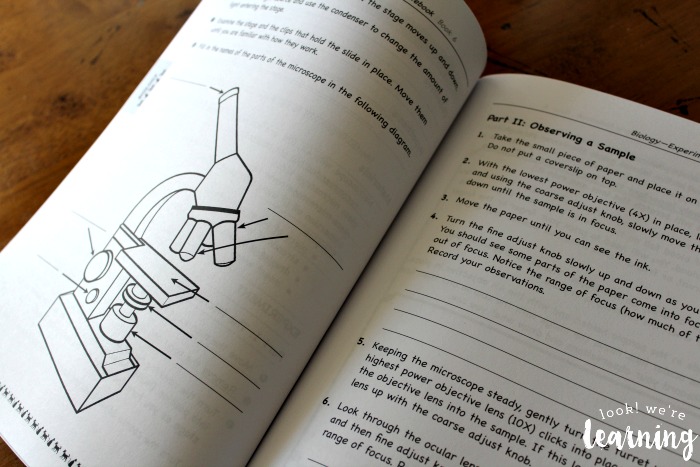
After that, it was easy peasy to fill in the diagram in the textbook!

Testing Out a Microscope in Middle School

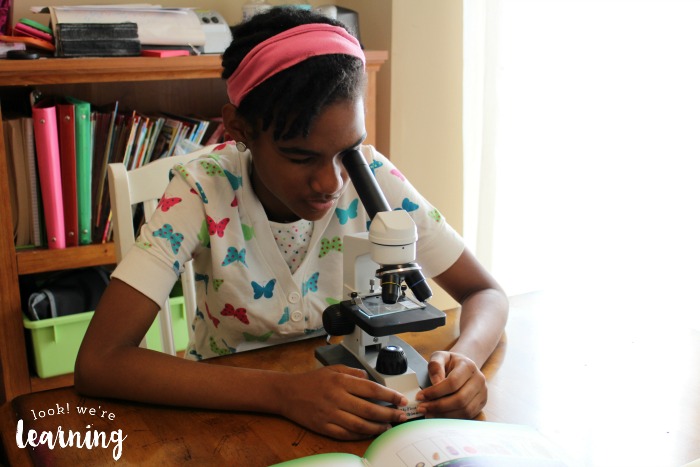
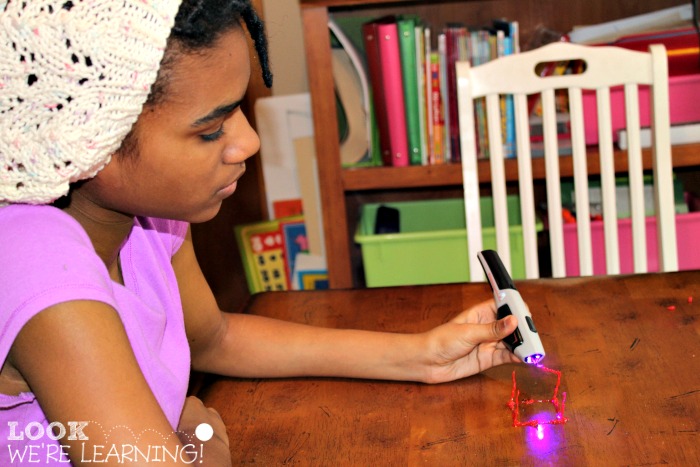
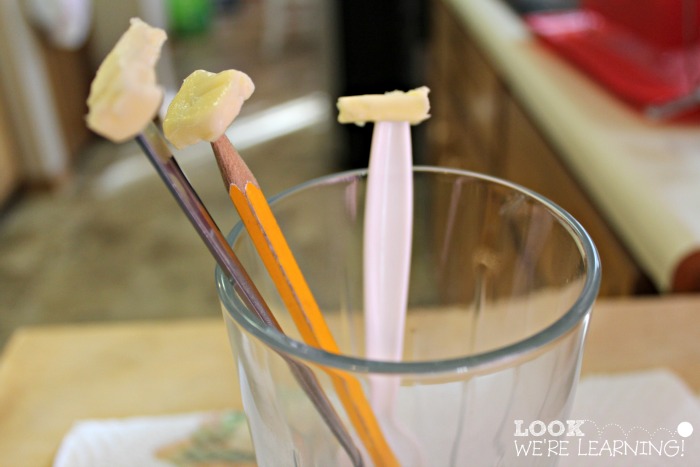
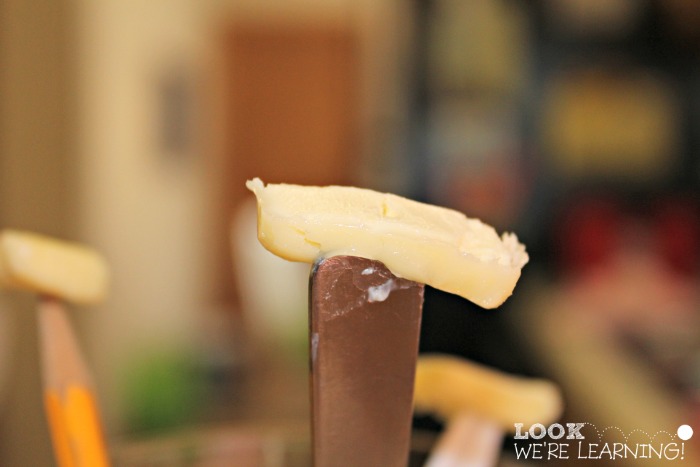
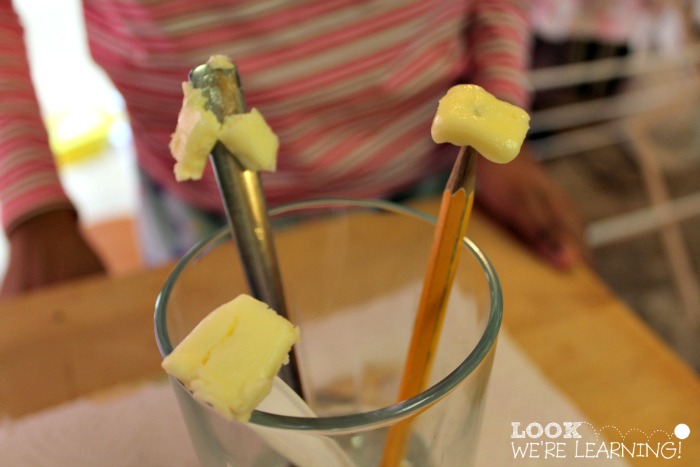
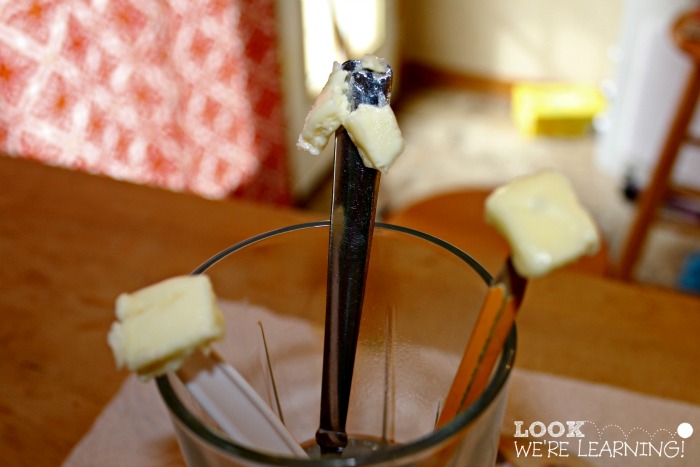
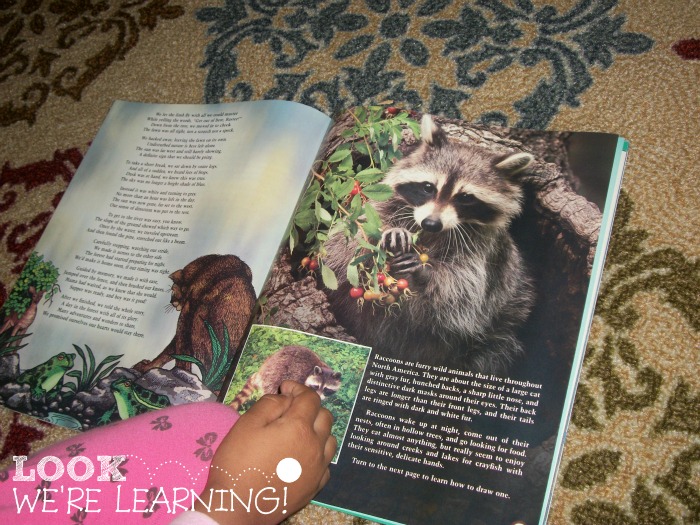
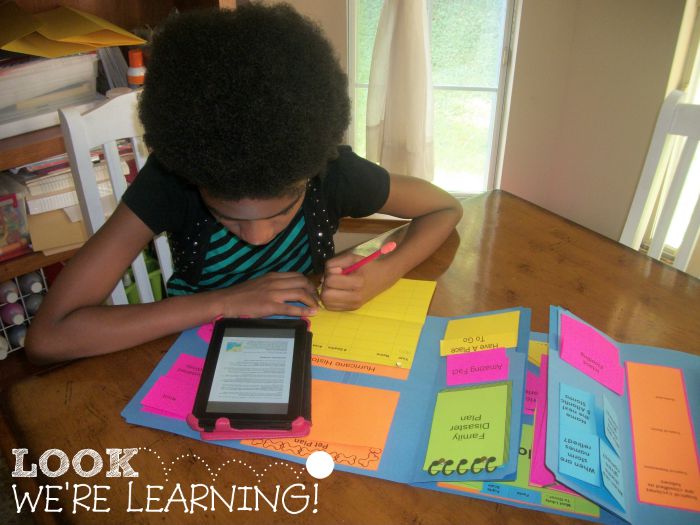
As part of the science lesson, we looked at various biological samples under the microscope, including pencil markings and blood. Since we already had prepared microscope slides with a sample of frog blood, we didn’t have to prepare them, which saved time. But if you want to make your own slides, you’ll need to pick up some blank slides to get started.

Making Observations from Microscope Experiments

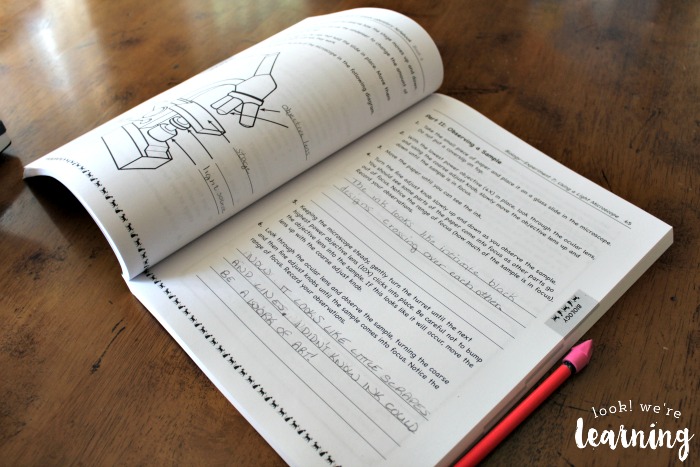
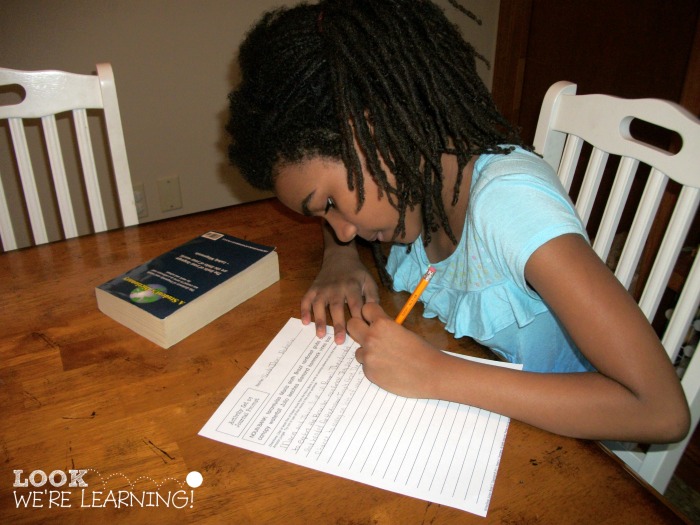
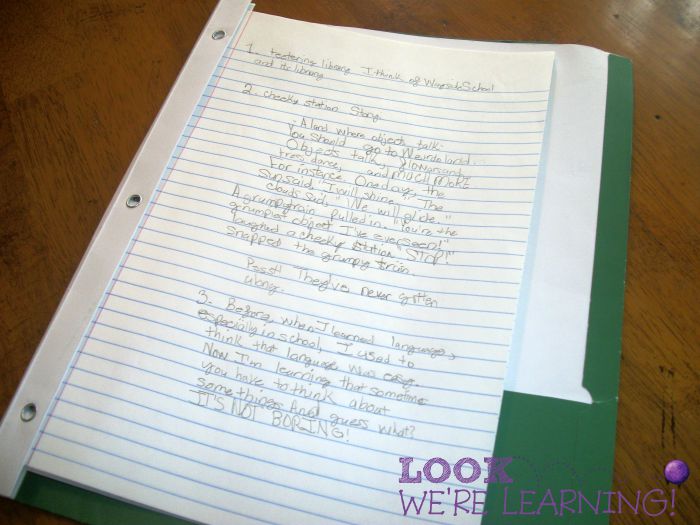
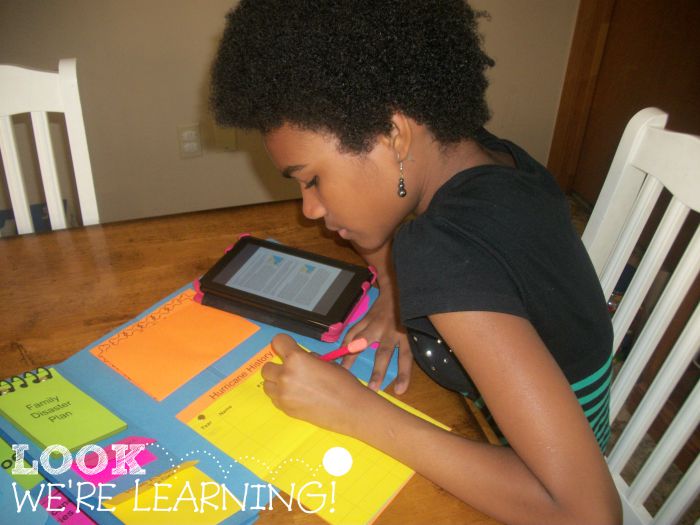
First, we wrote down letters in pencil and examined them at 4x magnification and 10x magnification. Tigger wrote down her observations afterward and surprised to see how different the markings appeared at a higher magnification.

Drawing Observations in a Science Notebook

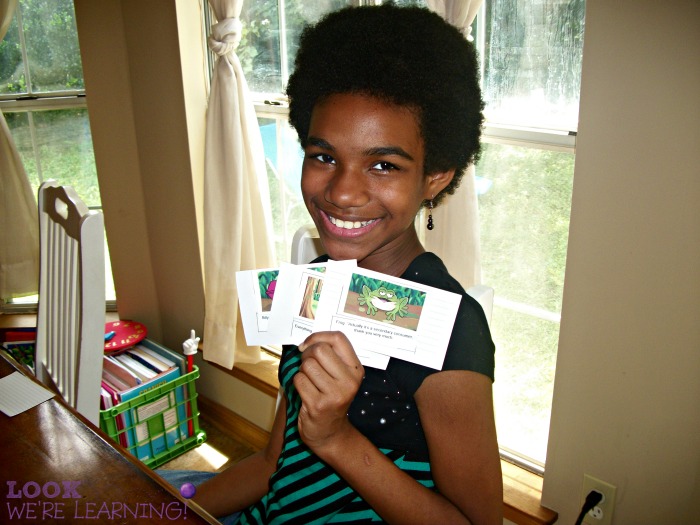
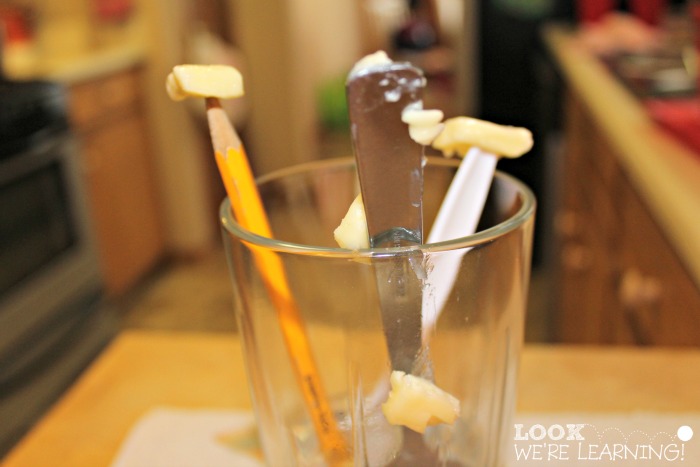
Next, it was time to examine a drop of blood under the microscope. This was really, really neat. At 4x magnification, we could see a pink mass with circles inside (the individual blood cells).

Exploring Magnification with a Microscope

As we increased the magnification to 100x, though, we could see even more detail, including colors inside the individual blood cells. Following the experiment instructions, Tigger drew pictures of how the sample changed as the magnification increased.

Teaching Middle Schoolers to Use a Microscope

I basically had to tear her away from the microscope afterward.

If you’re looking for a comprehensive (and affordable) grade 6 science curriculum, stop by and visit Real Science-4-Kids to pick up the Grade 6 Science bundle today! And science isn’t the only subject offered by Gravitas Publications! Visit the homepage to browse all of the company’s homeschooling helps!

Teaching Middle Schoolers to Use a Light Microscope

Want to score this program for 30 percent off? Click the image below to get a discount on your science purchase through September 30! Or visit my referral link to get your savings! (Once you buy, you can also sign up to get your own referral link and get rewarded when your friends buy the program!)

RS4K-30percent-off

Learn more about Real Science-4-Kids and Gravitas Publications by following the company on social media!

  • Twitter
  • Facebook
  • Pinterest
  • Instagram
  • Blog

Get more ideas for teaching homeschool science from my It’s Science board on Pinterest!


Why CTC Math is Great for Kids with ADHD

Why We Love Using CTC Math for ADHD Kids

August 12, 2016 by Selena Robinson Leave a Comment

My youngest son is a bit of a challenge when it comes to teaching math. He has ADHD, so he’s super active and his attention span is extremely short. He likes math in general, but when it’s time to do some actual work, he tends to whine, tune out, and get frustrated.

So I was excited to try out the CTC Math Membership to see if the program would be a good fit for him. Guess what? HE loves it! And I love any math program that will get him to love math. 😉 See why we love using CTC Math for ADHD kids in our family!

CTC Math for Second Graders with ADHD

Plus, there’s an incredible giveaway available! Five winners will get a one-year membership to CTC Math absolutely FREE! Read on to learn how to enter!

Disclosure: I received access to this program in exchange for this post and I was compensated for my time. All opinions are my own and I was not required to post a positive review.

Why CTC Math is Great for Kids with ADHD

How CTC Math Works

Here’s a look at how the CTC Math membership works:

CTC Math Second Grade Lessons

As parents, you can sign in and decide which lessons in each grade you want your child to cover. Roo is entering second grade this year, so we started him off there.

CTC Math Writing the Numeral Video Lesson

Each lesson has a short video that demonstrates the concept in question.

CTC Math Writing the Numeral Exercises

Then there are ten exercises for the child to complete.

CTC Math Patterns in Number Charts

One of the things I really like about this program is that the exercises follow the exact same structure as the problems shown in the video. So, there are no “tricky” questions.

CTC Math Patterns in Number Charts Questions

Every time your child completes a question, he or she gets a check mark or a red X showing if their answer was correct.

CTC Math Second Grade Lesson Outline

As they work through the lessons, they can see their grade for each concept. This is really helpful, because you can see at a glance which topics they may need more help with before test time.

And, if you look at the top, you’ll see that you can choose the length of your child’s tests. That’s a super option, because some kids don’t need a lot of questions (or don’t have the attention span to complete a lot of questions). That way you can customize the test length for each child and each lesson.

Just in time for the new school year, CTC Math is offering a huge discount – just for homeschoolers! Right now, we can get 60 PERCENT off the regular price, which means you can grab a one-year family CTC Math membership for just $118.80!

Want to test the program out before you buy? Sign up for a totally free trial!

Why I Love Using CTC Math for ADHD Kids

So, what makes CTC Math so awesome for kids who have ADHD?

CTC Math Video Lesson

As you can see, my boy is really into that video lesson. Know why?

CTC Math Video Lesson Summary

It was only a little over a minute long! While some videos are closer to three minutes, they’re all very short, which is perfect for kids with attention issues.

See the “For Your Reference” heading at the bottom? If you download the “Lesson Summary” PDF, you can see a list of what will be covered in the video, along with the answers.

CTC Math PDF Lesson Overview

Just like this! So you can prepare ahead of time and come up with additional problems for your child to practice that use this same concept. I also like that, because there are some concepts that I already know may be a bit confusing. This way, I’m prepared to work them through along with him.

Using CTC Math for Second Grade

Roo did a great job at using the computer to answer the questions. Since the questions aren’t timed, he didn’t feel any pressure to finish them before he was ready. That’s another reason why CTC Math is great for kids with ADHD. It reduces anxiety.

CTC Math Writing the Numeral Questions

At the top, the program keeps track of how your child is doing on the questions he or she has been answering so far. When Roo saw that he was on track to get them all right, he stopped in the middle of one of his problems and said, “I better slow down. I want to get a 100.”

I had to pick my mouth up off the floor. I don’t recall him ever saying he needed to slow down for anything ever in his life before. The scorekeeping is a great motivator.

CTC Math Lesson with a Chalkboard

So, since he wanted to slow down, we paused on the questions and worked out a couple of the “Writing the Numeral” problems together.

Using a Blackboard with CTC Math

I wrote numerals and number words on the blackboard.

Working Out Math Problems with CTC Math

He wrote them down as either numerals or number words on his paper. When we practiced a couple, he seemed to feel more confident and we returned to the questions.

You can take a break on the questions anytime and resume when you’re ready. (Another win for CTC Math!)

CTC Math Writing the Numeral Exercise Results

That break for more practice worked! He got his 100. 🙂

Why CTC Math Works for Kids with ADHD

And, he’s actually been asking to do this program each day since. It’s definitely a keeper!

To learn more about CTC Math, follow the company on social media!

  • Facebook
  • Twitter
  • Pinterest
  • YouTube
  • Periscope

And….drumroll….here’s your chance to enter the CTC Math giveaway! Five winners will receive a FREE 12-month membership! To enter, use the Giveaway Tools widget below!

Entry-Form


P.S. Don’t forget to stop by and check out the amazing 60% off CTC Math homechool deal – available right now! And while you’re shopping, sign up for a free trial to see if a CTC Math membership will work for your kids! SPOILER: It will. 🙂

Why My ADHD Child Loves CTC Math

Need more ideas for homeschooling your child with ADHD? Follow my ADHD Homeschooling Tips board for our tried-and-true suggestions!

How to Teach Kids to Care for Pets with Fish Toys

How to Teach Kids to Care for Pets with Fish Toys!

May 23, 2016 by Selena Robinson Leave a Comment

My kids have been begging for a pet for months. My 11-year-old daughter, in particular, has been cooing about how “cute” and “furry” kittens and puppies are, while simultaneously exchanging a knowing glance in my direction. I can take a hint.

But my kids aren’t used to caring for pets and I’ve been a tad…concerned that they’re not quite ready to be responsible for one. So I was considering buying a fish. Honestly, though, I wasn’t thrilled about exposing a living creature to the possibility of an untimely death at the hands of my children.

Which made me thrilled to try out the fish toys for Lil’ Fishys! Read on to see how I used Lil’ Fishys fish toys to teach my kids to care for pets!

Disclosure: I received this product in exchange for this post and I was compensated for my time. All opinions are my own and I was not required to post a positive review.

How to Teach Kids to Care for Pets with Fish Toys

Why I Love Lil’ Fishys Fish Toys

Take a look at the awesome products available from Lil’ Fishys!

Lil Fishys Fish Toys Review

We got a Fishbowl Habitat featuring two fish from Lil’ Fishys, which was what we used for our mock “pet care” lesson.

Lil Fishys Fish Toys Habitat

We also received several other fish, including Orky the Orca Whale and Wheldon the Whale. What makes these fish toys so great is that they actually spray water, so they are awesome for water play!

Lil Fishys Spraying Whaleys Fish Toys

Plus, we also got a giant swimming Clownfish, Jitters the Electric Eel, and Lucky the Clownfish! Lucky was our “pet”.

Lil Fishys Fish Toys Selection

Inside the Fishbowl Habitat were two fish and decals for decorating the fishbowl.

Lil Fishys Fish Toys Habitat Stickers

So we added some stickers to our fishbowl and filled it with water. Simple!

Lil Fishys Fishbowl Habitat Decoration

Now when it came to assembling the fish toys, I was a little intimidated. But the instructions were very clear.

Lil Fishys Fish Toys Assembly

I simply twisted off the top and unscrewed the battery compartment cover. The fish all take AAA batteries, so be sure to stock up on those.

Lil Fishys Fish Toys Instructions

Then I simply reattached the top and adjusted the tail. As the instructions show, you angle the tail, depending on the size of the water tank your fish will be swimming in. I angled ours all the way up because he would be swimming in the fishbowl.

To get a look at Lil’ Fishys in action, check out Orky the Orca Whale swimming around in our bathtub! My three-year-old daughter was thrilled. 🙂

Water play with @lilfishys Orca Whale: Orky! It really sprays water and swims! 🐳🌊 (Excuse the excited three-year-old in the background…) Review coming on Monday! #ihsnet #homeschooling #kids

A video posted by Selena Robinson (@lookwelearn) on May 10, 2016 at 1:01pm PDT

How to Teach Kids to Care for Pets with Fish Toys

Here’s one thing to keep in mind with Lil’ Fishys: They need to come out of the water when you’re not actively playing with them. So I couldn’t leave it in the fishbowl all the time like a live fish. Otherwise, though, I was committed to making this as much like caring for a real fish as possible.

Lil Fishys Fish Toys in Action

We took time to observe our fish in action each day.

Learning to Care for Pets with Fish Toys

We even spent time “feeding” the fish twice a day. A small container of ground thyme served as our “fish food”. I had them go through the motions of shaking the container over the fishbowl and everything.

Teaching Kids to Care for Pets

And, of course, you have to change the water in the fishbowl every few days.

This was definitely a great exercise for my kids, because they didn’t have to worry about hurting the fish, they were able to follow my instructions without feeling nervous. And, as they found out, it takes a LOT more to care for a pet than they thought. I think they’ll wait a while before asking for another one. 🙂

Lil’ Fishys fish toys are great toys for kids of all ages. They’re easy to assemble and fun to play with. Plus, they’re the easiest pets you’ll ever own! 😉

Add more fun to your fishy learning with these adorable free coloring pages featuring Lil’ Fishys!

Get a chance to win all kinds of Lil’ Fishys goodies, including a Fishbowl Habitat and a grab bag of Lil’ Fishys fish toys! Three people will win! To enter, use the Giveaway Tools widget below!

Entry-Form

If you’re on Instagram, be sure to check out the Lil’ Fishys Instagram challenge now through May 27!

lilfishy-Instagram-themes

And don’t miss the iHSNet Lil’ Fishys Twitter party on May 26! You could win awesome prizes from Lil’ Fishys and Atmosflare!

Summer-Fun-Twitter-P

To learn more about Lil’ Fishys, follow the company on social media:

  • Facebook
  • Twitter
  • Instagram


Mozart Composer Study for Kids

Mozart Composer Study for Kids with Zeezok!

March 11, 2016 by Selena Robinson Leave a Comment

I got into listening to classical music in my tween years. My mom went and bought some classical cassette tapes (remember those?) and played them for weeks on end.

While I grew to love classical music, I never really got to know much about the composers themselves. Which is why I was so excited to have the opportunity to review the Music Appreciation for the Elementary Grades program from Zeezok!

Not only do you get to hear classical music, you and your kids get to learn about the lives and experiences of the masters, which greatly influenced their work. Take a look at how the program makes music education a snap and how we used it to complete a Mozart composer study!

Disclosure: I received this product for free and I was compensated for my time. All opinions are my own and I was not required to post a positive review.

Mozart Composer Study for Kids

How Zeezok Makes Composer Study Simple

Teaching classical music can seem rather complicated, especially if you’re new to homeschooling or if your kids don’t really love history. But Zeezok’s Music Appreciation for the Elementary Grades really makes it simple.

Here’s how the program can handle some of the common objections homeschooling parents might make:

  • It’s too hard to plan my own lessons. Lesson planning is a serious time investment for homeschoolers. But Zeezok’s program already has the lessons planned out for you! There are weekly reading assignments, projects, and worksheets ready to go!
  • I don’t know enough about classical composers. As I mentioned above, I didn’t either. But the books and workbooks are so thoroughly written, I ended up learning about these composers right along with the kids!
  • I can’t get my kids to enjoy listening to classical music. When you mention “classical music” to your kids, you might not get the most excited response. Let’s face it: Kids are more likely to listen to Bieber than Bach. But the Zeezok Music Appreciation for the Elementary Grades program gets kids involved in learning about the composers, which makes them more interested in hearing the music they wrote.

Zeezok Composer Study Homeschool Curriculum

As you can see, the Zeezok Book 1 Collection includes composer studies for seven musicians: Beethoven, Paganini, Schubert, Bach, Mozart, Handel, and Haydn. Each composer has a chapter book with lovely illustrations and a set of weekly lesson plans in the workbook.

There is also a lapbook CD, which has lapbook printables for each composer, and a multi-disc music collection featuring works by all seven composers. It’s an amazingly complete curriculum.

Mozart Composer Study for Kids

For our first composer study, I decided to go with Mozart. Since he started composing at such a young age (five years old!), I thought he would be more relatable, especially for my boys.

Mozart Composer Study Materials

The Mozart book is entitled “Mozart, the Wonder Boy” and it’s a lovely, well-written chapter book about Mozart’s childhood, career, and early death. It’s written in a very kid-friendly tone, but it doesn’t mince words about Mozart’s problems, including his financial issues and his sickness.

We used it as a read-aloud and the kids really enjoyed it. As we read each chapter, we’d turn to the corresponding section in the Music Appreciation Book 1 workbook and complete the activities.

Mozart Instruments Composer Study

Mozart played several instruments and the Music Appreciation Workbook lists them all. Some of them like the clavier and the clavichord are no longer in common use, but some of the other instruments are.

To hear these instruments, we visited the Dallas Symphony Orchestra Kids website and listened to the sounds of the harpischord, organ, piano, and violin. The organ was the favorite by a long shot. 🙂

Towards the latter part of his career, Mozart branched out into writing operas, including “The Marriage of Figaro”. Since my kids knew almost nothing about operas, we read the section about the story in the Music Appreciation Workbook.

Mozart Composer Study Opera Lesson

Then we watched this Opera in Brief video to try to understand what happened in the plot.

It was neat for the kids to learn that opera is not always serious. It can be funny! Plus, it’s impressive to realize that composers can write what is basically a sitcom, except set to music and sung live in Italian. That takes talent.

We love using lapbooks and I was really enthralled with the Mozart lapbook, which is included in the Lapbook CD. You just print the pages and follow the directions.

Geography Lesson for Composer Study

One of the first activities in the lapbook is a geography minibook that lists countries and cities that Mozart visited. The country minibook is good for younger kids, while the city minibook suits older children. Since our boys were making the lapbook along with Tigger, we printed both geography minibooks and let them complete both separately.

As the boys found each country on our giant wall map, they ran back and drew a line from the name to the place on the map. Tigger did the same with the city minibook.

Country Composer Study Activity

Mozart was born in Salzburg, Austria, so we decided to learn more about the town and its history. This Rick Steves clip was super helpful.

Can I just run away and live there now? So, so beautiful. My boys weren’t that enthralled with the scenery, but they really liked the funicular railway. To each his own, right?

Making a Mozart Composer Study Lapbook

Now that we had a better understanding of Mozart’s early life, we started working on the timeline in the Mozart lapbook. Tigger sorted out the life events and glued them in the correct spot in the minibook.

Mozart Composer Study Lapbook Timeline

It was so tragic to learn that Mozart only lived to be 35. It’s astounding to think of how much music he produced in such a short period of time.

Finished Mozart Composer Study Lapbook

And our lapbook is complete!

If you think this was extensive, let me just add that this only shows a few of the activities for the Mozart unit. Plus, there are units for SIX other composers! Zeezok’s Music Appreciation for the Elementary Grades is truly a comprehensive music curriculum. We’re looking forward to using the rest of the program through the rest of this school year!

Stock your homeschooling library with the Book 1 Collection from the Zeezok online shop!

Mozart Composer Study with Zeezok Music Appreciation

Get a chance to win Zeezok Music Appreciation for the Elementary Grades in the company’s giveaway! To enter, use the widget below!

Entry-Form

Now’s the time to score the Book 1 Collection for 10 percent off! Through March 25, save 10% on the program with the promo code ihomeschool16! Get your set now!

To learn more about Zeezok’s product offerings, follow the publisher on social media!

  • Facebook
  • Pinterest
  • Twitter
  • YouTube

How We Teach by iHomeschool Network

Simple 3D Printing for Kids with the Atmosflare 3D Pen

Simple 3D Printing for Kids with Atmosflare!

March 1, 2016 by Selena Robinson Leave a Comment

I’m kind of an old, so the whole concept of 3D printing is still kind of “weird science” to me. But 3D printing holds a LOT of promise. Scientists are even trying to use the technology to make organs for organ transplants!

So it’s worth it to introduce it to kids. And that’s why I was excited to get a chance to try the Atmosflare 3D Drawing Pen! While it’s an artistic tool, it’s also a cool way to introduce 3D printing for kids! Take a look at how the pen works below!

Disclosure: I received this product in exchange for this post and I was compensated for my time. All opinions are my own and I was not required to post a positive review.

Simple 3D Printing for Kids with the Atmosflare 3D Pen

How the Atmosflare 3D Pen Introduces Kids to 3D Printing

In short, 3D printing works by layering molded plastic into a specific design shape to make a product. And that’s how the Atmosflare 3D Drawing Pen works as well!

For me, understanding how 3D printing works was a bit…difficult. But when I broke it down into steps (design, layer, create), it made more sense. And that’s why using the Atmosflare pen is a simple introduction to how 3D printing works: you can use the exact same steps!

Atmosflare 3D Drawing Pen

As you can see, the Atmosflare pen comes with the pen, two ink cartridges (blue and red), and a battery.

Atmosflare 3D Drawing Pen Unboxing

In the box, there are all the pen components and a very simple instruction diagram. But if you’re unsure how to assemble the pen, you can find instruction videos directly on the Atmosflare website.

How to Use the Atmosflare 3D Drawing Pen

So, here’s my take on the Atmosflare pen: simple to assemble, not so simple to master.

Atmosflare 3D Drawing Pen Use

As you can see, it fits nicely in your hand – just like a pen. To use the pen, you just squeeze the ink cartridge between your fingers….

How the Atmosflare 3D Pen Works

and hold down the light curing button on top to harden the ink as it flows out.

3D Printing Shapes with the Atmosflare Pen

After a few practice shots, we built a simple 3D shape – a cube.

3D Printing Cube with the Atmosflare Pen

We established a base, drew the sides, and then connected the top. We had to add a bit more ink at the corners to hold it together.

Drawing with the Atmosflare 3D Pen

On to our first structure!

3D Printing Art with Atmosflare

It’s a swing set! Kind of…

This pen is a lot of fun to work with, but it takes some practice to learn to use it properly. So if you have a child who’s easily frustrated, prepare him or her in advance for the fact that it will take a while to learn how to actually make something with the pen.

Atmosflare 3D Pen Usage Tips:

There is definitely a learning curve with the Atmosflare 3D Pen, so you can find helpful instruction videos on the company website. But here are a few tips we picked up as we used it:

  • Decide what you’re going to make before you begin. Once you start using the pen, it’s kind of hard to improvise without making a mess. Have an idea in mind before you start.
  • Always start with a base. It’s nice to think that you can just start drawing in the air, but you can’t. You need a base first, then you can start building up from there.
  • Go slowly. When you push the curing button, the ink tends to harden on the tip and clog. So try to work slowly to give the ink a chance to catch up with your movements.
  • Work in stages. I found that if you’re creating a structure, it’s best to work on one part at a time. You can even form a complete shape flat on the table and then attach it to another shape by just joining them at a corner and using the curing function on the pen.

Are you ready to introduce 3D printing for kids to your family? You can get an Atmosflare 3D Pen at ToysRUs, Best Buy, Amazon, and from the Atmosflare website!

But if you want to get one for FREE, you can win one in the huge Atmosflare giveaway! 30 winners will get an Atmosflare 3D Drawing Pen absolutely free! Use the giveaway widget below to enter.

Entry-Form

For more 3D drawing tips, keep up with Atmosflare using the social media links below!

  • Facebook
  • Twitter
  • Instagram
  • Pinterest

Save 30% off your first month!

Simple Heat Conduction Experiment

Simple Heat Conduction Experiment with Air is Not Oxygen!

February 11, 2016 by Selena Robinson 1 Comment

How many of you parents are extremely comfortable with teaching science? And I mean extremely comfortable.

If you’re not, you’re not alone! I’m not much of a science buff myself. I got good grades in it as a kid, but I haven’t really ever been interested in it. (Except for astronomy. Astronomy is awesome.)

So when it comes to teaching science, I find it hard to get a good grasp of the concepts so I can teach them to my kids. And that’s why I was thrilled to get a chance to review a great science book and try some of the activities, including a simple heat conduction experiment!

Read on to see why I loved this book and to see one of the included hands-on activities!

Disclosure: I received this product in exchange for this post and I was compensated for my time. All opinions are my own and I was not required to post a positive review.

Simple Heat Conduction Experiment

Science Concepts for the Non-Scientific Parent

As I mentioned earlier, I’m not super comfortable with science. And what’s worse – I’ve forgotten most of what I did learn in school. Fortunately, I’ve recently gotten a copy of the book Air Is Not Oxygen: Essential Science You Should Have Learned … But Probably Didn’t! and I have to say: It. Is. Incredible.

It’s a thorough overview of several scientific concepts, including light, heat, animal behaviors, and more. So it’s a good introduction or re-introduction to the same things you and I learned in school.

I had so many “Ohhhhh!” moments reading this book. For example, when Dr. Morelan talks about heat, he explains that you can generate heat through physical or chemical reactions. And for a physical reaction example, he tells you to rub your hands together (warming them) and then wave them in the air (cooling them).

Now did you ever think of that as friction or an example of how heat is generated? I didn’t!

And the book is written in a witty, conversational manner that just makes sense. I actually found my husband reading it later. That’s how good it is.

Simple Heat Conduction Experiment

After I read the section about how heat is generated with the kids, we tried one of the experiments in the book to observe heat conduction in action.

What is heat conduction? It’s how heat travels from one object to another. For example, when you touch something made of metal, it feels cold, right? Know why?

Because the metal is sucking the heat out of your body! For real! Just another thing I learned from Air is Not Oxygen. (Seriously, buy it now. You’ll be glad you did.)

It turns out that metal is an excellent heat conductor. And to test that statement, the book recommends experimenting by comparing to two other materials to see which one conducts heat the best. We took butter and spread it onto a plastic spoon, a metal spoon, and a pencil.

Heat Conduction Experiment Supplies

Then we stood all three up in a glass and added hot water.

Conducting Heat Conduction Experiment

Like so.

Heat Conduction Experiment Setup

And slowly but surely, the butter on the metal spoon began to soften.

Heat Conduction Experiment Stage 1

We watched with bated breath…

Observing Heat Conduction Experiment

Until it finally melted!

Heat Conduction Experiment Comparison

The butter on the pencil softened, but the butter on the plastic stayed fairly firm.

Heat Conduction Experiment Stage 2

Yep. There’s no doubt that metal is the best conductor of the three. Science works!

Heat Conduction Experiment Stage 3

This whole experiment took about half an hour. And most of that was spent in the observation phase. It was a really simple science experiment and a great way to “see” science in action.

And I finally understand what heat conduction is!

Heat Conduction Science Experiment

To brush up on science concepts and give your kids a chance to try a fun and simple heat conduction experiment, get your copy of Air is Not Oxygen from Amazon!

For more science fun, check out my It’s Science board on Pinterest!

And you can get even more ideas for teaching all kinds of homeschooling subjects, including science, in the book “The Big Book of Homeschool Ideas” from iHomeschool Network!

The Big Book of Homeschool Ideas by iHomeschool Network

Improving Math Thinking Skills with Redbird Math

Improving Math Thinking Skills with Redbird Mathematics

January 12, 2016 by Selena Robinson Leave a Comment

How many of you think that you’re “bad” at math? I didn’t think I was bad at it, but I didn’t think I was exactly good at it either. I mean, I can get through it, but it’s not a pleasant journey.

So, I was thrilled to get a chance to try Redbird Mathematics from GiftedandTalented.com! Since the program was developed by Stanford University, I knew it would be exceptional for teaching kids how to use mathematical principles to think their way through operations, rather than just memorizing them. And I wasn’t disappointed.

Read on to see how we used Redbird Mathematics to improve math thinking skills with our second-grader. Plus, enter to win a three-month subscription absolutely FREE!

Disclosure: I received this product in exchange for this post and I was compensated for my time. All opinions are my own and I was not required to post a positive review.

Improving Math Thinking Skills with Redbird Math

What If My Child Hasn’t Been Labeled as Gifted?

Don’t worry! You can still use Redbird Mathematics by GiftedandTalented.com. One of the things I love about this program’s philosophy is that “giftedness” should be the destination, not the starting point. Which means that your child doesn’t have to be termed “gifted” in order to use it.

Instead of being a program catered to gifted kids, Redbird Mathematics strives to help kids of all learning abilities develop their own mathematical gifts. And, since we’re trying to combat the “bad at math” stigma in our family, that’s a philosophy we can get behind!

How Redbird Mathematics Works

When you purchase a subscription to Redbird Mathematics, you’re not tied to a single grade level. The program covers math concepts from kindergarten through grade 7, so you can move up or down as your child needs.

Redbird Grade 2 Outline

If you’re unsure which grade level your child should use, Redbird Mathematics gives you the option to look at the concepts covered in each grade. Since Pooh was already familiar with the Grade 1 concepts, we decided to start with Grade 2.

Redbird Intro Assessment

Here’s where it gets interesting. Once you choose a grade level for your child, the program gives him or her an assessment test to see what concepts they already know.

Redbird Math 2

I’ll be honest: It was extremely tough for me NOT to help Pooh with the problems on the assessment. I had to keep telling myself “It’s just to see what he knows. He doesn’t have to get them right.” Eventually I just walked away. So this part might be hard if you tend to be a helicopter parent like *ahem* me.

Redbird Math 1

Once the assessment is complete, the program automatically chooses a starting point for your child. Then it’s time to get started!

How Redbird Mathematics Improves Math Thinking Skills

What separates Redbird Mathematics from other math programs (to me) is the way that the program encourages kids to think about math operations.

Redbird Grade 2 Intro

Pooh already knows his addition and subtraction facts through 12, but he had never used a hundred chart or base 10 blocks before. So it was almost as if he had to relearn adding and subtracting.

Redbird Lesson Outline

Frankly, it was as if I had to relearn them too. So, if you are used to teaching math in the traditional manner, expect a fairly steep learning curve when you first begin using the program.

I also found that it was not a program Pooh could use on his own. But that’s okay. I don’t expect a lot of independent math learning in second grade anyway.

Redbird Math 3

In the beginning of each lesson, Redbird Mathematics gives you an overview of what your child will cover, as well as a few sample problems. That’s really helpful, because it can help your child prepare for what to expect as the lesson moves along.

Correct

Here’s what I really loved: Pooh had to really use his brain to learn how to add with the hundred chart. For example, when he saw the problem “8 + 10”, his first instinct was to start adding it in his head.

Instead, I asked him to follow the program directions and learn how to find the same answer using the hundred chart. After a few minutes of practice, he got the hang of it.

Redbird Math 5

But if he already knows addition facts, what’s the point of learning to use a hundred chart?

Well – if he can understand how numbers are related to one another, then his ability to solve math problems becomes more flexible.

Redbird Math 4

As the program showed him, moving up and down by rows increases or decreases numbers by 10.

Redbird 100 Chart Adding

And moving left and right increases or decreases numbers by one.

Redbird 100 Chart Shading

Once he grasped that, he could find missing numbers in equations and alternate counting by ones and tens quickly. That’s good practice for counting change, telling time, and algebra!

Redbird Math 6

There were a few times that I supplemented Redbird Mathematics with some hands-on tools. For example, when we were learning about how to find the distance between 42 and 67 on the hundred chart and then place the resulting numbers in addition and subtraction equations, it was time to break out the chalkboard.

Redbird Math 7

Once Pooh saw that we were using the numbers on the chart to fill in an abbreviated fact family, he understood what to do with them.

Base 10 Blocks Overview

When Pooh finished working with the hundred chart, the program moved him on to learning to add and subtract using Base Ten blocks. That’s right. After learning to add and subtract with one strategy, Redbird Mathematics introduces another strategy to learn the exact same skills.

But here’s what’s good about that: If kids can learn how to perform the same operations with differing data, numbers, and methods, they begin to understand mathematical principles better. Which means they can use them in various situations with ease.

And that’s what we want, right?

Base 10 Blocks Intro

With the Base Ten blocks strategy, I also used a hands-on tool: Unifix cubes.

Redbird Math 9

Breaking the rows apart into single cubes to replicate the math problem on the screen really helped Pooh “get” what we were learning.

Redbird Math 10

As he found out, you can regroup 6 ones and 7 ones into 1 ten and 3 ones.

Redbird Math 11

Which means that 6+7 is equal to 10 + 3!

Base 10 Blocks One and Ten

And that is the beauty of learning to add in different ways!

If you’d like to boost your child’s math thinking skills, now’s the time to purchase Redbird Mathematics! You can score a 10 percent discount on a three-month subscription through February 1 with the promo code LEARNMATH! Just be sure to enter the code during the checkout process.

Now – on to the giveaway!

Ten winners will receive a free 3-­month subscription to GiftedandTalented.com’s K7 Redbird Mathematics: Advanced Edition – a $60 value! This giveaway ends January 28, 2016.

To enter, use the giveaway widget below!


Entry-Form


To learn more about Redbird Mathematics from GiftedandTalented.com, follow the company on the social networks below! And don’t forget to sign up for the Redbird Mathematics Newsletter while you’re there! You’ll find the signup form on the company website.

  • Facebook
  • Twitter
  • Pinterest
  • YouTube
  • Google Plus


How to Make a Unit Study with Magazines for Kids

November 9, 2015 by Selena Robinson 1 Comment

We’ve been using unit studies in our homeschool since the very beginning. I love the idea of “settling in” to a specific topic and tying our school subjects into the topic, instead of the other way around.

Over the years, I’ve started creating our own homeschool unit studies. Often, I use a book or a video as the basis for the unit. But, recently, I’ve also found that I can create a unit using kids’ magazines! Here’s how to make a unit study with magazines for kids!

Disclosure: I received this product in exchange for this post and I was compensated for my time. All opinions are my own and I was not required to post a positive review.

How to Make a Unit Study with Magazines for Kids

Choosing a Good Set of Kids’ Magazines

First, you’ll have to find a great set of magazines for kids. Most recently, we used Fun for Kidz magazine as a starting point for some of our units.

How to Make a Unit Study with Kids' Magazines - Look! We're Learning!

If it’s been awhile since you’ve perused a children’s magazine, I can tell you that times have seriously changed since I read them as a kid. Many kids’ magazines nowadays have a LOT of advertisements, and they may be for products or entertainment that you’d rather not show to your children.

Fun for Kidz is different. There are NO advertisements at all. So I can hand the magazine to my children and let them read without having to tear out questionable content in advance.

How to Make a Unit Study with Kids' Magazines - Look! We're Learning!

Fun for Kidz is available in three versions:

Fun for Kidz – the original magazine, which features stories, comics, games, activities, and non-fiction articles

How to Make a Unit Study with Kids' Magazines - Look! We're Learning!

Boys’ Quest – geared toward boys aged 6 to 14 and featuring exploration and discovery

How to Make a Unit Study with Kids' Magazines - Look! We're Learning!

and Hopscotch for Girls – geared toward elementary and middle school-aged girls and featuring articles, stories, craft activities, and puzzles.

As you can see, there is something in Fun for Kidz for everyone. In fact, the content was so good that my kids ended up swapping magazines after they were done! So girls can read Boys’ Quest and boys can read Hopscotch for Girls without feeling weird. 🙂

How to Make a Unit Study with Kids’ Magazines

Okay. So you have your magazines. Now, how do you make them into a unit study? Simple. You find an article that features a broad topic and you build your unit around it.

How to Make a Unit Study with Kids' Magazines - Look! We're Learning!

For example, this edition of Fun for Kidz has an article on China. That’s a super broad topic for a unit study. You can use the information in the article to research additional topics and find matching activities, movies, and books. Since the article mentions Beijing, learning to write and speak Chinese, and Chinese currency, those are excellent areas to focus on in the unit.

Maybe you could read a few books about Beijing (reading), watch a video about what the city looks like and how it was built (geography/history), learn how to calculate the currency exchange rate (math), try to cook an authentic Chinese dish (cooking), and brush up on how to write and pronounce a few words in Chinese (foreign language). That sounds like a pretty good unit to me!

How to Make a Unit Study with Kids' Magazines - Look! We're Learning!

This was a short article about Pi. Why not use it as a starting point for a Pi Day unit?

How to Make a Unit Study with Kids' Magazines - Look! We're Learning!

Piglet loved this poem about exploring outer space. Naturally, this would be a good fit for an outer space unit.

How to Make a Unit Study with Kids' Magazines - Look! We're Learning!

Anne of Green Gables is on our homeschool reading list for fifth grade this year. Tigger started reading this article about Lucy Maud Montgomery, which I think will end up being part of our Anne of Green Gables unit.

How to Make a Unit Study with Kids' Magazines - Look! We're Learning!

We’re talking about forest animals right now in our homeschool, so this article on raccoons would be a great intro to a raccoon unit!

How to Make a Unit Study with Kids' Magazines - Look! We're Learning!

Of course, when the kids are reading the magazine, sound effects are encouraged. 🙂

How to Make a Unit Study with Kids' Magazines - Look! We're Learning!

When Pooh saw the articles on firefighters, though, he was hooked. He’s wanted to be a firefighter for the last several months. So – that was our most recent unit study: a Firefighter Unit Study. And we used the Fun for Kidz articles as our inspiration!

How to Make a Unit Study with Kids' Magazines - Look! We're Learning!

After we read the articles, we watched a video about firefighters and then we were off on our latest learning journey! Get a look at our Firefighters Unit Study to see what we learned!

Firefighter Unit Study - Look! We're Learning!

We loved exploring Fun for Kidz, Hopscotch for Girls, and Boys’ Quest! And with so many great educational articles, we can use these kids’ magazines as the basis for several unit studies in the future!

If you’d like to try Fun for Kidz for yourself, you can get an awesome deal on your subscription through December 15, 2015! Order two subscriptions and get 50 percent off your order, including back issues, with the promo code HOMESCHOOL.

Terms:

  • This deal is only valid through December 15, 2015.
  • Postage for shipping magazines outside the U.S. is not included in the offer.

To learn more about Fun for Kidz, visit the company’s Facebook page and “Like” it to receive updates!

3 Ways to Make Math Fun for Active Learners

October 22, 2015 by Selena Robinson Leave a Comment

Do your kids move and wiggle and jump around during school lessons? Mine too! Naturally, that’s par for the course when you’re raising kids with ADHD.

But there are lots of kids who don’t have ADHD and are still active learners. Here’s the problem: Teaching math generally requires concentration and wiggly kids tend to have a short attention span, which can make math class the most grueling part of the day.

In our family, we try to keep math lessons fun, interactive, and hands-on, so today I’m sharing some of our secrets. Check out 3 ways to make math fun for active learners using some wonderful homeschooling resources from Rainbowresource.com!

Disclosure: I received the products shown in this post for free and I was compensated for my time. All opinions are my own and I was not required to post a positive review.

Ways to Make Math Fun for Active Learners

Image: c/o pressmaster via Deposit Photos

Why Use Ways to Make Math Fun?

Math has been the bane of childhood for centuries. There are some kids who take to it right away and master it quickly. Then there are others (mine included) who just don’t seem to “get it”. I understand. After all, I was a humanities major and math was not my favorite subject either.

If you remember your math classes in public school, you likely recall sitting at a desk trying to complete a worksheet full of arithmetic problems or trying to take notes as your teacher wrote equations (at lightning speed!) on the chalkboard. That’s not going to work if you’re homeschooling an active learner. In our house, my kids are out of their seats before I finish demonstrating one problem.

The fascinating thing about ADHD is that kids who have it are actually capable of paying attention for extended periods of time if they are interested in the material. Catch their interest and you can get them to stay involved in the lesson. That’s why it’s worth our effort as parents to make math fun.

3 Ways to Make Math Fun for Active Learners

1. Use Math Games

Math games are a wonderful way to make math into an interesting activity for kids. We got to try a Wooden Domino set from Rainbowresource.com. (Confession: I had never played dominoes before, so I had to do a little studying on my own.)

Ways to Make Math Fun for Active Learners - Look! We're Learning!

Learning to play dominoes is actually a great way to practice counting, number recognition, and doubles.

Ways to Make Math Fun for Active Learners - Look! We're Learning!

After I explained the basic rules of the game to the kids, we started playing!

Ways to Make Math Fun for Active Learners - Look! We're Learning!

They quickly matched the correct number of dots to the existing dominoes on the board.

Ways to Make Math Fun for Active Learners - Look! We're Learning!

Then they isolated the doubles by turning them vertically against the other dominoes. For Roo, that was his first introduction to the concept of doubles. Something that would have taken a handful of worksheets otherwise was learned in 20 minutes of play. 🙂

Word problems are one of the math concepts that give kids the most trouble, especially in early grades. So I was excited to use Rainbowresource.com’s Under the Sea Shells Word Problem Activity Set with my boys.

Ways to Make Math Fun for Active Learners - Look! We're Learning!

Inside the box are word problem cards, seashells, and stars and crabs for counting.

Ways to Make Math Fun for Active Learners - Look! We're Learning!

Kids read the problem, choose the correct color and number of manipulatives, and solve the problem.

Ways to Make Math Fun for Active Learners - Look! We're Learning!

Since there are “easy” problems and “advanced” problems, both of my boys could work on problem-solving at their specific grade level.

Ways to Make Math Fun for Active Learners - Look! We're Learning!

For Pooh, seeing the items in action made a HUGE difference. He was finally able to understand what we’re doing when we solve a word problem. We’re simply using numbers to represent what actually happened. Lightbulb moment! And since we were “just” playing, he learned it without the pressure of feeling like he had to meet a certain standard.

The boys loved playing dominoes and using the seashell game, but I was super excited about playing Equate: the Equation Thinking Game.

Ways to Make Math Fun for Active Learners - Look! We're Learning!

Do you love Scrabble? This is basically Scrabble with equations. So it’s a really cool way for kids to learn to form equations and to find ways to build on them.

Ways to Make Math Fun for Active Learners - Look! We're Learning!

Players start by forming an equation on the board.

Ways to Make Math Fun for Active Learners - Look! We're Learning!

Then they build on the existing equation by using pieces of it to make other equations.

Ways to Make Math Fun for Active Learners - Look! We're Learning!

See? What I loved most about Equate is that, since you can remove certain operations from play, all three of my kids could play the game together, even though they’re at different grade levels. To make the game accessible for my younger boys, I removed the multiplication, division, and fraction operations. But I’m saving those for a private game with Tigger later. 🙂

What really made this awesome is that Pooh, who is math-averse, actually asked to play this game the next day! That’s the power of using math games!

2. Use Visual Math

Another great way to make math fun is to make it into a visual activity. When kids can “see” what they’re actually doing by solving a math problem, they can understand the concept a lot better.

To help with our ability to visualize math, we got to try two products from Rainbowresource.com: the book Hands-On! Math Projects and the Fraction Tower Cube Equivalency Set.

Ways to Make Math Fun for Active Learners - Look! We're Learning!

In the book Hands-On! Math Projects, kids can build structures, draw pictures, and play games that are all designed to reinforce math concepts. We started with the Value Your Digits! activity – a way to examine place value.

Ways to Make Math Fun for Active Learners - Look! We're Learning!

According to the instructions, kids are to draw out a grid of squares that represent the number values in certain digits. For example, with the number 31, they would draw a grid that had 30 squares in it and then draw a “3” inside the grid. Then they would outline a single square in which they would write a “1”.

The idea is to actually see the value of each place – that, in the number 31, “3” actually means 30 and the “1” means simply 1.

Ways to Make Math Fun for Active Learners - Look! We're Learning!

Tigger tried it with a three-digit number: 136. And that was the first time the boys really understood why the “1” is in the hundreds place!

Then we wanted to work with fractions a bit, so we built a “fraction wall” – another of the activities in Hands-On! Math Projects. Time to use our Fraction Cube Equivalency Set!

Ways to Make Math Fun for Active Learners - Look! We're Learning!

As you can see, the set includes fractions made into cubes in varying amounts. There’s a tower of 1/10 fractions, a tower of 1/6 fractions, 1/3 fractions, and so on.

Ways to Make Math Fun for Active Learners - Look! We're Learning!

To build our fraction wall, we started with the “1” tower, which is a solid rectangle representing 1 whole. Then we started building our wall by adding enough of each fraction set to equal 1.

Ways to Make Math Fun for Active Learners - Look! We're Learning!

As the kids learned, fractions are merely pieces of a whole. The actual fraction you use simply describes how much of the whole you’re talking about. So they all mean the same amount if you use the right number of pieces.

Ways to Make Math Fun for Active Learners - Look! We're Learning!

10/10 is equal to 6/6, which is equal to 3/3, which is equal to 1. Everyone understood that afterward and I was a happy homeschooling mama.

Ways to Make Math Fun for Active Learners - Look! We're Learning!

Ta-da! All finished! The kids learned equivalent fractions without a single worksheet! Plus, they actually learned the concept behind making equivalent fractions on paper, because they could see what they were creating.

3. Use Your Child’s Existing Interests

Really, the simplest way to make math fun for your active learner is to tie it in with something he or she is already interested in. For Tigger, that something is reading.

She, like her mom, is an avid bookworm. And that’s exactly the kind of person that the Life of Fred book series was written for. Since we’re covering both fractions and decimals in fifth grade this year, we were excited to try Life of Fred: Fractions and Life of Fred: Decimals from Rainbowresource.com!

Ways to Make Math Fun for Active Learners - Look! We're Learning!

In Life of Fred, kids follow the daily life of five-year-old Fred, a math professor (yes, you read that right) at Kittens University. In the Decimals book, Fred wants to build a robot, but he needs to weigh all of the parts together.

Ways to Make Math Fun for Active Learners - Look! We're Learning!

The spring weighs 0.007g, the gear weighs 0.09, and the motor weighs 13.3029 g. As the book so wonderfully (and nonchalantly) mentions, the key to mastering decimals is lining up the decimal points.

Ways to Make Math Fun for Active Learners - Look! We're Learning!

After Tigger read the section, she wrote down her problem and solved it correctly on the first try – all because she was actually interested in the story! She really wanted to know if Fred would be able to build his robot or not. Solving the math problem was just a step to finding that out.

Later we went on to fractions and we discussed Fred’s statement that you can reduce fractions by simply dividing the same number of objects into fewer groups.

Ways to Make Math Fun for Active Learners - Look! We're Learning!

In the book are practice problems to help kids see this in action. Tigger was asked to divide six pencils among two people, which works out to three per person. As she could see, three out of six (3/6) is the same as half (1/2) of the pencils.

Ways to Make Math Fun for Active Learners - Look! We're Learning!

Then the problem asked her to divide the same six pencils among three people. Working that out showed her that 2/6 is the same as 1/3 of the pencils.

Ways to Make Math Fun for Active Learners - Look! We're Learning!

Now that she had a grasp on the concept behind reducing fractions, I had her try a traditional math problem: reducing 7/21 by using the greatest common factor (GCF).

Ways to Make Math Fun for Active Learners - Look! We're Learning!

Success! That’s one math concept we can check off for this school year! And she understood the traditional problem because she had already gained an understanding by reading the story! She’s been asking to finish the books ever since. 🙂

As you can see, we loved every single product we reviewed from Rainbowresource.com! They were wonderful for helping our kids to love math class without having to force them to be still – something that would have made us all miserable.

To learn more about Rainbowresource.com‘s enormous product catalog, including even more products for families with active learners, keep up with the company using the social media links below!

  • Facebook
  • Twitter
  • Pinterest
  • Instagram
  • YouTube
  • Google Plus

Do you have any ways to make math for active learners? Share your tips in the comments!


STEM for Homeschoolers: Learning about Atoms Activities

October 1, 2015 by Selena Robinson 2 Comments

Tigger is a huge science fan. HUGE. For me, though, science is so abstract that it can be difficult for me to get into teaching it in our homeschool.

Thanks to a great kids’ book that I got the chance to review, though, I was able to teach my kids (even my toddler) about electrons and atoms! After we read the book, we did a few learning about atoms activities to help the kids retain what they learned. And so far, it’s working!

Check out some of the hands-on ways we learned about atoms recently!

Disclosure: I received this book in exchange for this review and I was compensated for my time. All opinions are my own and I was not required to post a positive review.

STEM Learning about Atoms Activities - Look! We're Learning!

STEM Learning about Atoms

Learning about Atoms Activities - Look! We're Learning!

To begin our study of atoms, we read the book Eddie the Electron by Melissa Rooney from Amberjack Publishing.

Learning about Atoms Activities - Look! We're Learning!

As you can see, the book is well illustrated and funny, so it’s perfect for kids! Especially kids who want to be entertained all the time (like mine). 🙂

Eddie “speaks” directly to readers about where he lives (on a helium atom), what he does (rotates around the nucleus), and how his atom behaves (it’s a noble gas). There are so many advanced scientific concepts that are casually introduced in the book that it’s full of information for kids in several grade levels!

Learning about Atoms Activities - Look! We're Learning!

After we read the book together, the kids studied the pictures to get a visual idea of how electrons orbit around atoms.

What I loved about Eddie the Electron was how engaging the story was. The kids were so interested in the story, especially Eddie’s frustration with Erwin, his fellow electron, that they didn’t even realize we were discussing a fairly advanced topic.

Science is probably my least favorite subject to teach, because it’s hard for me to get a good grasp on some of the concepts, especially those that cannot be observed with the naked eye (such as the atom). But reading Eddie the Electron helped me a lot, because it made the atomic theory relatable enough for me to understand and teach to my kids!

For Melissa Rooney, the author of the book, making science relatable was the goal. Several years after earning her Ph.D. in Chemistry, Melissa Rooney decided she did not want to be a career chemist. As she has always loved and collected children’s books, Melissa decided to utilize her Ph.D. and write her own children’s book, which transformed into Eddie the Electron.

Melissa has said, “I am confident that, by presenting these scientific concepts to children at an early age, Eddie would increase the likelihood that they would be comfortable and interested in such ‘complicated’ ideas.”

To learn more about Melissa, visit her website: http://www.melissarooneywriting.com/ or read more about her collegiate career here.

Learning about Atoms Activities - Look! We're Learning!

After we read the book, we pulled out an anchor chart about the atom, which described more about atoms work, including other parts such as neutrons, protons, and quarks.

Learning about Atoms Activities - Look! We're Learning!

For Tigger, I added a bit of reading in her science book about atoms, including the history of scientists who were interested in researching atomic theory.

STEM Learning about Atoms Activities

Learning about Atoms Activities - Look! We're Learning!

Then it was time to get hands-on! The kids started by drawing diagrams of atoms and electrons in motion.

Learning about Atoms Activities - Look! We're Learning!

Here’s Pooh’s. Positive protons in the center and negative electrons orbiting around the nucleus.

Learning about Atoms Activities - Look! We're Learning!

Once we got a grasp on how atoms and electrons worked, we decided to form our own atoms out of modeling clay. We used similar colors to those in Eddie the Electron, so it’d be easy for the kids to identify each part as they formed it.

Learning about Atoms Activities - Look! We're Learning!

And here’s Eddie and Erwin orbiting around the nucleus of their helium atom!

Learning about Atoms Activities - Look! We're Learning!

Piglet even got in on the fun by making her atom and electrons out of pom-poms and toothpicks. 🙂

If you’re looking for a fun and easy way to introduce kids to STEM concepts such as atoms, Eddie the Electron is a great resource for children! Pick up a copy of the book to make science fun and hands-on!

Through October 31, 2015, get 10 percent off all the books from Amberjack Publishing, including Eddie the Electron, with the promo code homeschool10. (Purchases must be made from Amberjack Publishing’s website in order to qualify for the discount.)

To see more of the great educational resources available from Amberjack Publishing, keep up with the company on social media!

  • https://www.facebook.com/AmberjackPublishing
  • https://twitter.com/amberjackpub
  • https://www.pinterest.com/amberjackpub/
  • https://www.youtube.com/channel/UCoLzhWpli0jPnysMWX9B6sg
  • https://plus.google.com/u/0/+Amberjackpublishing/

Teaching Analogies to Elementary Students

September 21, 2015 by Selena Robinson Leave a Comment

We’re adding more logic to our homeschooling lessons this year and one of the concepts we’re working on is analogies.

When I was in school, I started learning about analogies in about third grade (I think). It was usually presented as part of language class, but they’re really a study in logic. Go figure!

I recently got the chance to try two great resources from Prufrock Press that were a huge help in teaching analogies to elementary students! See how we implemented them below!

*Note: I received these resources in exchange for this review. All opinions are my own and I was not required to post a positive review.*

Teaching Analogies to Elementary Students - Look! We're Learning!

Since I wanted to cover analogies with two different grades (fifth and second), I used two different books:

  • Analogies for Beginners (Grades 1-3)
  • Thinking Through Analogies (Grades 3-6)

Teaching Analogies to Elementary Students - Look! We're Learning!

I thought that I’d have to spend some time talking about what analogies were and how to solve them, but all of the instructions were right in the book! Easy-peasy!

Teaching Analogies to Elementary Students - Look! We're Learning!

Pooh, who’s in second grade, started with the first few exercises in Analogies for Beginners. He blew through the first couple, but then he started missing some of the similar attributes in the others.

Teaching Analogies to Elementary Students - Look! We're Learning!

I had him slow down and describe each shape. Generally, once he did so, he could easily spot the matching figure. “The big circle with the medium circle inside is like the big circle with the tiny circle inside as the big rectangle with the medium rectangle inside is like the….big circle with the tiny rectangle inside!” 🙂

Teaching Analogies to Elementary Students - Look! We're Learning!

Tigger, who’s in fifth grade, took a crack at Thinking Through Analogies. I had her read the introduction on her own to see if she’d understand how to do the exercises herself.

Teaching Analogies to Elementary Students - Look! We're Learning!

As you can see, these analogies are structured in a more advanced way (as they should be). They also work with words, rather than shapes. Since Tigger is a language lover, she liked them a lot.

Teaching Analogies to Elementary Students - Look! We're Learning!

What I really liked about this book is that in the beginning, the lessons introduce students to the particular concept they will be examining. That’s a huge help, because kids don’t have to sit there and figure out how the word pairs are related.

Teaching Analogies to Elementary Students - Look! We're Learning!

Once they understand the types of relationships that analogies use, they’ll be able to spot them on their own later in the book.

Teaching Analogies to Elementary Students - Look! We're Learning!

But what I loved about the exercises is that the vocabulary words were challenging enough to force Tigger to get out the dictionary. 🙂 It was logic, critical thinking, language arts, and research skills all in one!

I found both of these books to be a huge help in teaching analogies to elementary students! If you’d like to see more of the resources available from Prufrock Press, visit the company’s website to learn more!

Fifth Grade Creative Writing: Brave Writer Review

September 7, 2015 by Selena Robinson 2 Comments

Creative writing is one of the most difficult subjects I’ve ever had to teach in our homeschool. I was an English major in college and I love the writing process, but letting go of what English “should” sound and look like has been a real issue for me personally, so it’s hard for me to teach my kids to write freely.

So I was thrilled to get a chance to post a Brave Writer review after trying the program’s Faltering Ownership for fifth grade creative writing! In fact, I loved Brave Writer so much that it’s going to be our creative writing program for this homeschool year!

Check out our review to see how we used Brave Writer to make creative writing accessible and fun!

*Disclosure: I received access to this resource in exchange for this post. All opinions are my own and I was not required to post a positive review.*

Fifth Grade Creative Writing - Brave Writer Review

The Faltering Ownership Philosophy

For fifth grade, we used “Faltering Ownership”, the Brave Writer program that’s geared toward 11-12 year olds. I was a little puzzled by the title until I read the introduction to the program, but it turns out that the title fits the program perfectly!

As Julie explains in the intro, middle school is the time when children begin to “take the wheel” of the writing process. It’s kind of like giving your child the keys to the car for the first time and riding in the passenger seat as they drive.

They make turns you’re not expecting and the loss of control can be unnerving for parents, but the experience is essential for kids so that they can take ownership, even if it’s faltering, over their own direction. And Julie applies that analogy to writing.

In middle grades, kids need to develop more confidence in their writing ability. As parents, we shift from teachers to consultants, giving our children direction but also instilling them with confidence to write what they feel. And that means letting them learn to look at language differently.

Once I read the introduction to the program, I had a new outlook on what it means to teach creative writing, even though I’ve already finished a degree in English! So Brave Writer taught me quite a lot as well. 🙂

Fifth Grade Creative Writing: Brave Writer Review

We jumped right in with the activities in month 1 – Word Collecting and Building.

Fifth Grade Creative Writing: Brave Writer Review - Look! We're Learning!

One of the first monthly exercises in “Faltering Ownership” is to collect words and learn to use them as building blocks for writing prompts and expressions. Tigger started off by listening to television shows and conversations, as well as by reading signs, snippets of books that were lying nearby, and product labels in stores.

Fifth Grade Creative Writing: Brave Writer Review - Look! We're Learning!

Once she filled several pages of paper with various words, she copied them onto trimmed pieces of index cards.

Fifth Grade Creative Writing: Brave Writer Review - Look! We're Learning!

As you can see, we ended up with quite a lot. She really liked collecting those words.

Fifth Grade Creative Writing: Brave Writer Review - Look! We're Learning!

When we had all of our index cards completed, it was time to group the words into piles. In Faltering Ownership, the instructions are quite liberal, so Tigger could group the words however she wanted: alphabetically, adjective/noun pairs, similar topics, or any other way she could think of.

Fifth Grade Creative Writing: Brave Writer Review - Look! We're Learning!

We aimed for about six or seven words per pile.

Fifth Grade Creative Writing: Brave Writer Review - Look! We're Learning!

Then she started matching them up to create two-word phrases. Faltering Ownership suggested pasting the words on household objects, so we started with our homeschooling space: the dining room.

Craftsy
Fifth Grade Creative Writing: Brave Writer Review - Look! We're Learning!

From the random word pairings, we got some great phrases, including “fuzzy television”,

Fifth Grade Creative Writing: Brave Writer Review - Look! We're Learning!

“teetering library”,

Fifth Grade Creative Writing: Brave Writer Review - Look! We're Learning!

…and “beautiful friendship”. Awww… 🙂

Fifth Grade Creative Writing: Brave Writer Review - Look! We're Learning!

After creating another phrase “cheeky station”, Tigger wrote a short story:

A Land Where Objects Talk

“You should go to Weirdoland. Objects talk, flowers and trees dance, and MUCH MORE. For instance, one day the sun said, “I will shine.” The clouds said, “We will glide.” A grumpy train pulled in. “You’re the grumpiest object I’ve ever seen!”, laughed a cheeky station. “STOP!” snapped the grumpy train. (Psst…they’ve never gotten along.)”

Faltering Ownership recommended asking students how their perspective on language has changed after completing the word building activity. When I asked Tigger, she wrote down her answer:

“Before when I learned language, especially in school, I used to think that language was easy. Now I’m learning that sometimes you have to think about some things. And guess what? IT’S NOT BORING!”

She’s absolutely right. Creative writing is not boring, especially when you can learn to look at words differently and free your mind to use them in new ways.

How to Use Faltering Ownership

Faltering Ownership is designed to be used along with The Writer’s Jungle, the focal point of the Brave Writer curriculum. The Writer’s Jungle is a homeschooling creative writing course that is geared toward parents. 

It’s a complete overview of language arts in general – from narration and freewriting to editing and publishing. If you’re unsure where to begin when you’re teaching creative writing, The Writer’s Jungle is basically a guided journey through teaching language arts to your kids.

Since Faltering Ownership is a year-long curriculum, there are exercises for an entire year of creative writing. Naturally, we began with Month 1: Wild Words, but the program continues for 9 months more, covering topics such as historical writing and composing reports. There are also two bonus activities, in case you teach year-round or just want to round out your program with more activities.

Faltering Ownership is based on three core segments: language arts, oral language, and writing projects. One of the things I’m truly enjoying about the program is its emphasis on appreciating language in general before beginning to write. So children can learn to use copywork, narration, and dictation (core components of the Charlotte Mason approach) as keys to examining literature. These are great stepping stones to building their own creativity for what they’ll write later.

Plus, the ebook is beautifully laid out, complete with pictures, diagrams, and prompts. All of the instructions are included for each activity, so you don’t have to be an expert on teaching English before you begin. I can’t tell you how much of a help that was, especially when you’re teaching kids with ADHD and you need to get a lesson done before their attention span goes out the window. 🙂

We can’t wait to use Brave Writer for our fifth grade creative writing program to see how much further we can stretch our writing muscles! If you’re interested in trying Faltering Ownership or another one of the Brave Writer programs, you can save 10 percent on your purchase with the code iHomeschoolDiscount. This code is valid through September 21, 2015 only.

To learn more about Brave Writer, visit the program’s website or keep up with Brave Writer on Facebook, Twitter, Pinterest, or Instagram!

Simple STEM Challenges with Hands-On Engineering!

July 29, 2015 by Selena Robinson Leave a Comment

I’ve set a few homeschooling goals this upcoming school year and one is to include more STEM learning with the kids. My biggest problem is that my passions include literature, writing, and dance – basically everything that is the opposite of STEM….lol.

So I was excited to try the book “Hands-On Engineering” from Prufrock Press! If you’re unsure how you can set up STEM learning at home, this is a great resource for simple STEM challenges!

Disclosure: I received a copy of this book in exchange for this post. All opinions are my own and I was not required to post a positive review.

Simple STEM Challenges - Look! We're Learning!

Simple STEM Challenges with Hands-On Engineering

In “Hands-On Engineering“, you get complete teacher instructions, project descriptions, internet resource links, and student activity sheets. It’s almost a no-prep solution to planning STEM activities. 🙂

Simple STEM Challenges - Look! We're Learning!

The resource is described as appropriate for grades 4-7 and I can see why. Some of the projects are fairly detailed and require a good amount of critical thinking from kids. But I decided to use it with all three of our school-age kids – just to see.

Simple STEM Challenges - Look! We're Learning!

The teacher resources are fabulous. There are diagrams, explanations, Internet links, and summaries that give you a good background of each activity.

Simple STEM Challenges - Look! We're Learning!

We settled on the Build a Catapult challenge from the book, and that involved getting an understanding of how a lever works. I drew the same diagram from the Instructor Key on the board and we talked about the essential parts of a lever.

Simple STEM Challenges - Look! We're Learning!

Then the kids sketched their own diagrams. Afterward, we used some of the internet links listed in the Teacher’s activity sheet for the catapult activity.

Simple STEM Challenges - Look! We're Learning!

We watched a video showing how ancient catapults (or “onagers”) were assembled and we talked about some of the advantages and challenges they posed for armies in battle. Then it was time for the kids to build their own catapult!

Explore Science, Technology, Engineering, Math!
Simple STEM Challenges - Look! We're Learning!

One thing I really like about “Hands-On Engineering” is that there are no detailed instructions on how to build the item in question. As a result, the kids were forced to try various methods, brainstorm ideas, and cooperate. Among the list of available supplies were rubber bands, clothespins, popsicle sticks, and plastic spoons.

Simple STEM Challenges - Look! We're Learning!

What really impressed me was that, of all three children, Pooh (our almost seven-year-old) was the first to build a working catapult!

Simple STEM Challenges - Look! We're Learning!

We rounded up all of the pennies in the house and, before I knew it, it was raining pennies from heaven…lol.

Simple STEM Challenges - Look! We're Learning!

Look at that face. That is the face of a boy who is extremely pleased with himself.

Once Pooh figured out the basic design of a catapult, the other kids made their own. But then they started hitting the chandelier in my dining room with their pennies, so they were banished to the living room. After all, engineers have to learn to work in all kinds of environments. 😉

I loved Hands-On Engineering and I’m looking forward to making more of the projects with the kids this school year! If you’d like to try to build a catapult or any of the other simple STEM challenges in “Hands-On Engineering“, check out the book for yourself!

Study hurricanes with this awesome hands-on hurricane lapbook for kids!

Hurricane Lapbook Review

July 22, 2015 by Selena Robinson 1 Comment

Making a Hurricane Lapbook

Having lived in the southern U.S. for all of my life, summer is just not summer until you talk about hurricanes. 🙂

When I was a child, I lived closer to the coast and we evacuated a couple of times during the 80s and 90s. Hurricanes Hugo, Andrew, and Floyd are the ones I remember the most. As a kid, those experiences are exciting. As an adult? Not so much.

Now that we live farther inland, we don’t worry about hurricanes to the extent people on the coast do, but they’re still fascinating weather patterns to study. So I was excited when I got the chance to try a hurricane lapbook from Knowledge Box Central!

Using a Hurricanes Lapbook from Knowledge Box Central for Homeschool

Take a look at how you can use this lapbook in your homeschool! And, for more hurricane learning, don’t miss our Hurricane Unit Study!

Disclosure: I received a copy of this resource in exchange for this post. All opinions are my own and I was not required to post a positive review.

Study hurricanes with this awesome hands-on hurricane lapbook for kids!

Hurricane Lapbook Review

After getting the hang of the Math Mini Office Lapbook, this one wasn’t much more work. It’s more involved, but I thought it was pretty fun to assemble. Maybe I’m just a nerd. 🙂

Hurricane Lapbook

I added a hurricane graphic that I got from Wikimedia Commons to the front. Otherwise, I’ll probably forget what it is…lol.

Hurricane Lapbook

Look at that beauty!

When you get a lapbook from Knowledge Box Central, the assembly instructions show you a completed picture of the inside so you can see where everything goes.

Plus, the instructions explain how to put each book together and even suggest when to use colored paper. A huge help for people who tend to get overwhelmed easily (like yours truly).

Hurricane Lapbook

Here’s the inside of the first folder. There are three in all.

Hurricane Lapbook

And the inside of the second folder…

Hurricane Lapbook

And the third!

Hurricane Lapbook

Two of the books in the last folder fold down – including the Pet Plan…

Hurricane Lapbook

…and the Hurricane History book.

Hurricane Lapbook

I usually start a lapbook activity by just giving the kids a chance to explore all of the minibooks. These are all blank inside, so if they want to use them, they’ve got to learn something to write inside!

Knowledge Box Central
Hurricane Lapbook

What makes this lapbook even better is that the PDF includes most of the information you’ll need to teach about hurricanes. So it’s not just a hurricane lapbook – it’s really a mini hurricane unit study.

I just sent the file to my Kindle Fire and let Tigger read from certain sections. Then we’d discuss them together.

Hurricane Lapbook

After learning about some of the most destructive hurricanes in U.S. history, Tigger started filling in the “Hurricane History” minibook at the back of the lapbook. She made notes of the year, the name of the storm, the location it affected, and the level of damage. Some of those storms that struck before the invention of modern radar were truly terrible.

Hurricane Lapbook

Then we flipped back to the beginning of the book and started discussing how meteorologists determine when a storm qualifies to be called a hurricane. We learned about the wind speed requirements for tropical depressions, tropical storms, and hurricanes. Tigger used the information to fill in a minibook.

Hurricane Lapbook

And, of course, she wanted to learn about tornadoes. What child doesn’t? 🙂

The “Tornadoes” minibook is a flip book that has space for kids to record what they learn about each aspect of these destructive storms. One of the supposed “positive” aspects about hurricanes when I was young was that you generally had plenty of time to evacuate. But tornadoes are, of course, another story. Just another reason to take those hurricane watches seriously.

Hurricane Lapbook

The Fujita scale has been revised and it is now called the EF scale. We looked up the wind speed classifications online and Tigger filled in her Tornadoes minibook with what we learned. She couldn’t believe that tornadoes could ever have winds of 200 mph or higher. I think we may do a unit study about tornadoes this year as well. 😉

We loved the Hurricane Lapbook from Knowledge Box Central! We’ll be using it throughout the school year and we’re excited about all the things we’ll be learning!

To get a look at the Hurricane Lapbook and all of the other lapbooks available, visit Knowledge Box Central today!

Want to learn more about weather with kids? Try these other learning ideas!

Learn about extreme summer weather with these amazing hurricane books for kids!

Weather ASL Fingerspelling Practice

Learn about extreme weather in this hurricane unit study for kids!

And see more ideas for homeschool units on my Unit Studies Pinterest board!

Knowledge Box Central

Teaching Math with Math Mini Office Lapbooks

Teaching Math with Math Mini Office Lapbooks

July 10, 2015 by Selena Robinson Leave a Comment

We have a small problem in our homeschool. Tigger doesn’t like math. And I’ve been so frustrated with her about it, because when she puts forth the effort, she does a good job. She just doesn’t like it enough to try.

I talked about one of the hallmarks of ADHD in our review of Math Bafflers – lack of desire to sustain mental effort on a challenging topic. That symptom always rears its head when it’s time to learn math.

So – I was glad to get a chance to review the Math Mini Office Lapbook from Knowledge Box Central! And the great thing is: Not only did it work wonders for Tigger’s attention span, it was also good for all three of my oldest kids!

Here’s how I used the Math Mini Office Lapbook to teach math to multiple ages. 🙂

Disclosure: I received a complimentary copy of this resource in exchange for this post. All opinions are my own and I was not required to post a positive review.

Teaching Math with Math Mini Office Lapbooks

Teaching Math with Math Mini Office Lapbooks

Knowledge Box Central is a homeschool provider that specializes in fun and engaging lapbooks. In fact, I’ll be sharing a couple more of their resources in upcoming weeks. 🙂

But when I saw that the Math Mini Office Lapbook was an option, I jumped on it!

I will say that putting the lapbook together took a little time on my part. But, Knowledge Box Central includes extremely detailed instructions with pictures to help you know what to put where. There are even suggestions as to which pages to print on what color paper!

Teaching Math with Math Mini Office Lapbooks

I love how you can assemble the lapbook and then stand it up to work as a mini-office. Tigger loved that idea! She wanted to sit behind it and do “real work”.

Teaching Math with Math Mini Office Lapbooks

So we handed out scratch paper and got to work! Here’s a closer look at what’s inside the lapbook.

Teaching Math with Math Mini Office Lapbooks

As you can see, this math mini-office is basically a stand-up reference chart. There is a number line, a math symbol chart, a 100 chart, an addition chart, and a subtraction chart. There’s also a telling time activity that helps kids practice representing analog time and calculating time forward and back.

Teaching Math with Math Mini Office Lapbooks

On the other side, there is a multiplication table, multiplication chart, fraction equivalent chart, division chart, and a place value practice activity. If you use the hand trick for learning 9 time tables, there’s a handy reference for that and for recognizing patterns in the 9’s tables.

Teaching Math with Math Mini Office Lapbooks

For Tigger, I wanted to focus on fraction equivalents first. Fractions were one of the last math concepts she reviewed during the school year.

Teaching Math with Math Mini Office Lapbooks

We talked about the relationship between multiplying and dividing in order to increase or reduce fractions. As we learned, we multiply to increase a fraction and we divide to reduce a fraction – just like with any other number.

The fraction equivalent chart shows that you can increase any fraction by multiplying the numerator and denominator by the same number.

Seeing it represented that way was very helpful to Tigger. Plus, we were able to test it out with any fraction on the chart!

Teaching Math with Math Mini Office Lapbooks

Here’s where the Math Mini Office Lapbook really became helpful to our family. The resource is listed as appropriate for Grades 3-5. But some of the concepts are also good for younger learners!

The lapbook instructions recommend laminating it before you use it, and for good reason. That way, your kids can use the Telling Time, Place Value, and Number Line activities again and again!

I decided to focus on the number line with Roo.

Teaching Math with Math Mini Office Lapbooks

We practiced a few addition and subtraction problems with the number line. When we drew the line on the board, Roo would copy down our actions using a dry-erase marker in the lapbook. He loved it!

Teaching Math with Math Mini Office Lapbooks

Pooh worked on telling time. Since we usually have digital clocks around the house, telling analog time is a skill my kids really have to work on. But once he remembered how to count minutes (by 5’s), he did fine!

And when we were done, we just erased our marks to get the lapbook ready for next time!

Teaching Math with Math Mini Office Lapbooks

It even folds back up for easy storage when you’re done!

We loved using the Math Mini-Office Lapbook from Knowledge Box Central! I’ll be using it with all three of our kids during the upcoming school year. 🙂

To get one for yourself, check out Knowledge Box Central’s huge list of lapbook offerings!

Knowledge Box Central

Math Bafflers Review: Introducing Logic to Kids with ADHD

July 8, 2015 by Selena Robinson 2 Comments

One of the challenging things about homeschooling a child with ADHD is helping him or her learn to think critically. Kids who have classic ADD tend to avoid any kind of sustained mental effort, especially when the topic is challenging.

And that’s my Tigger. She’s linguistically smart, but she’s not a natural at math. When there’s a concept that’s hard for her to grasp, she tends to tune out or get frustrated. But we can’t just skip those parts, right?

Recently I got a chance to try the workbook Math Bafflers from Prufrock Press and I found it to be a great way to teach logic to kids with ADHD! Here’s our Math Bafflers review.

Disclosure: I received a complimentary copy of this book in exchange for this post. All opinions are my own and I was not required to post a positive review.

Using Math Bafflers to Introduce Logic to Kids with ADHD

Math Bafflers Review

Just to give you a little background:

I’m pretty sympathetic to Tigger on the whole “avoiding sustained mental effort” thing, because…

I’m the exact same way.

Last semester, I took Honors Logic and I’m here to tell you that it was rough. I can do the work, but there are times when I sit down to concentrate and my head pretty much feels like it’s filled with bees. Kind of like a mental static.

So if that’s what Tigger deals with, I can vouch for the fact that it’s irritating and it interferes with your ability to concentrate.

However, logic is SUCH an important skill to learn that I was determined to find a way to teach it. And Math Bafflers was a great way to introduce it.

Using Math Bafflers to Introduce Logic to Kids with ADHD

Math Bafflers 
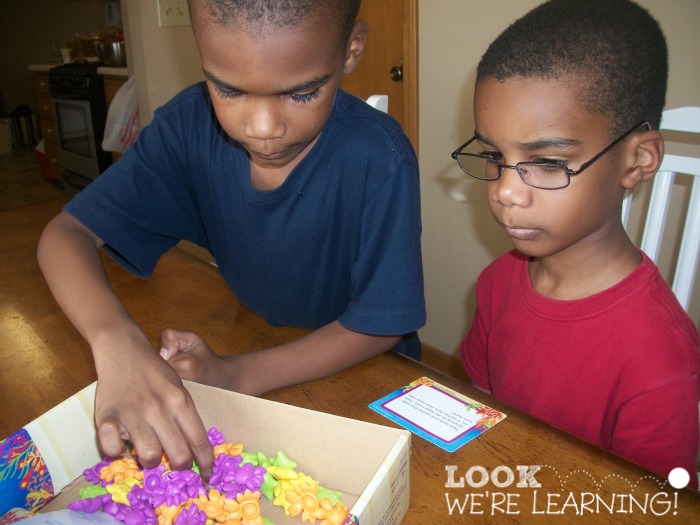
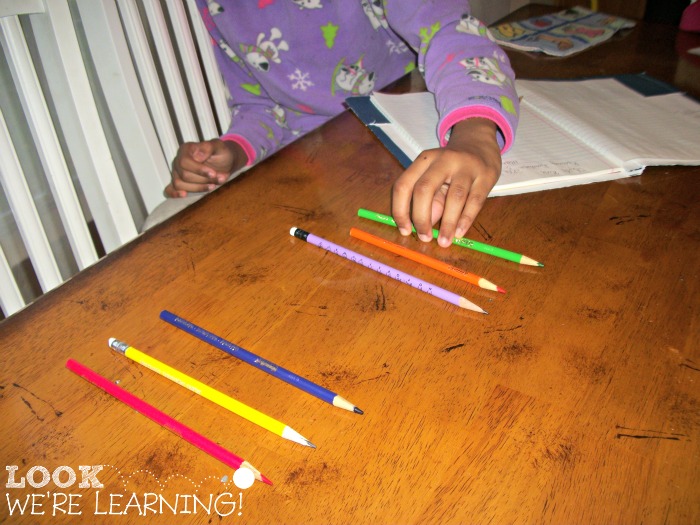
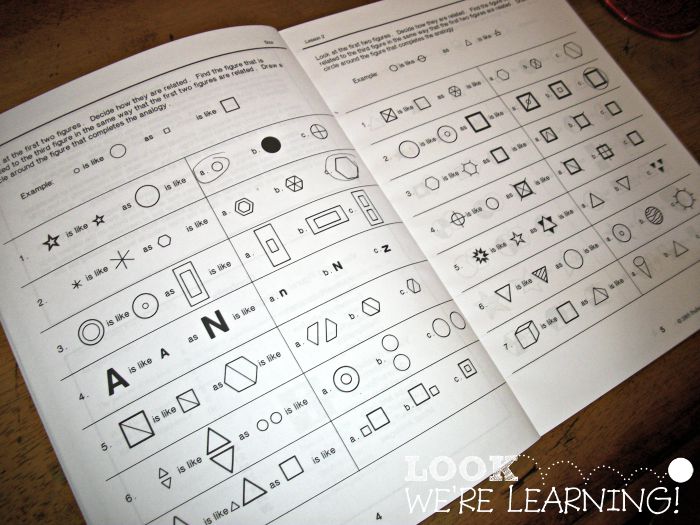
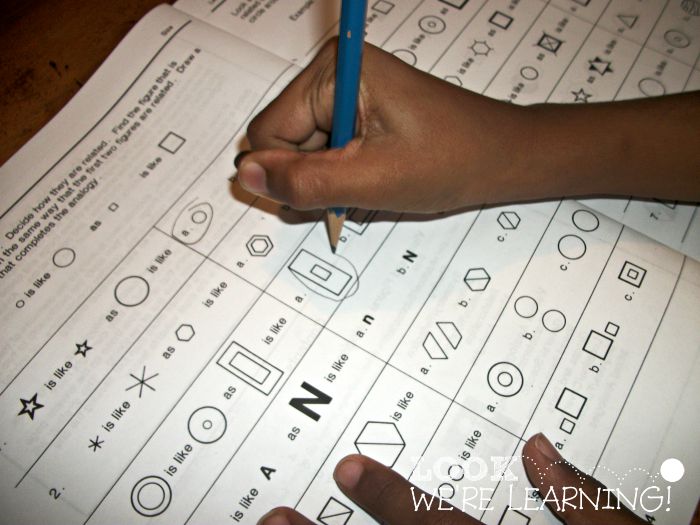
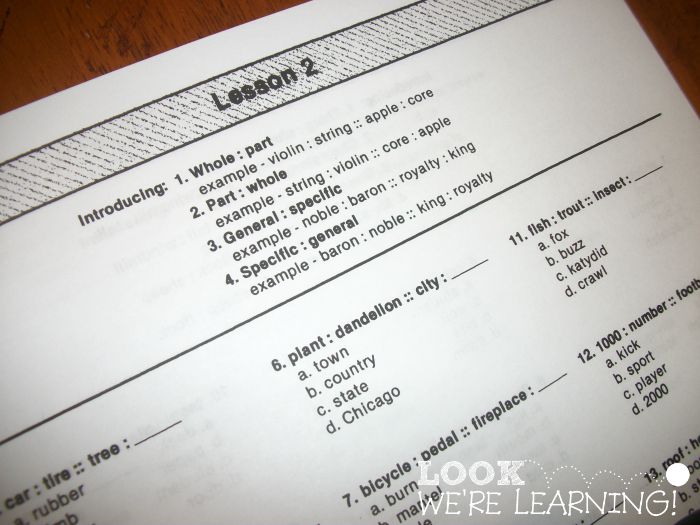
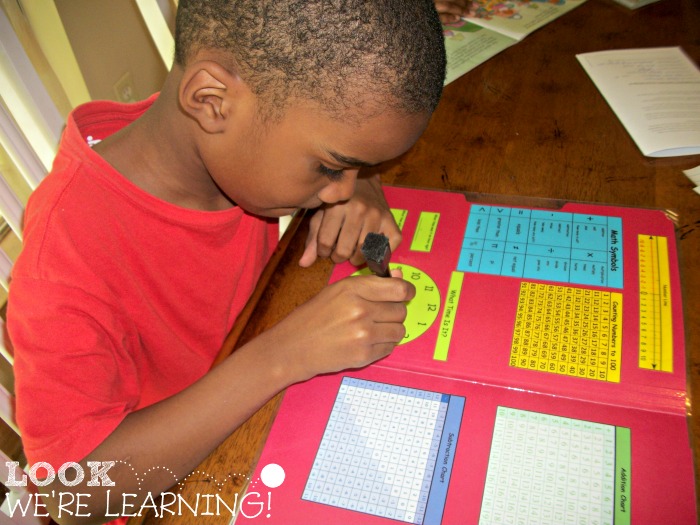
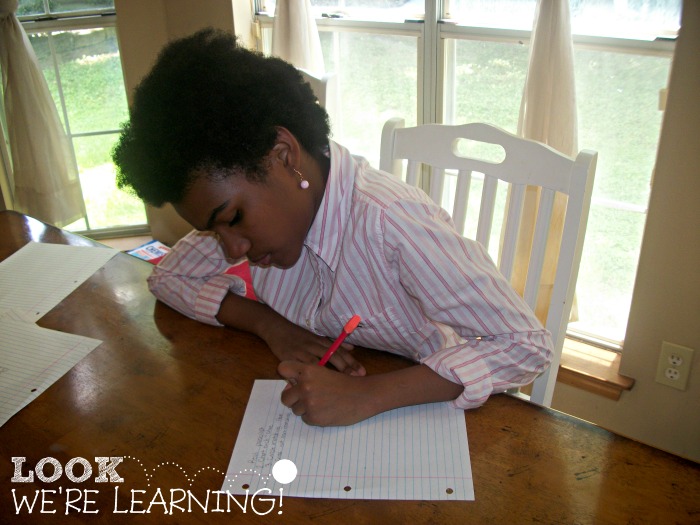
is not a logic curriculum, but it is a logic puzzle workbook. The first thing I loved about it was that the activities are fairly short – perfect for Tigger’s short attention span!

Using Math Bafflers to Introduce Logic to Kids with ADHD

Look at her expression. That is the face of a child who is NOT interested in this subject at all…lol.

Sensory Fix™ for Everyday Sensory Needs
Using Math Bafflers to Introduce Logic to Kids with ADHD

I loved the way Math Bafflers provided a gentle intro to logic for children. In the very beginning, the book acknowledges that logic is not the easiest subject to learn.

So there are a list of steps to follow to help kids (and their parents) make sense of how to solve each puzzle. I summarized the steps and wrote them on the board.

Using Math Bafflers to Introduce Logic to Kids with ADHD

Then I had Tigger copy them down. Having her write things down seems to “ground” her in a way. Then, she’ll have something to refer back to when she can’t remember how to solve a problem.

Using Math Bafflers to Introduce Logic to Kids with ADHD

We started with the very first Math Bafflers 
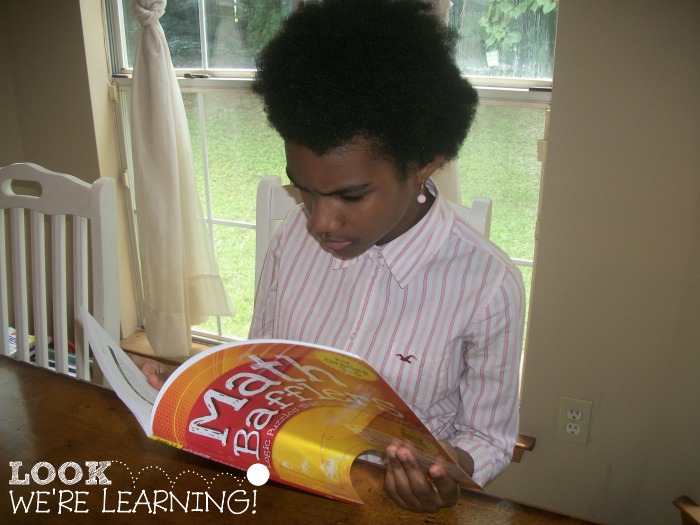
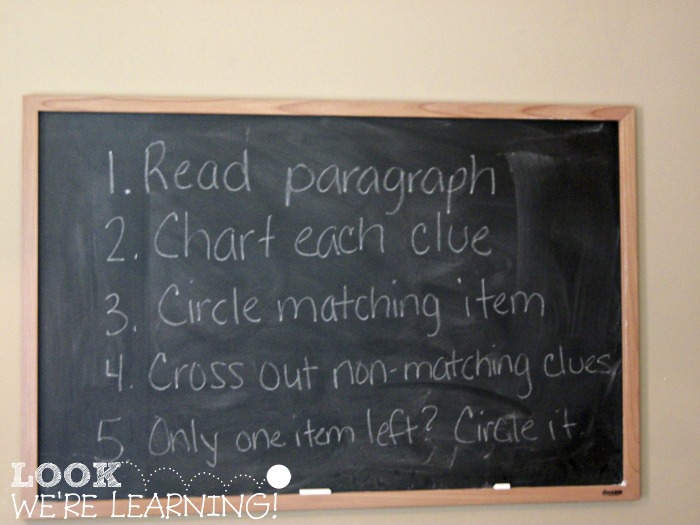
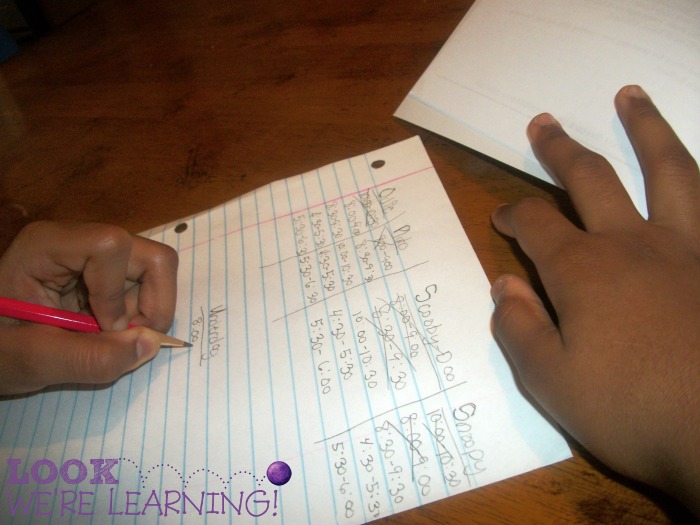
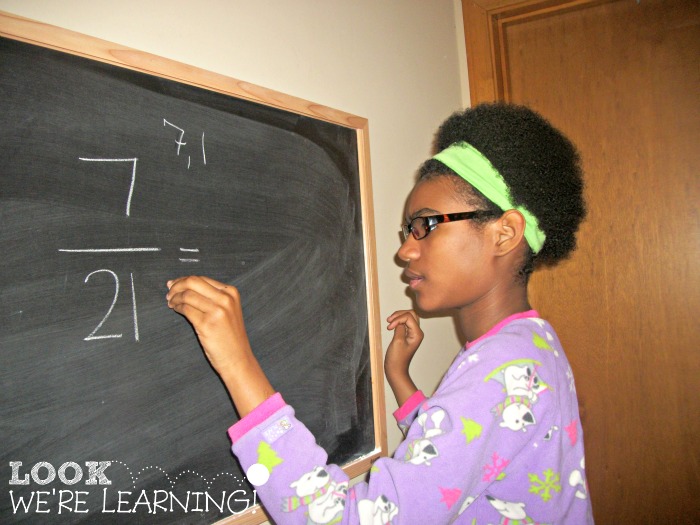
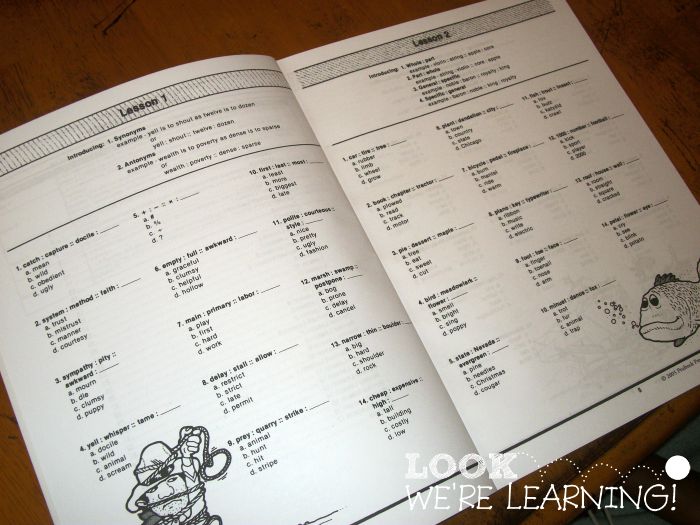
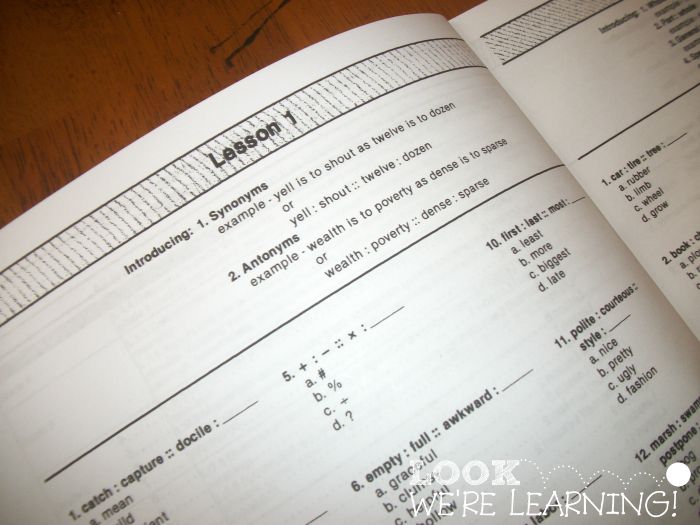
puzzle. Basically, it requires kids to sort through a list of criteria to determine which television program comes on when. There are clues such as: “Program ABC comes on after Program XYZ, but before Program DEF.”

I’ll be honest. Those kinds of puzzles stump me too.

Which is why I was so glad for the problem-solving steps in the beginning of the book. Finding the answer seemed overwhelming initially, but as we followed each step for each clue, we ended up narrowing down our choices fairly quickly.

Something I noticed about Tigger is that she tends to read “more into” a sentence than is actually there. For example, a clue might say “Leah does not breakfast while watching Program XYZ. She eats breakfast between 8:30 to 9:30 a.m.”

When I asked Tigger, “What does that mean about Program XYZ and when it doesn’t come on?”, she would answer, “It doesn’t come on in the morning!” But the clue didn’t say that. It simply said that it didn’t come on during her breakfast time. There were other morning times outside of the time when Leah eats breakfast.

I chalk that up to her desire to hurry up and get through a problem quickly. So helping her slow down and develop patience with her schoolwork is going to be one of our focuses this school year.

Using Math Bafflers to Introduce Logic to Kids with ADHD

Tigger kept trying to give up, but I wouldn’t let her. And sure enough, we solved the puzzle! Whoohoo!

Now I will say – After we finished the first puzzle, we stopped with this subject for that day. I didn’t want to overwhelm her and I didn’t want her to hate learning logic. But this will definitely be part of our curriculum for the 2015-16 school year. 🙂

And that’s our Math Bafflers Review! If you’re just getting started with a study of logic in your homeschool, I highly recommend Math Bafflers
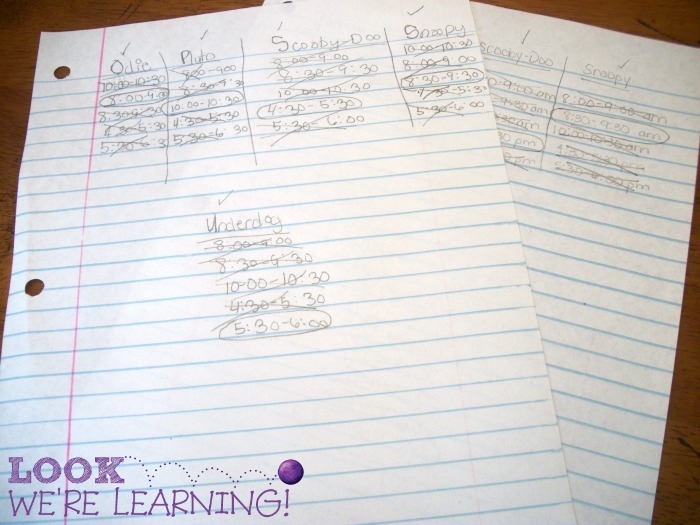
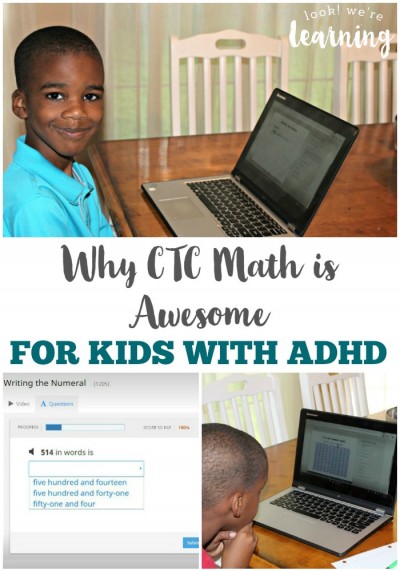
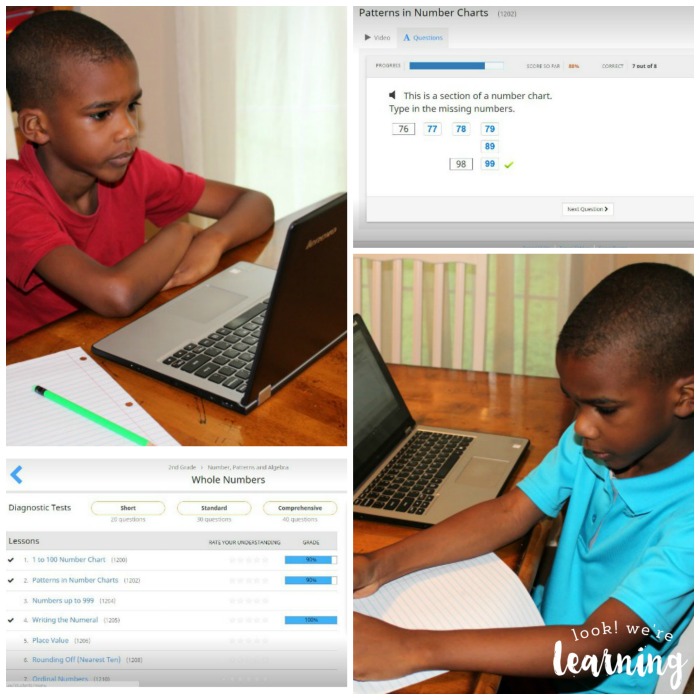
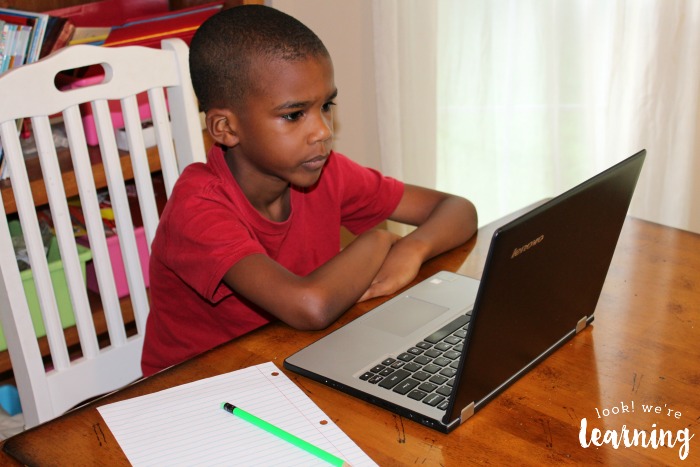
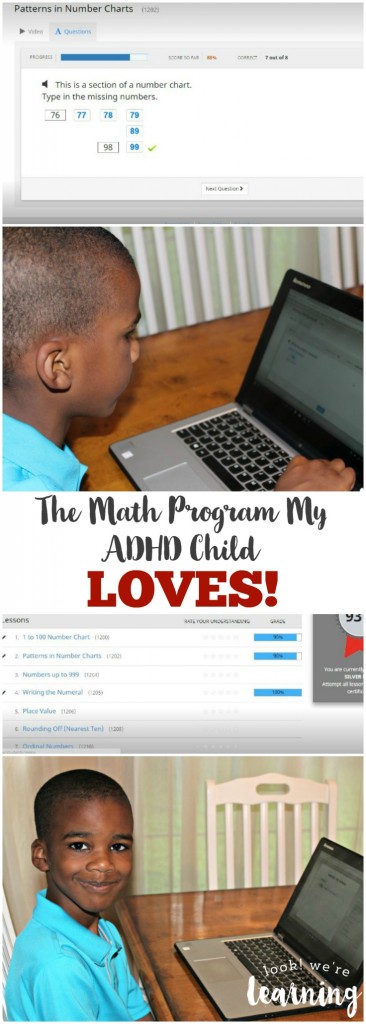
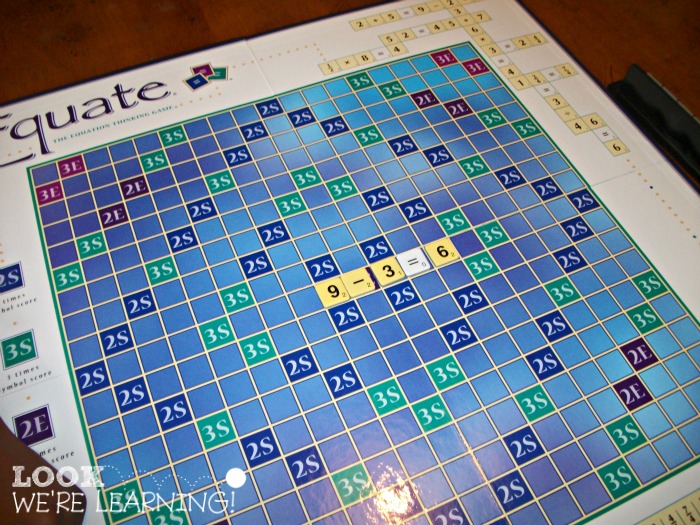
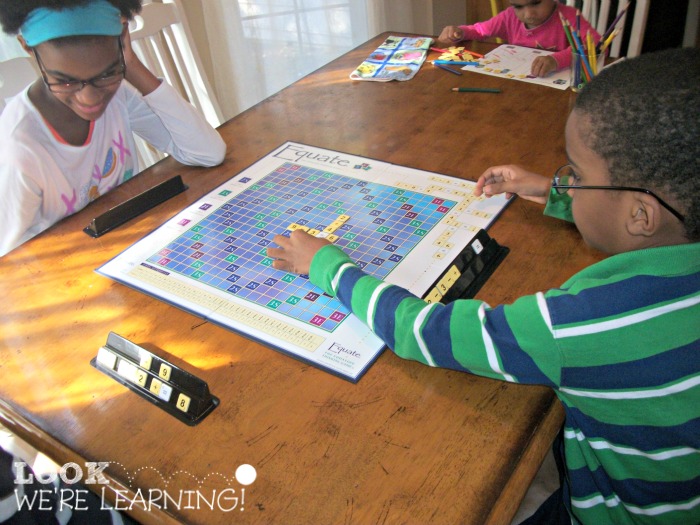
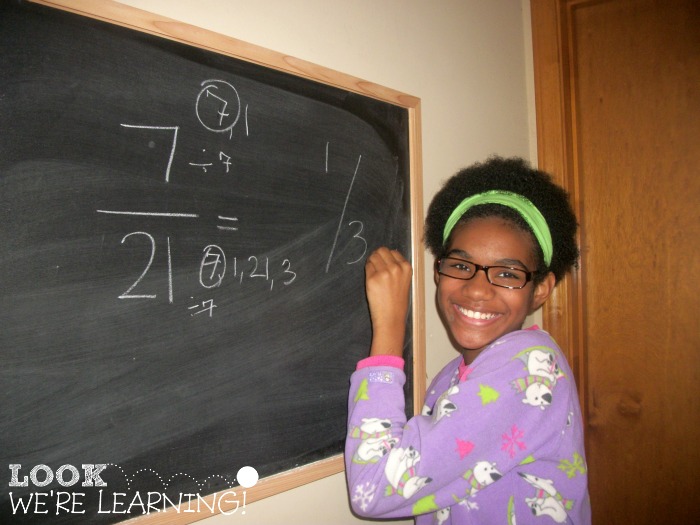
! It’s perfect for kids with ADHD, kids who struggle with math, or anyone else!

3 Ways to Interest Girls in Science

June 17, 2015 by Selena Robinson 1 Comment

Tigger is a HUGE science fan. Huge. She loves learning about animals, the human body, the environment – pretty much any scientific topic you can think of.

Here’s the issue for us: She has ADHD. So finding ways to hold her interest in a science lesson can be a challenge.

When I heard about the opportunity to try a new science program – Mosa Mack Science – I jumped at the chance! And I’m so glad I did. By using the program, I learned three ways to interest girls in science and they worked for us!

Disclosure: I received access to this program in exchange for this review. All opinions are my own.

3 Ways to Interest Girls in Science

Ways to Interest Girls in Science

1. Make it accessible.

First of all, science has to be accessible for girls. I’ll be honest. I was not interested in science as a child, except for dinosaurs which I still happen to think are awesome. 🙂

I was definitely more interested in the humanities, as were most girls in my school. Now that the sciences have become more inclusive, I’m glad to see that more girls are pursuing STEM fields.

MM Screenshot 5

Accessibility is one of the things I love about Mosa Mack Science. It’s extremely easy to use. All of the modules are located on the site, complete with a summary and a blurb about the specific activity students will complete during the process.

I loved that because I could easily look at the summaries and help Tigger choose a topic that interested her.

MM Review

Naturally, I looked through the module first and printed all of the materials. It gave me a head start on planning, so I could keep her moving from activity to activity without having to wait around.

MM Screenshot 3

Each module includes a Warm-Up – a gentle introduction to the topic at hand. Since we were covering the “Food Chains” module, our warm-up was an intro to food webs and how they are organized.

MM Screenshot 4

After learning about food webs and getting instructions to make our own, we also had the chance to do a design project (a super tie-in to STEM)!

MM Screenshot 2

The module also has a short, animated video that contains a scientific mystery Mosa Mack has to solve. In a separate window, you can click and find out the answer (after your kids try to think of it, of course).

2. Make it relatable.

Female scientists were hardly even discussed when I was in school, except for Marie Curie. Most of the women I learned about were wives or mothers of famous people – wives of presidents, wives of civil rights leaders, mothers of famous singers, and so on.

A major reason I wanted to review this product was because the main character, Mosa Mack, is a girl of color. Since Tigger is a young girl of color, she loved seeing someone who resembled her on the screen. When girls relate to scientists, they are far more likely to see science as a field “for them”.

MM Screenshot

Further, Mosa is an excellent portrayal for young girls. She’s inquisitive, persistent, well-spoken, and extremely intelligent – everything we want our daughters to be!

3. Make it interesting!

Finally, science lessons should be interesting! I was always bored in science class, because it mostly consisted of lectures. Mosa Mack Science, though, is much more interactive.

MM Review 3

The characters in the videos are funny, but not distracting. And the story moves quickly enough to keep kids’ attention, even wiggly ones like Tigger. 🙂

MM Review 4

The modules also include hands-on activities that relate to the video. Tigger completed a paper review of the major points covered in the video. The handout contained still captures from the video to help her recall the pertinent scenes.

MM Review 1

Tigger also got to make vocabulary and quote flashcards using new terms she learned in the unit. In the Food Chains unit, some of her terms included “Primary Consumer”, “Decomposer”, and “Producer”. She cut out the pictures, matched them with the right quotes, and added her terms and definitions.

MM Review 2

All done! She had a blast and quickly asked me when we could do more of the units!

Do you have a budding girl scientist in your family? How do you help her direct her interest in the sciences? Let us know in the comments! And be sure to visit Mosa Mack Science to check out the free resources and learn more about the program!

Making Creative Writing Fun for Reluctant Writers: Writeshop Junior Review

March 9, 2015 by Selena Robinson 4 Comments

This is a conversation on behalf of WriteShop. Opinions are 100% my own.

Do you have any reluctant writers in your family? We do. Tigger is an avid reader, but a hesitant writer. I understand. I’m exactly the same way. 🙂

So I was thrilled when we got a chance to try the homeschool writing program: Writeshop Junior! It’s a comprehensive creative writing program for upper elementary kids!

Check out our Writeshop Junior review to see how the program helped us make creative writing fun!

Making Creative Writing Fun for Kids with WriteShop

One of my favorite things about the WriteShop curriculum is that literally everything is explained for you. What to print, how to assemble it, and how to teach each section. It’s super simple to use.

Making Creative Writing Fun for Kids with WriteShop

The curriculum has a unique way to introduce the basic concept of writing a letter. Kids can color code each section of the letter to help them remember the basics: body, date, salutation, closing, and signature.

Making Creative Writing Fun for Kids with WriteShop

Then we made a fun parts of a letter robot, which Tigger assembled (in order) and then colored. After that, she understood where everything goes on a letter without having to write an endless amount of letters herself. 🙂

Making Creative Writing Fun for Kids with WriteShop

WriteShop also includes plenty of reading work to help kids concentrate on reading good literature. I always feel that grammar is learned by lots and lots of reading. Since Tigger loves books, she found the reading logs and took off running! (The book she read for this assignment was “Soupy Saturdays with the Pain and the Great One” by Judy Blume.)

I’ll tell you – there’s no better sound than hearing your child ask, “Can I go and read so I can complete my reading log, Mama?” That’s the sound of a bookworm developing!

Making Creative Writing Fun for Kids with WriteShop

Another part of WriteShop that both Tigger and I loved was the Grammar Folders. All of the templates (and assembly instructions) are provided for you. And they are a great way for kids to get involved in their own lessons and take responsibility for studying.

Whenever Tigger was confused about when to use which quotation mark, she could just consult the folder herself for a quick reminder. The folder templates even come with detachable bookmarks!

Making Creative Writing Fun for Kids with WriteShop

After a few weeks of introductory work, it was time to actually begin creative writing! Since the program opens with such a gentle introduction to the concept, though, Tigger was ready and not overwhelmed at all!

Making Creative Writing Fun for Kids with WriteShop

As we got further along into the program, the assignments became longer, which I thought was a great thing. During Unit 3, Tigger got to use several words from a noun bank to write a story based in the Amazon jungle. Here’s her story:

Maria and Julio live in Brazil. They decided to explore the Brazilian rainforest. They packed up and headed for the Amazon jungle first. They got a chance to swing on lots of vines. They packed hammocks for the nights they traveled. As they set them up, Maria pointed out a bat family flying across the night sky.

The next morning they headed for the Brazilian rainforest. Julio found a diamond. He put it in his backpack. Maria and Julio also discovered maggots on the ground. They rode a boat down a waterfall. They even picked up a tarantula! They also climbed up a tree and found a sloth!

Before they went to sleep that night, they sat up in their hammocks looking at the pictures they’d taken. They both agreed it was the best time they’d ever had!

The end.

Personally, I think it’s worthy of a Pulitzer. 🙂

We really enjoyed using WriteShop. The curriculum is a great way to motivate kids who are reluctant writers to jump in with both feet!

Are you on Instagram? Show off your creativity with a photo writing prompt. Use nature, toys, kids, whatever. Or, make a collage like a comic book. Follow WriteShop on Instagram and then share your image with the hashtag #writeshopwriting. Be sure to tag @WriteShop in your photo. Their team will be choosing from your photo writing prompts to share in their social media!

And now, it’s time to host the awesome giveaway!

Giveaway product provided by WriteShop. Winner will be selected and notified by email on April 4, 2015. Winner has 48 hours to respond or another winner will be selected. If the winner is a US resident, a physical product will be provided. If the winner lives internationally, only a digital product will be provided. Void where prohibited.
a Rafflecopter giveaway

Interested in learning more about how WriteShop can be used in your homeschool? Check out these awesome reviews!

An InLinkz Link-up


How to Improve Academic Writing with Grammarly

November 16, 2014 by Selena Robinson Leave a Comment

I’m nearing the end of my third semester in college and I’m an English major, so it goes without saying that I write A LOT of academic papers. A LOT. Fortunately, I actually enjoy writing papers, although I realize that I’m in the distinct minority on this. 🙂

When you’re in college, you don’t really get to spend a lot of time studying grammar. Naturally, professors assume that you already know the basics of English grammar long before you begin college courses. My problem is that I had been out of high school for over a decade when I enrolled, so I was rather rusty.

Recently, I got the chance to try the online grammar application Grammarly and it really makes it easier to write with proper grammar, whether you’re writing an academic paper, a business report, or even a personal letter. Here’s a quick look at how to improve academic writing with Grammarly.

Disclosure: I received free limited-time access to this program in exchange for this review. My opinions are my own and I was not required to post a positive review.

How to Improve Academic Writing with Grammarly - Look! We're Learning!

There are a lot of online proofreaders around, but one of the things that sets Grammarly apart (in my opinion) is that it offers a far more customizable set of options.

When you first log into the program, you have the option to explore the it by examining a demo document. Or you can get right to work on something of your own. Which brings me to one of my favorite features of Grammarly: You can either upload an existing document you’ve already written OR you can write something new directly in the program.

You can even download Grammarly as an add-in for Microsoft Word and use it right from within Word. Awesome.

How to Improve Academic Writing with Grammarly - Look! We're Learning!

While I love the flexibility of editing a completed document or writing it within the program, Grammarly really shines in the editing and revising arena. You can check for plagiarism, which is great to do before you submit a paper. (It’s amazing how many of the same words and phrases are used in academic writing, without any intent to plagiarize.)

But you can also ask the program to look at your document according to its specific type. For example, if you’re writing a college paper, you can choose “Academic” and then the type of paper (“Essay”, “Case Study”, “Dissertation”, etc.). Grammarly will then look at the document and offer revision and proofreading remarks based on that type of submission. You can also choose from several other types of documents, including “Business” (letter, report, proposal, etc.), “Technical” (end-user documentation, marketing), and “Creative” (novel, script, short story). Wowzers.

If you want to add a little “something” to your work, Grammarly can offer you suggestions through the Vocabulary Enhancement tool. Click the magic wand to get a list of more polished words or phrases that can make your work stand out.

How to Improve Academic Writing with Grammarly - Look! We're Learning!

Once the program finishes looking at your document, you’ll get a report containing a list of all of your errors. As you can see, Grammarly examines the document in several areas, including “contextual spelling”, “sentence structure”, and “style”. You don’t have to try to remember what a dangling modifier is! Grammarly will fix it for you. 😉

How to Improve Academic Writing with Grammarly - Look! We're Learning!

I really enjoyed using Grammarly and I’d highly recommend it if you plan to do any type of professional writing on a regular basis. If you’d like to try Grammarly, you can get a free seven-day trial to see if the service is right for you!

The Best Essay Check

5 Choices for Homeschool Art and Music Curriculum - Look! We're Learning!

5 Homeschool Art and Music Curriculum Choices

August 23, 2014 by Selena Robinson Leave a Comment

Our children love art and music! Tigger is extremely interested in dance and playing music. Roo and Pooh love drawing and painting. So, we try to find good art and music curriculum choices to keep them interested.

If you’re searching for homeschool art and music curriculum, check out these five options to add both subjects to your weekly lessons!

Keep Reading…

Five Homeschool Language Arts Curriculum Resources - Look! We're Learning!

5 Homeschool Language Arts Curriculum Resources

August 21, 2014 by Selena Robinson Leave a Comment

Language arts is one of the most important aspects of a good homeschooling education. Since we’re eclectic homeschoolers, we tend to mix and match resources for most subjects, including language arts.

Today, I’m sharing five homeschool language arts curriculum resources to help you put together your own language arts program! Trust me, it’s easier than you think. 😉 I hope you find these suggestions helpful!

Five Homeschool Language Arts Curriculum Resources - Look! We're Learning!

Resources for Homeschool Language Arts Curriculum

How to Choose “Just Right” Books: Helping Kids Grow as Readers – Becky Spence

I’m a huge enormous bookworm, but that doesn’t mean that my kids will automatically love reading. A big part of helping kids love to read is choosing books that are a good fit for their age and comprehension level. We don’t want to set them up for frustration by handing them books that are above their reading ability. Becky Spence shares excellent suggestions for choosing books that are “just right” for your kids in How to Choose “Just Right” Books: Helping Kids Grow as Readers.

Designing Your Language Arts Curriculum – Jimmie Lanley

What’s involved in a good language arts curriculum? Ideally, we should be including grammar, reading, literature, spelling, and penmanship. If you’re wondering how you can possibly include all of those subjects in your lesson plan, Jimmie Lanley explains how you can in Designing Your Language Arts Curriculum.

Understanding Copywork – Amy Maze

Copywork is a grammar concept from the Charlotte Mason style of education. It involves having children practice penmanship and grammar by copying excerpts from examples of excellent writing. If you’re wondering just why copywork is beneficial and how to include it in your homeschool, Amy Maze’s Understanding Copywork is a perfect primer on the subject!

Essay Tune Up – Jimmie Lanley

Writing an essay doesn’t have to be a difficult assignment for kids. In Essay Tune Up, Jimmie Lanley offers printable worksheets to help students break essays into sections: introduction, details, and conclusion. She also includes prewriting organizers, cheat sheets for better transitions, and a peer editing checklist!

Writing a Biography – Valerie McClintick

Since writing about a real person can involve lots of research and preparation, it’s important that students learn how to look up information, find good sources, compile their thoughts into an outline, and express them fluently. In Writing a Biography, Valerie McClintick takes elementary-aged students through the step-by-step process of writing a biography for the first time.

Do you have any great homeschool language arts curriculum resources to share? Tell us about them in the comments!

Instant Grammar Checker

  • « Previous Page
  • 1
  • 2
  • 3
  • Next Page »
Hi! I'm Selena, a teacher and a veteran homeschool mom to four. I'm so glad you're here!
About Me Contact Terms of Use Privacy Policy Places I Share
Facebook Twitter Pinterest Instagram
Homeschool Printables Unit Studies Shop the Store
Copyright ©2023, Look! We're Learning!. All Rights Reserved. Design by Pixel Me Designs