Look! We're Learning!

Early Learning. Happy Teaching.

  • Shop
  • Printables
  • Homeschool
  • Crafts
  • Parenting
  • Blog
How to Use Teaching Textbooks for Simple Homeschool Math

How I Teach Math to Multiple Kids with Teaching Textbooks

January 19, 2021 by Selena Robinson Leave a Comment

How many of you are teaching multiple kids at home this year?

*waits patiently for many of you to raise your hand*

Now, how many of you are actually attempting to teach math to those same kids this year?

Anyone looking around nervously hoping we can talk about something else? Been there.

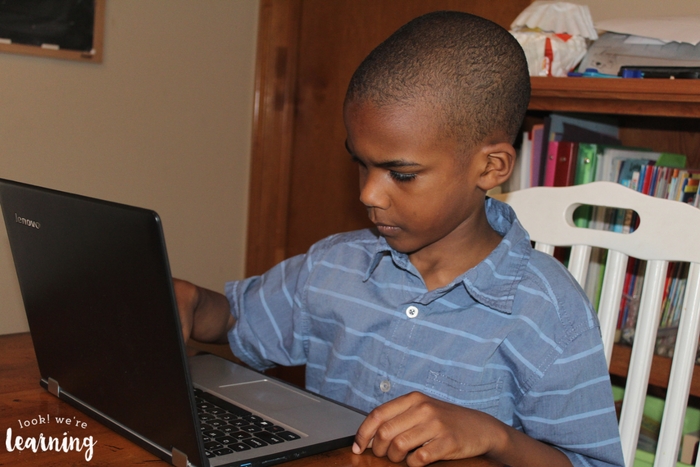
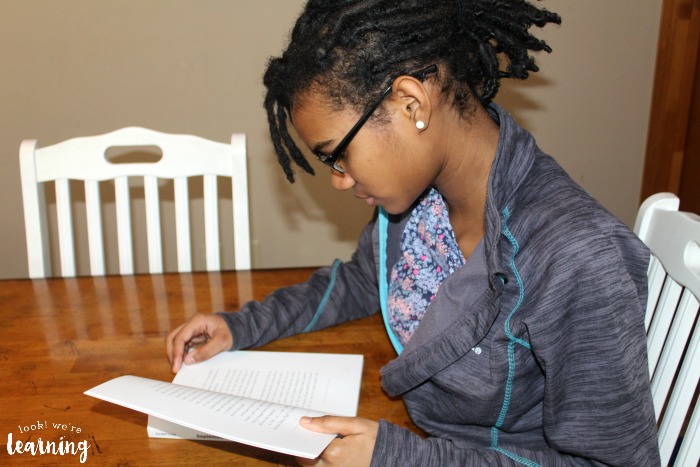
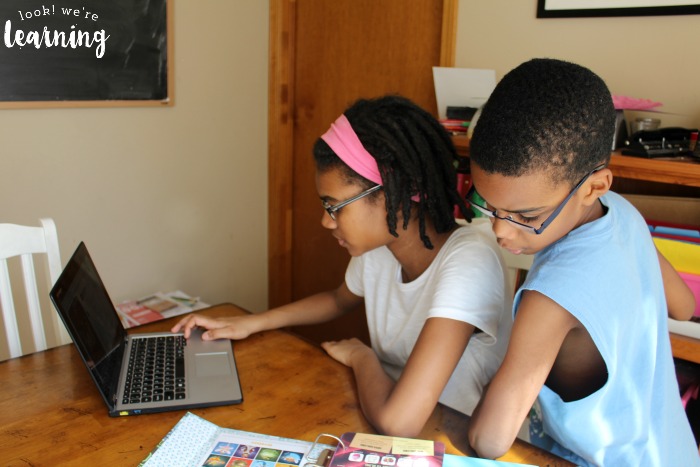
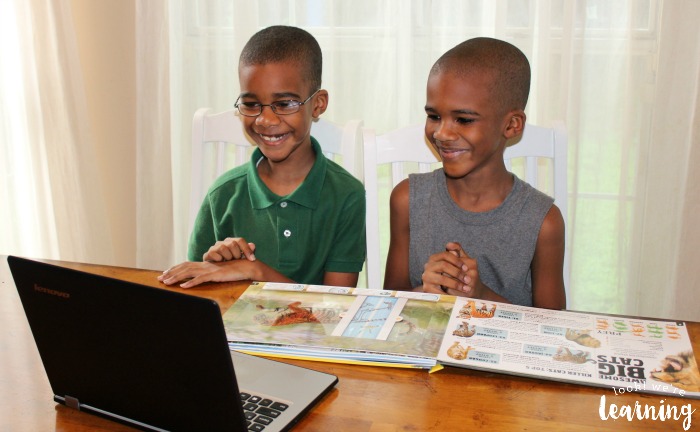
We’re teaching three kids at home this year and each one of them has a different relationship with math.

How to Use Teaching Textbooks for Homeschool Math

One loves it but wants to move at a faster pace than the public school system.

One likes it but loses interest very quickly.

The third outright despises it.

And I, as the homeschooling parent, get to figure out how to teach math to all three of them! Yay!

Not.

When I found out that I’d could try Teaching Textbooks with all three this year, I breathed an audible sigh of relief. I’d never used TT before, but I’d always heard it praised by other homeschoolers.

And now I see why.

Read on to see how we’re using Teaching Textbooks for all three of our homeschooled kids this year and how it’s making homeschool math a snap. Plus, find out how to get a free trial for your family!

Disclosure: This is a sponsored post and I was compensated for my time. All opinions are my own and I was not required to write a positive review.

How to Use Teaching Textbooks for Simple Homeschool Math

Common Problems when Teaching Homeschool Math to Multiple Kids

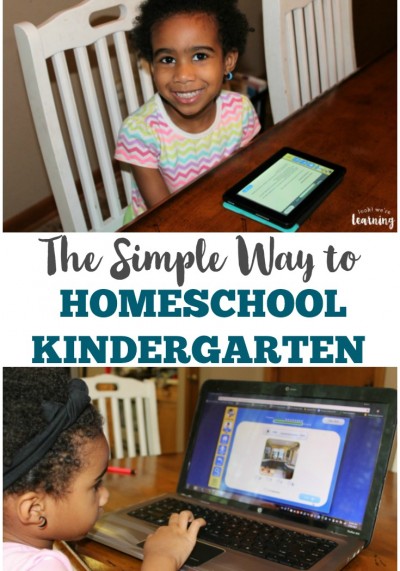
My youngest child is a learning dynamo.

If she could just be locked in a library with every encyclopedia in the world for the rest of her life, she’d be thrilled.

As much as I love her interest in learning, it can be a challenge to keep up with her everyday.

Using Teaching Textbooks for Self Paced Lessons

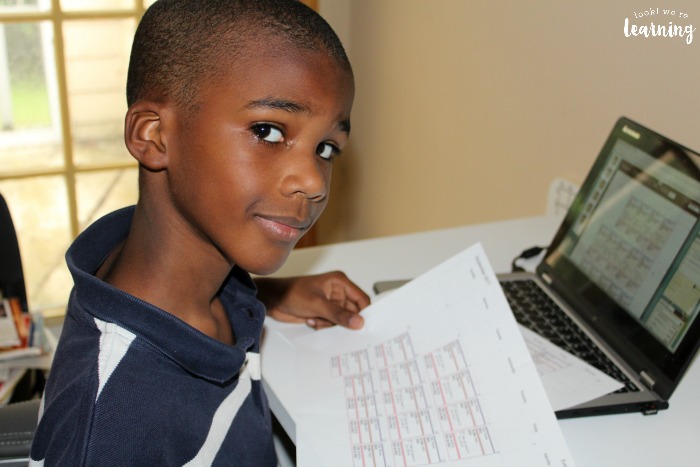
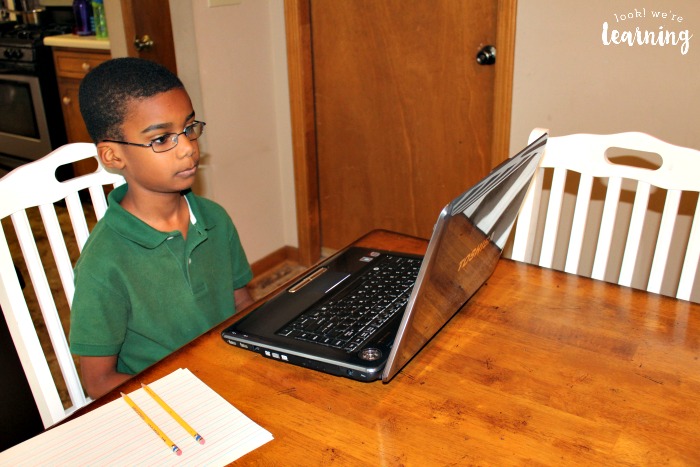
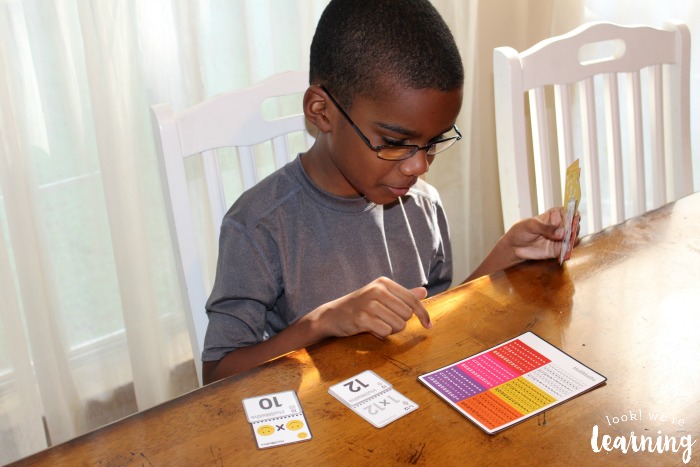
My sixth grader has a great aptitude for math. He picks up concepts quickly and masters them efficiently.

He does not, however, have the longest attention span.

And it’s hard for him to exercise the patience needed to get through a concept that he doesn’t grasp right away.

How Teaching Textbooks Works

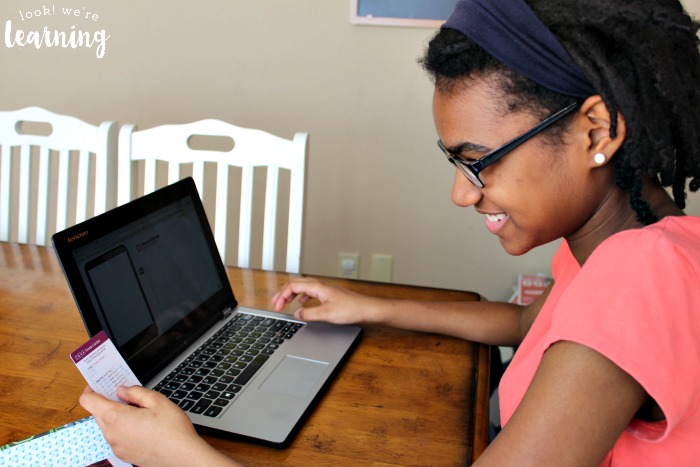
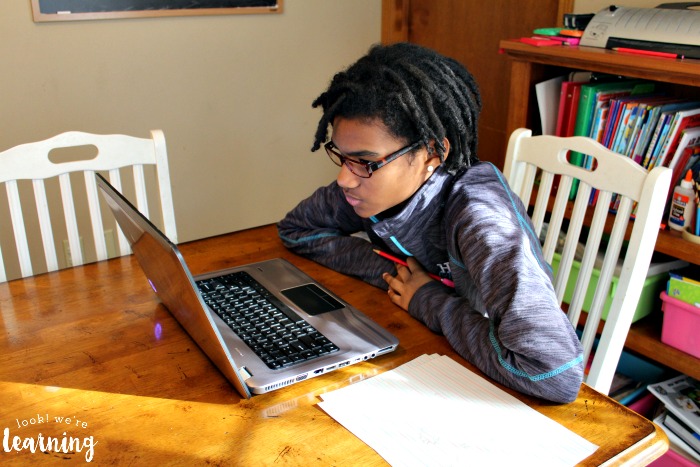
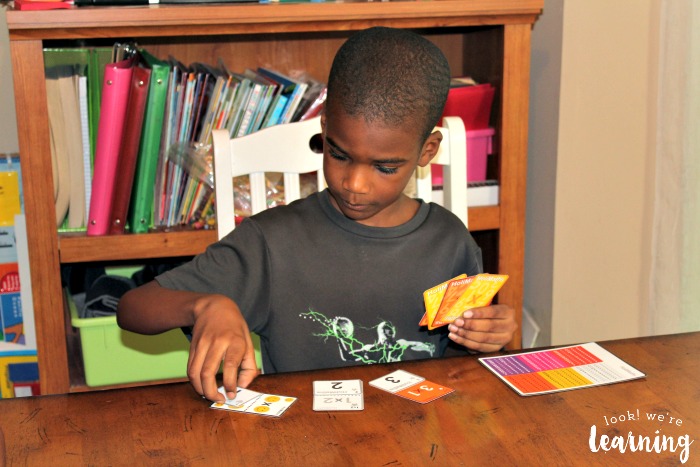
My seventh grader is another story.

When I tell you that this child hates math, I mean he HATES math.

Last school year, it was a struggle just to get him to complete his daily assignments. He spent most of his winter break that year catching up on past work.

Using Teaching Textbooks for Kids Who Hate Math

And, then, there’s me.

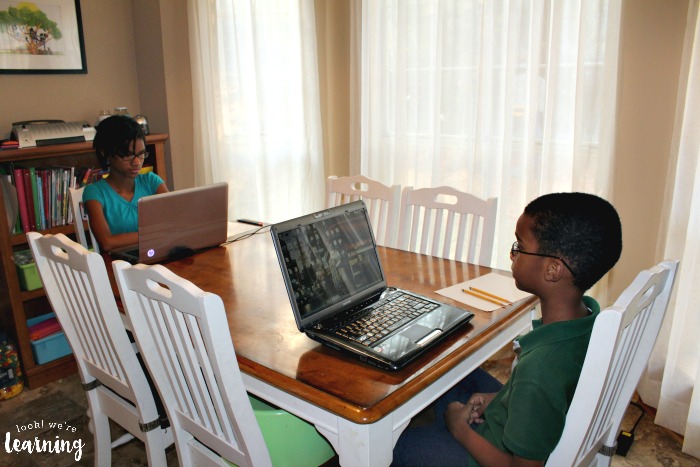
I’m a veteran homeschooler, so teaching my own children is not new to me. But I’m busy!

I work from home, I have a house to take care of, and our oldest is a high school sophomore who is doing distance learning this year.

I’m barely keeping my head above water as it is *before* you add teaching math into the equation.

When I found out we’d need to homeschool again, I was just looking to get it done.

Teaching Textbooks Zero Prep Free Trial Graphic

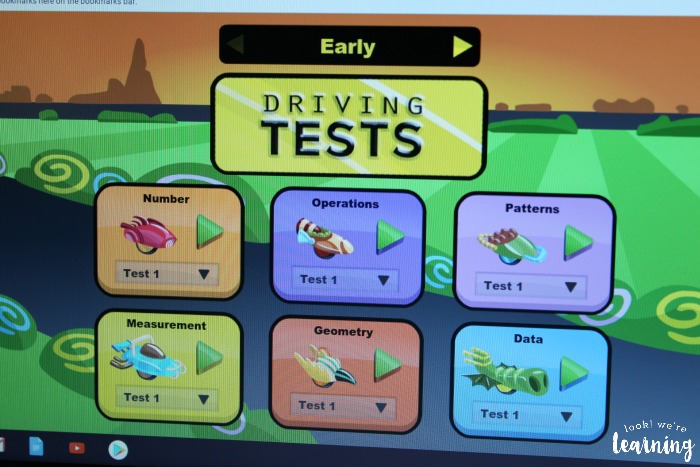
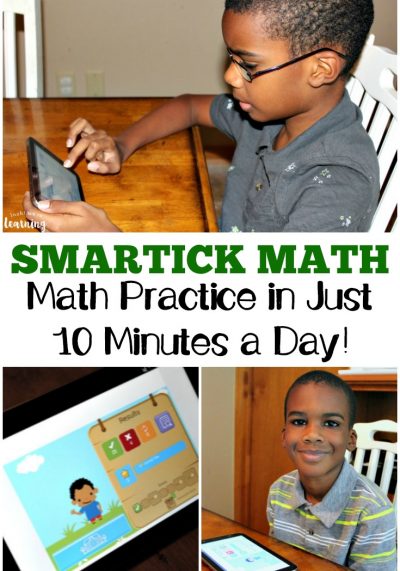
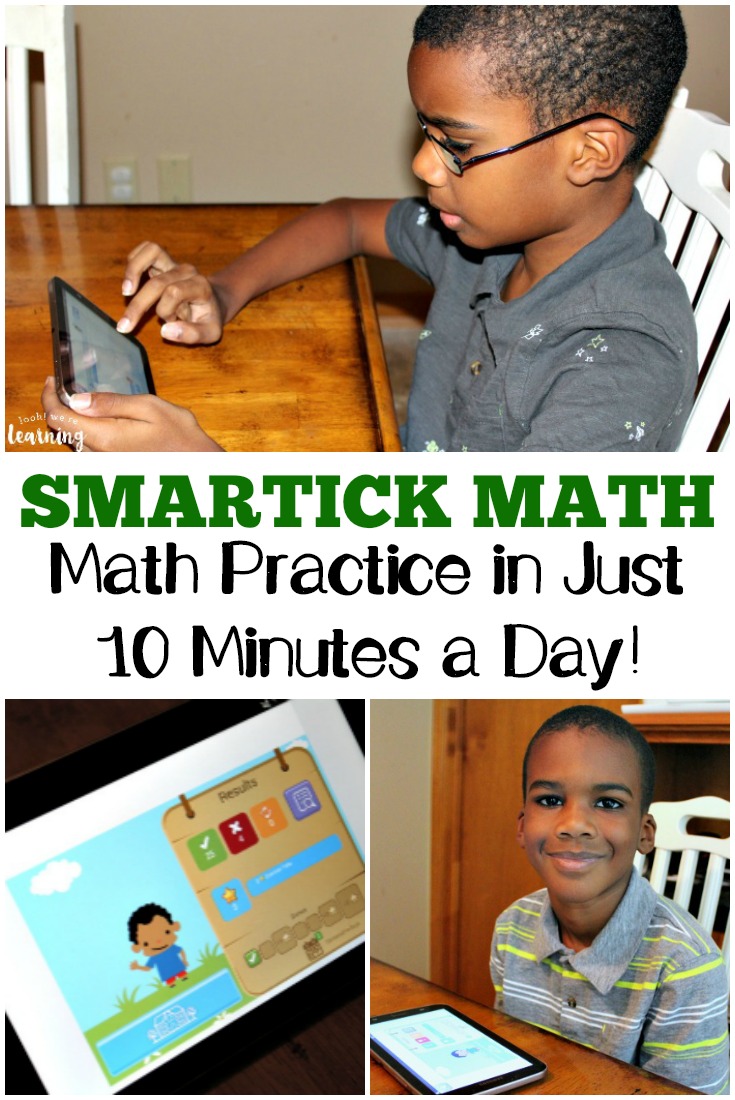
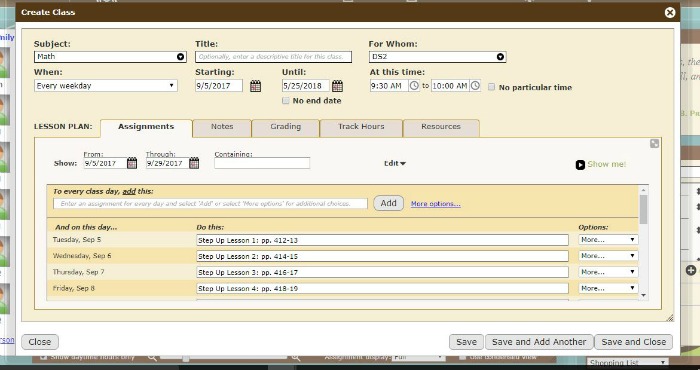
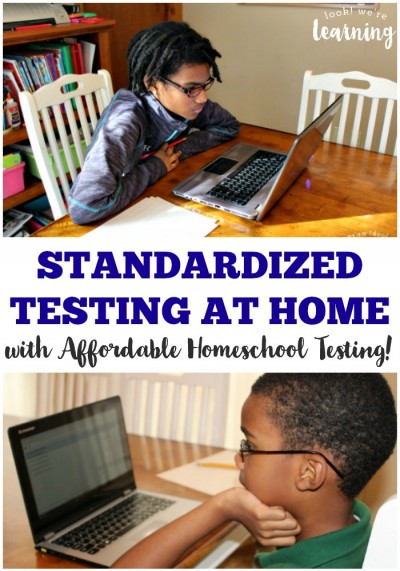
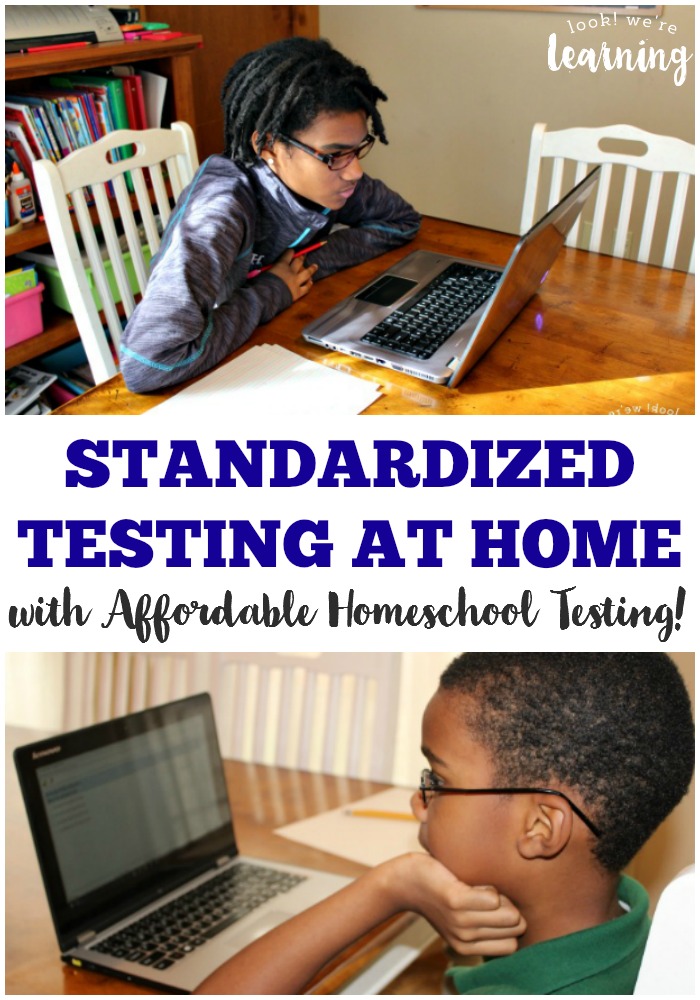
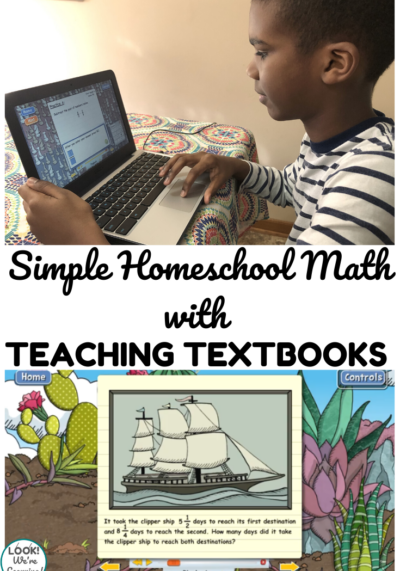
How Teaching Textbooks Makes Homeschool Math Easy

So – how does Teaching Textbooks 4.0 help?

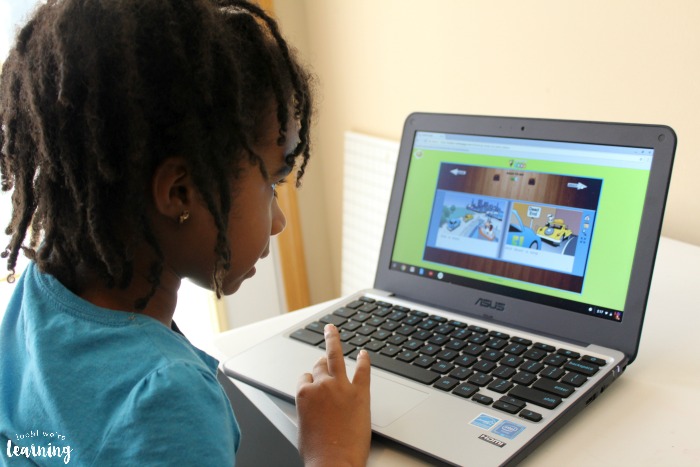
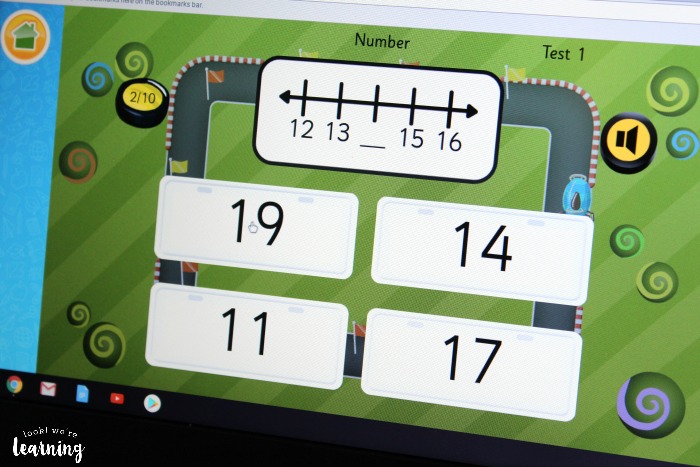
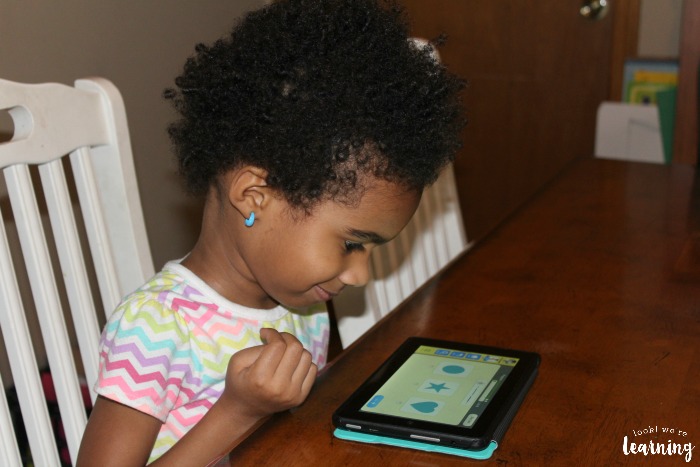
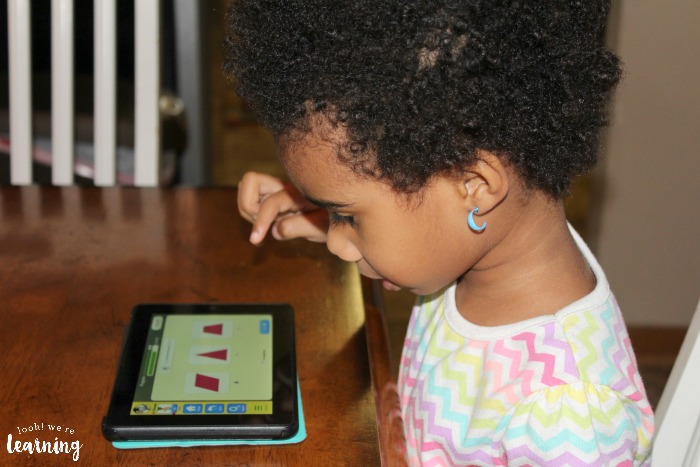
My little one can go through the lessons at her own pace.

According to her age, she should be in second grade this year. But she was bored in first grade last school year, so we decided to let her skip to third.

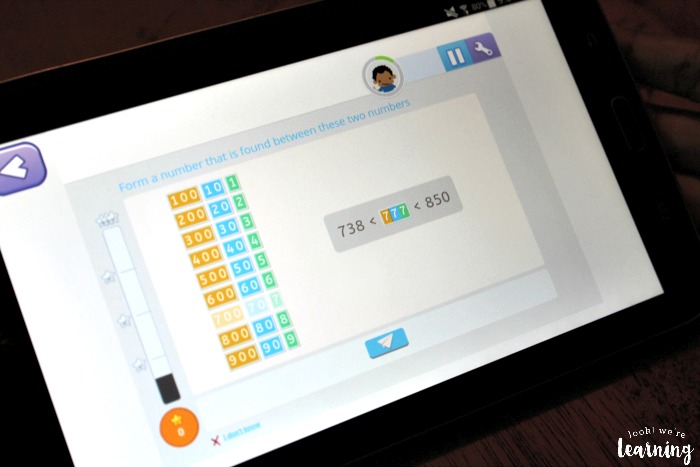
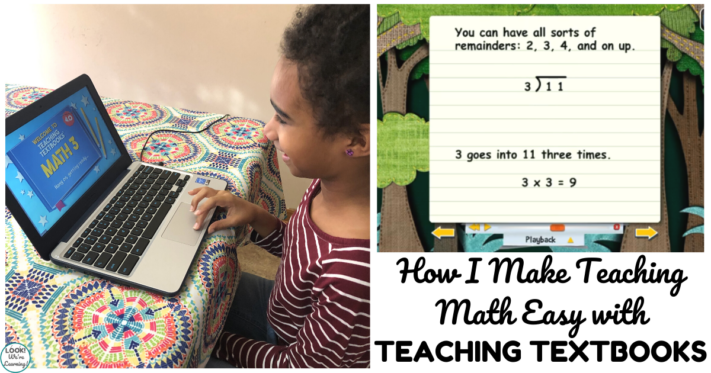
I was a little unsure about placing her in Teaching Textbooks 3. As she worked on the first lesson, she let me know that it was way too easy.

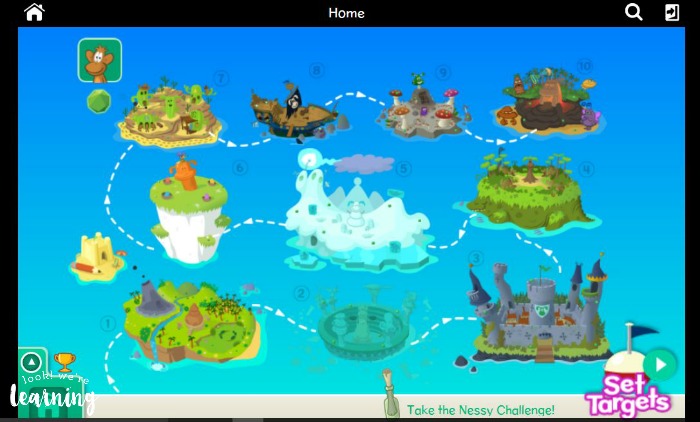
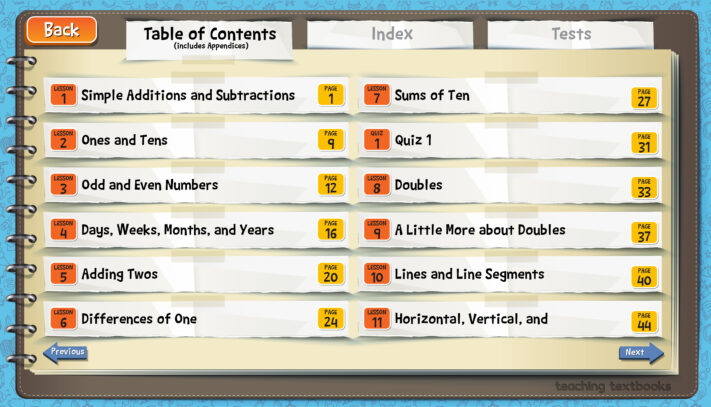
Teaching Textbooks lets you move around in the curriculum as you like. So we skipped ahead about ten lessons and she started getting a bit more of a challenge.

How Teaching Textbooks Grades Homeschool Math

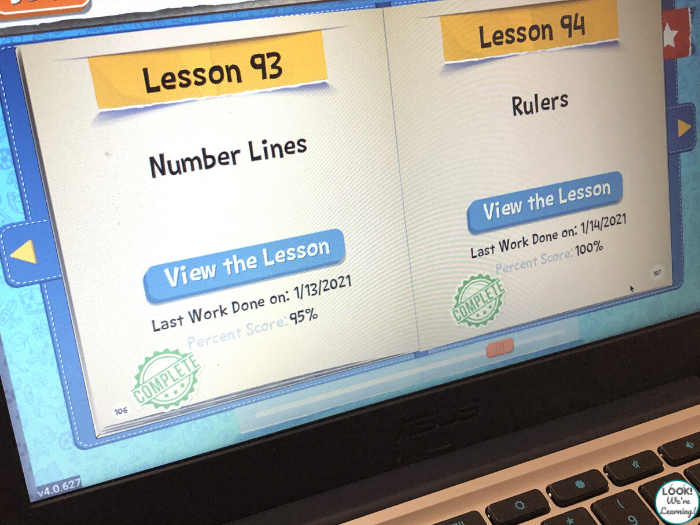
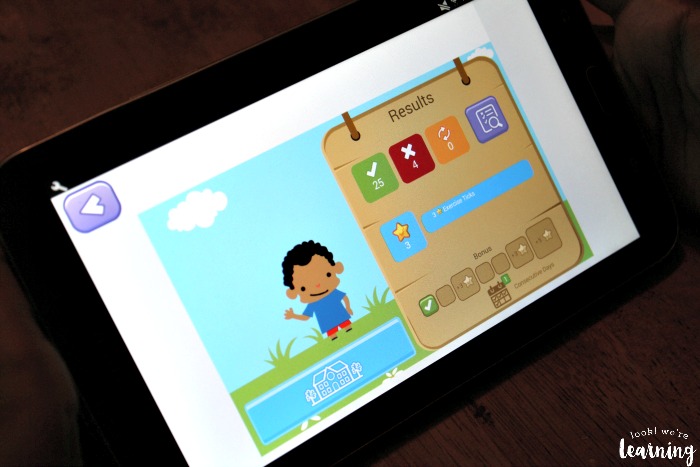
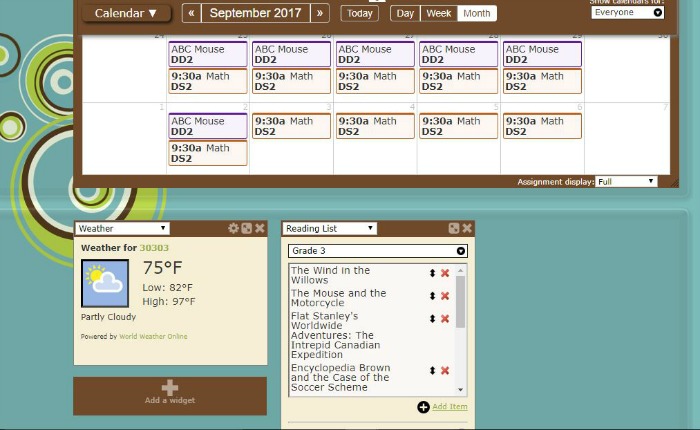
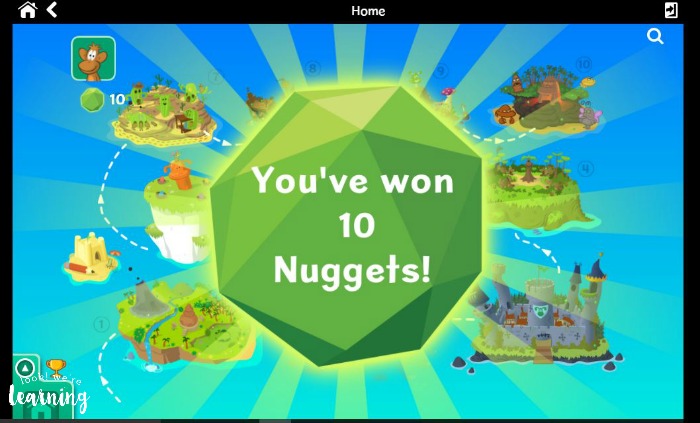
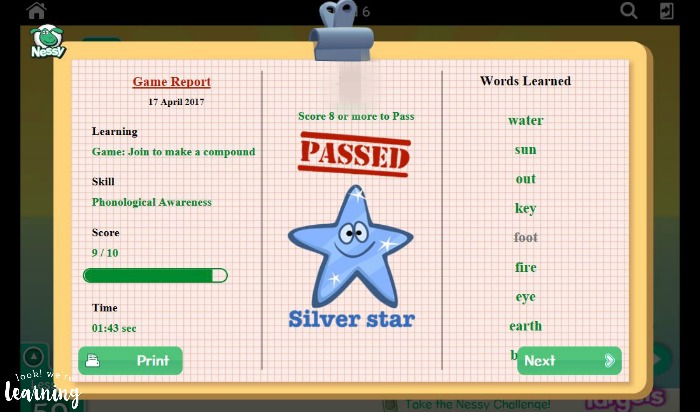
She’s two-thirds of the way through Grade 3 and excited to start Grade 4 this fall! And she can view her grades easily on her daily lesson pages.

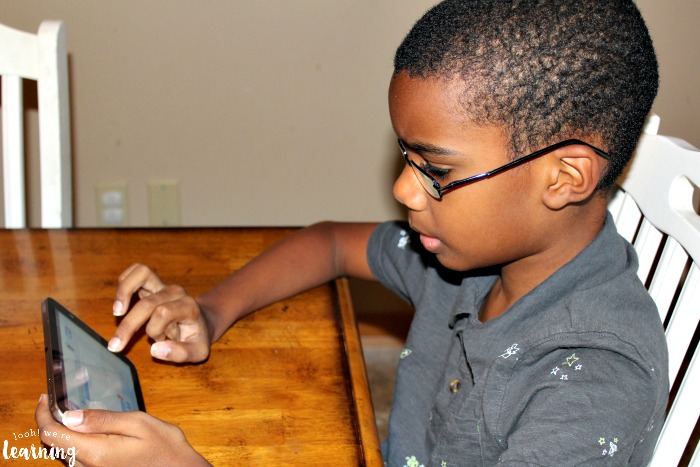
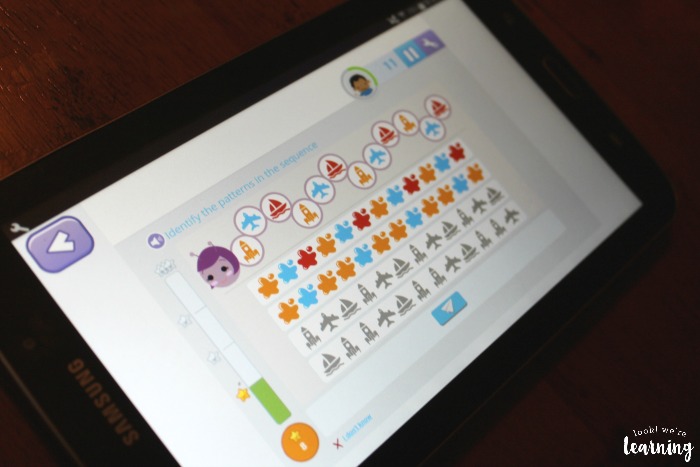
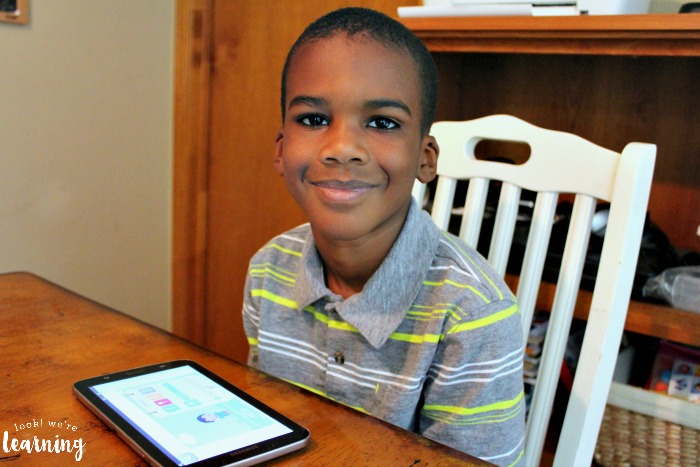
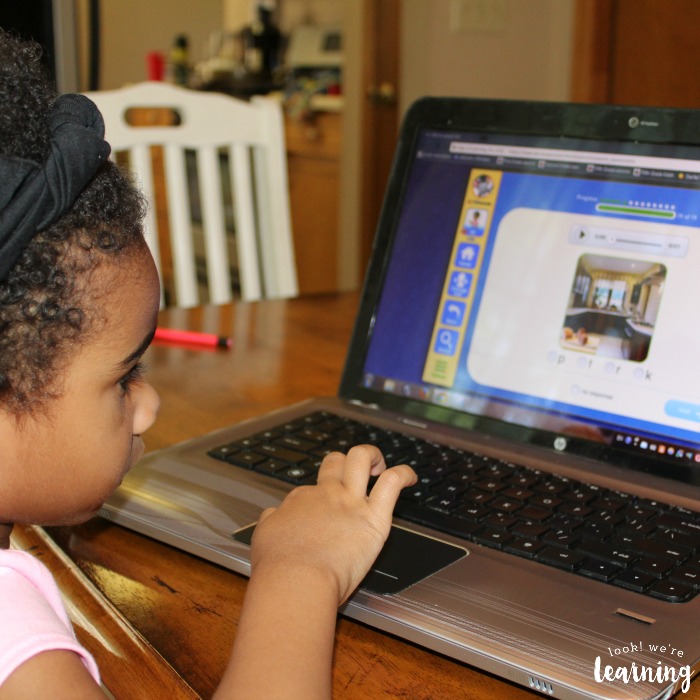
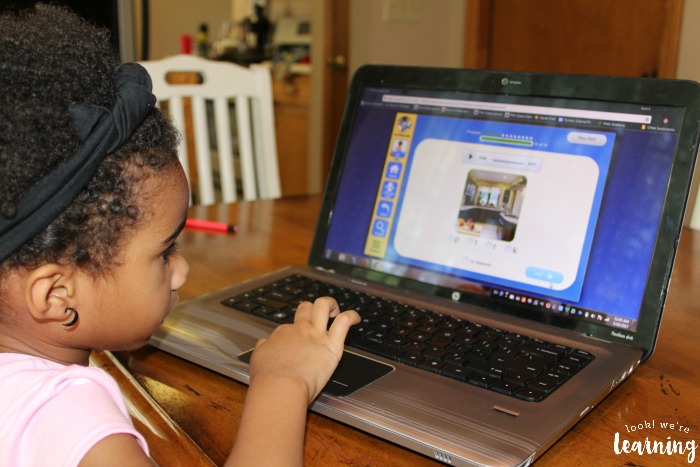
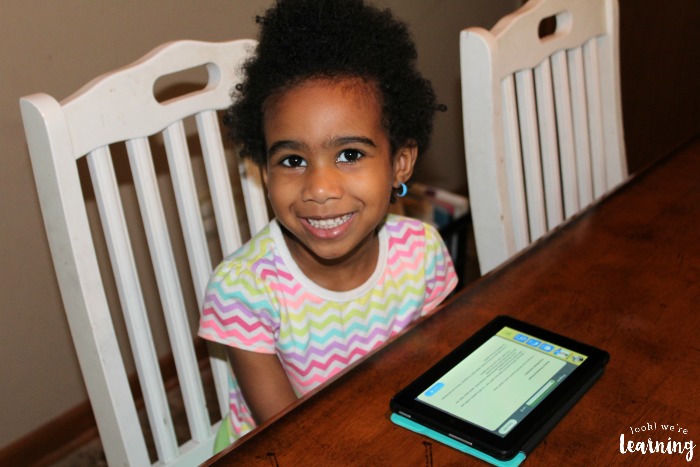
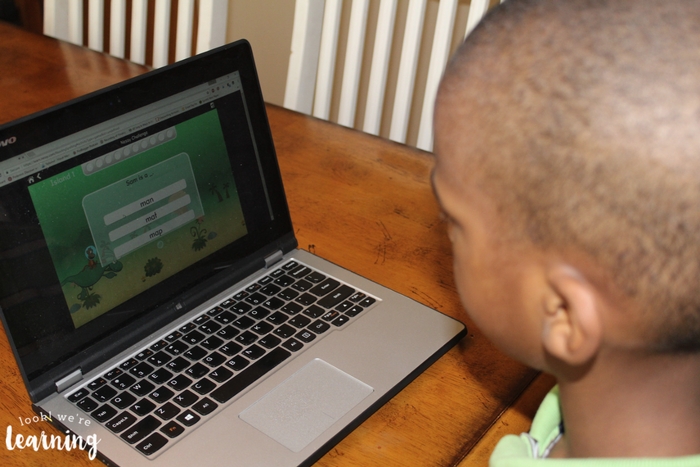
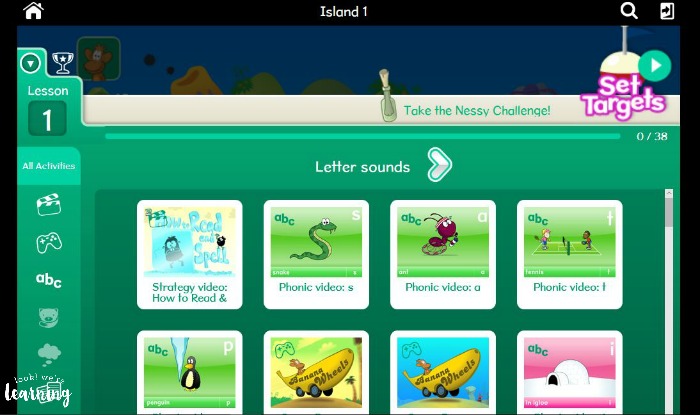
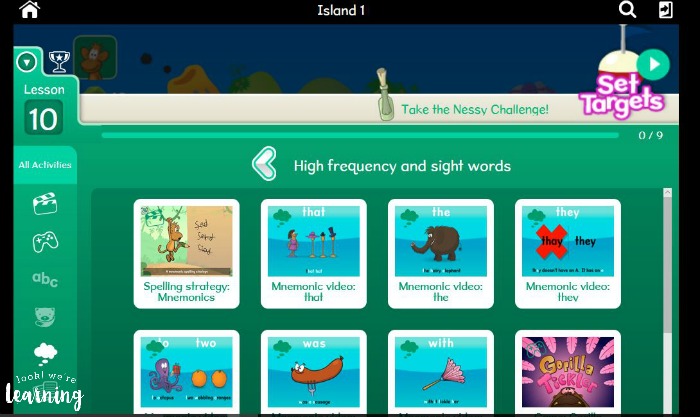
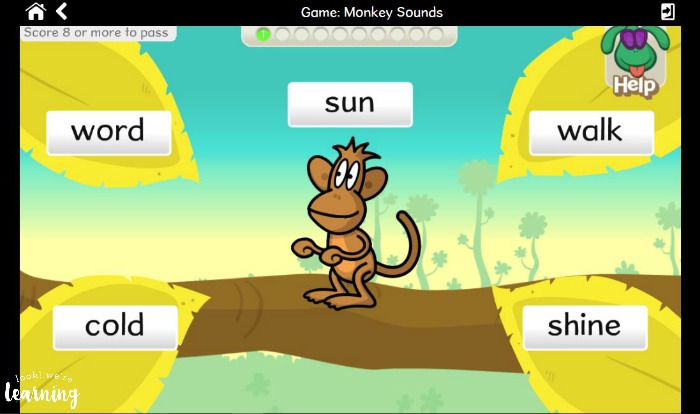
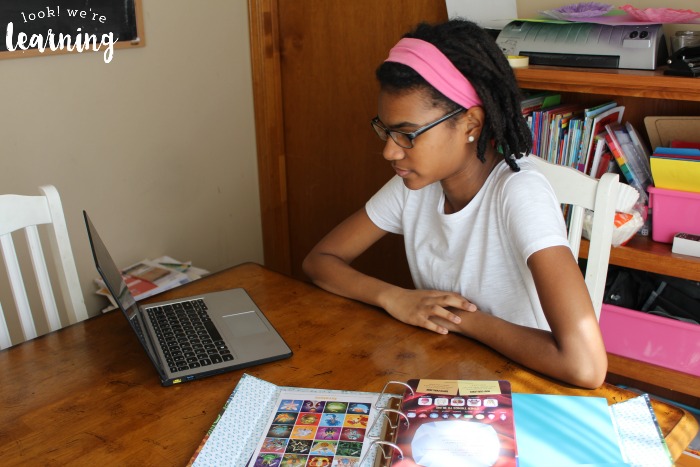
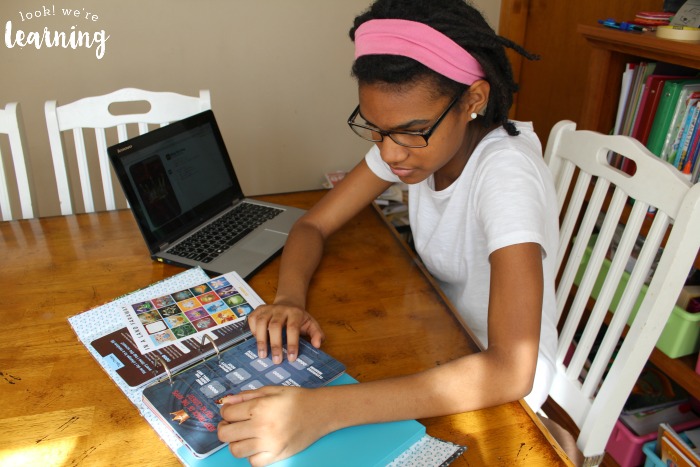
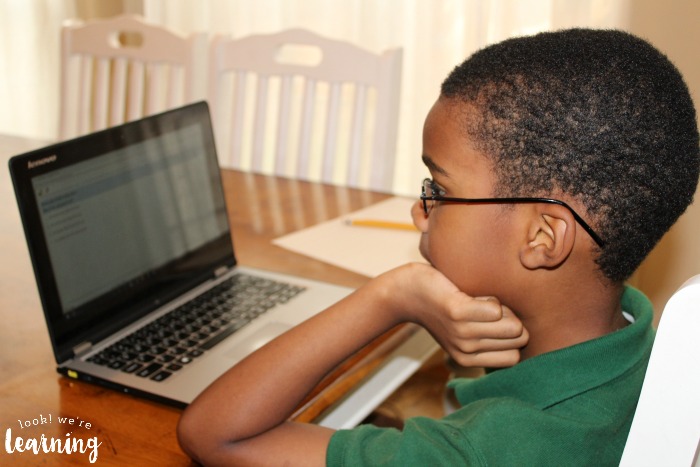
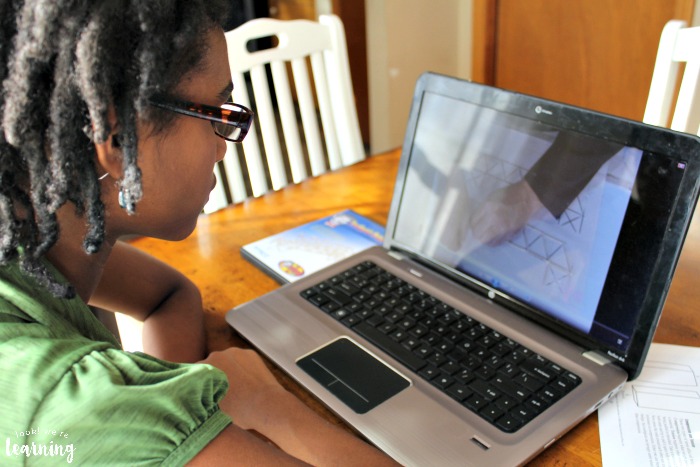
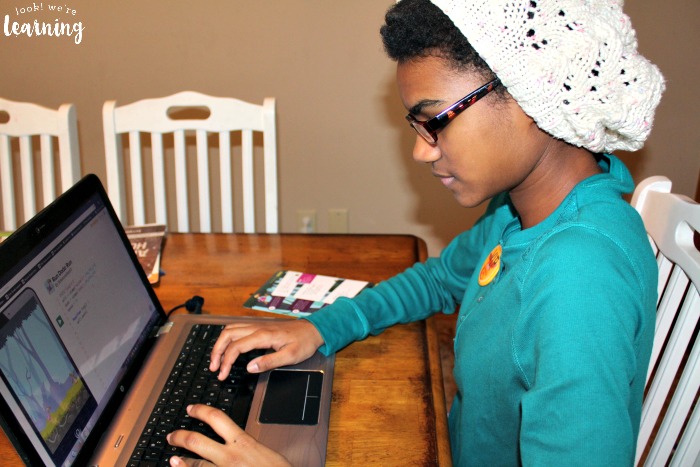
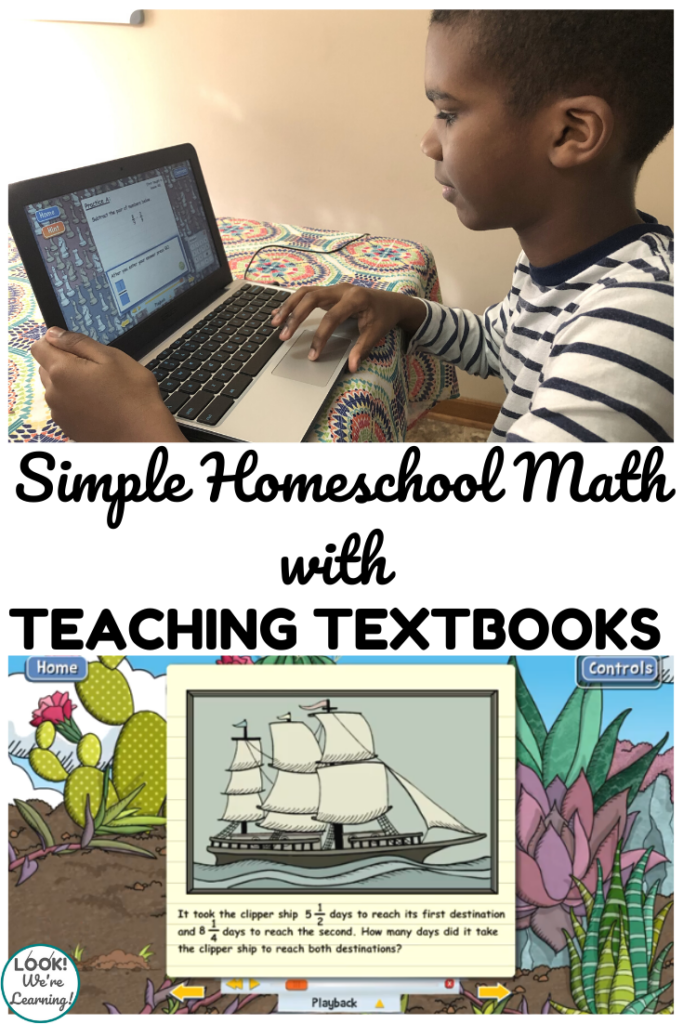
My sixth grader, who has a short attention span, is also finding Teaching Textbooks 4.0 to be a great fit.

How to add or subtract mixed numbers

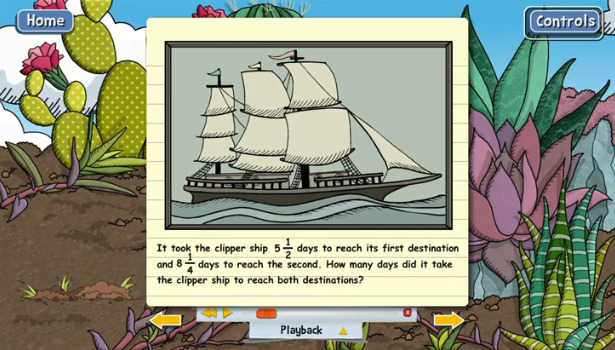
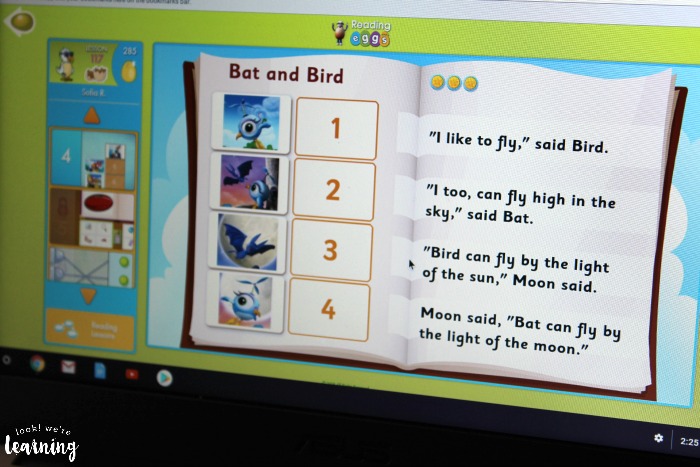
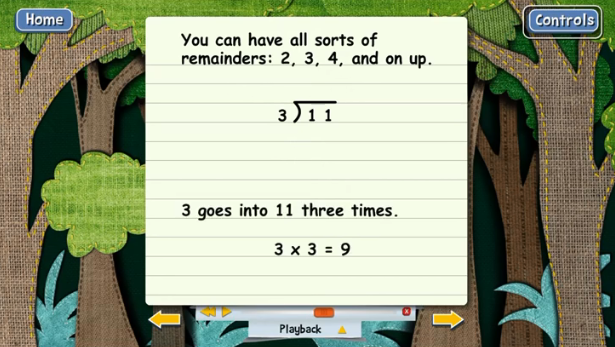
The program includes a lecture for each day’s lesson. And the lectures use pictures, short paragraphs, and prompts to keep kids interested and attentive throughout.

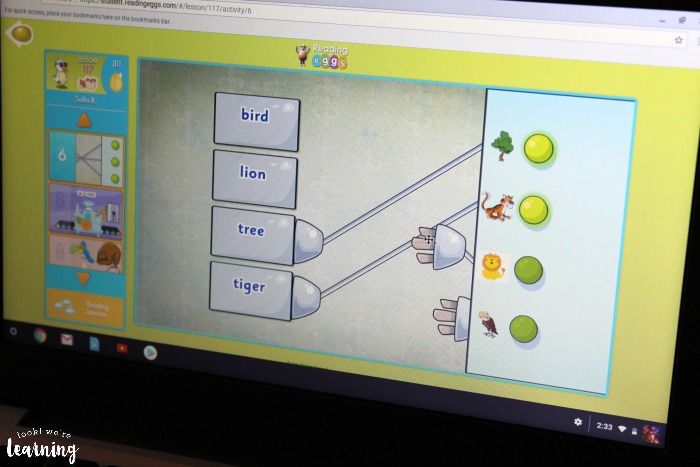
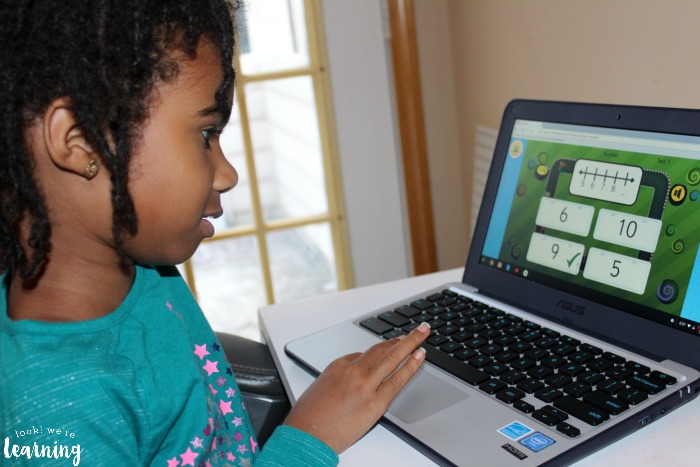
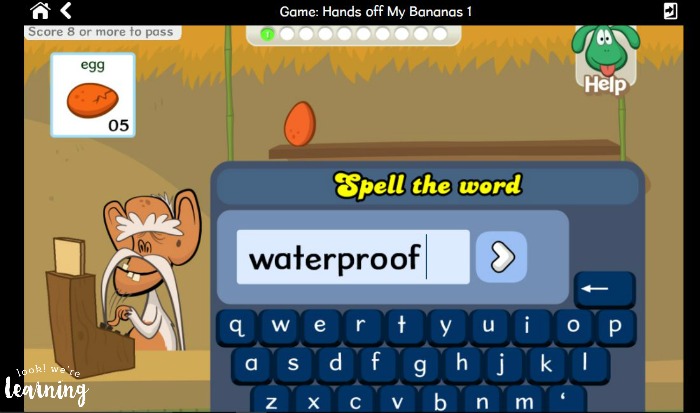
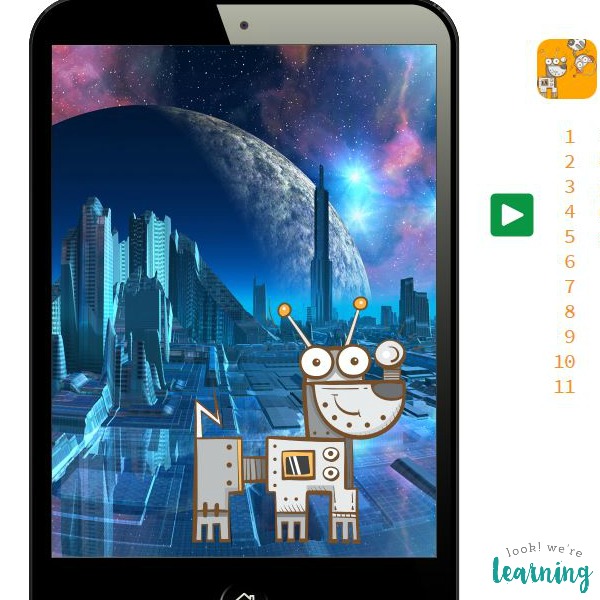
Plus, when you’re working on a problem, you can use the onscreen Scratchpad to show your work, which he loves.

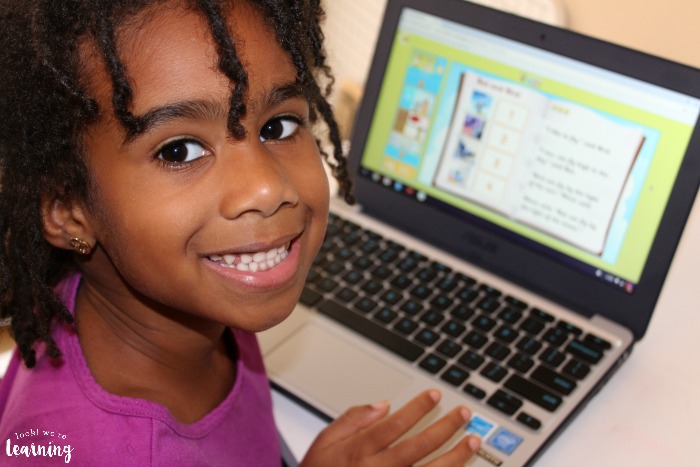
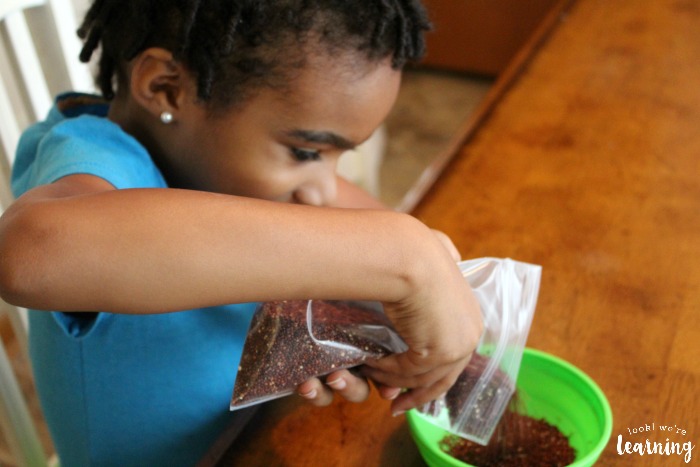
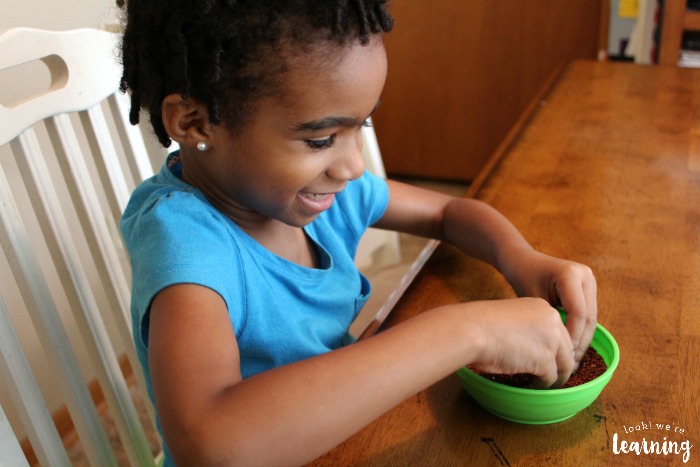
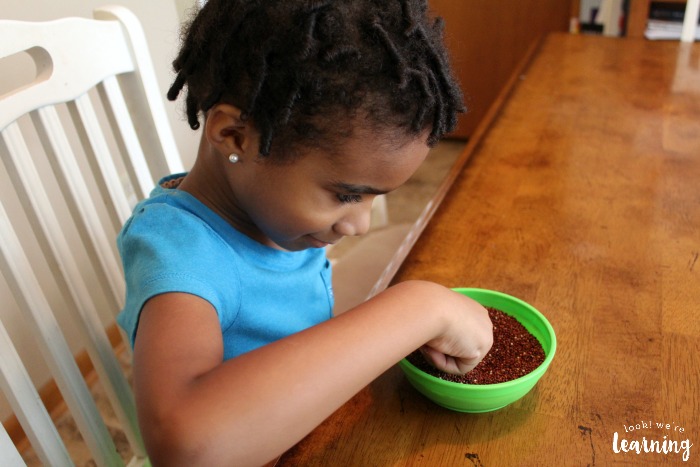
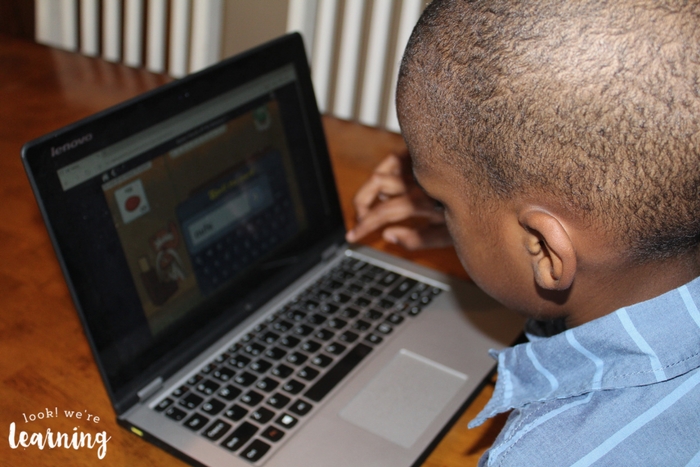
You can see how my youngest child uses the Scratchpad in the video below.

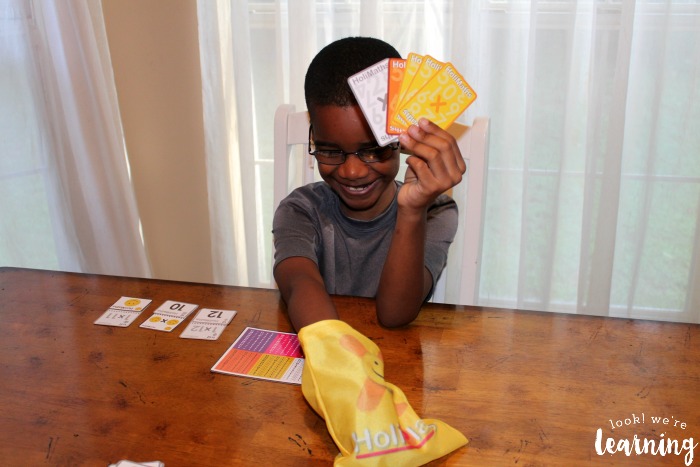
And what about my math-hating child?

Teaching Textbooks opens the school year with a gentle pace. So when he started Grade 7, he didn’t have to feel as if it was going to be difficult right away.

Whenever he has trouble mastering a concept, we just watch the practice problems again. Or we pause the lecture and work through the problems along with the lesson.

How to do long division with remainders

So, how’s it going with him?

Well, to be honest, he’s still not a fan of math. But he’s actually doing his work everyday! And he’s been getting mostly A’s this year.

That is practically a miracle.

I never thought he would be able to develop the self-discipline to sit down and complete his own work, but halfway through one school year with Teaching Textbooks, he’s doing just that.

Finally, there’s me with the packed schedule and almost no time to lesson plan for math.

Teaching Textbooks 4.0 comes with an ebook you can view inside the program.

So when a child needs help, I can take a quick look and refresh my memory before sitting down with them.

Table of Contents Ebook Teaching Textbooks

Honestly, because the program is so comprehensive, I haven’t needed to help my kids much at all this year. Particularly once they got the hang of using it.

It’s been a genuine lifesaver for all of us.

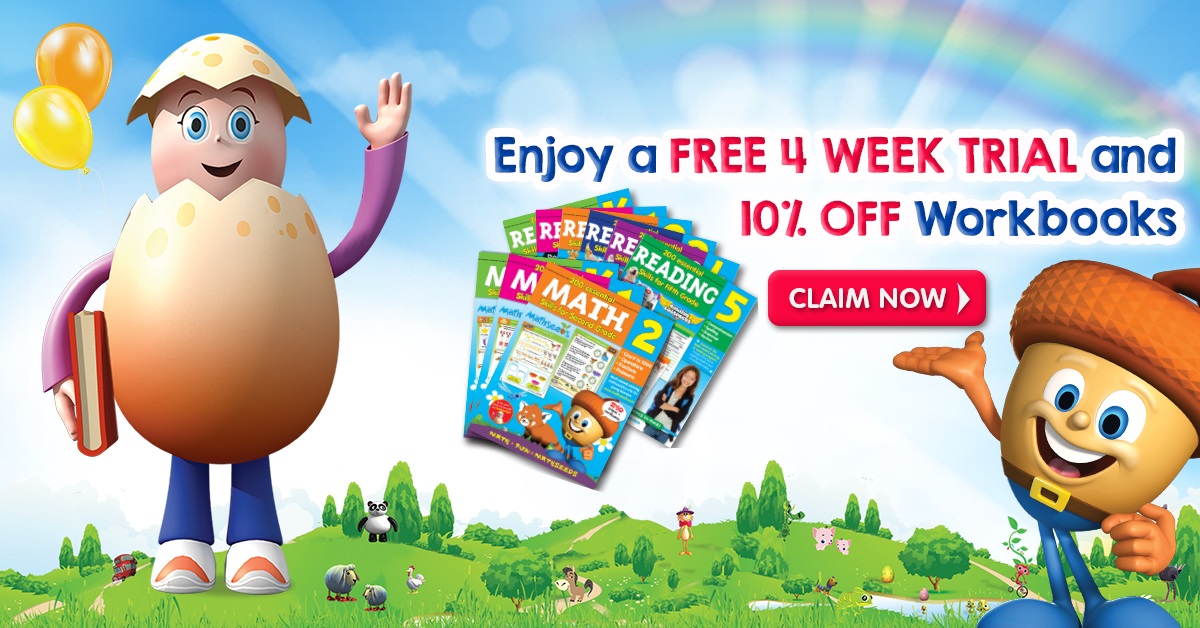
Ready to try Teaching Textbooks 4.0 with your family? Visit Teaching Textbooks and sign up for the free trial to get the first 15 lessons of any math level free!

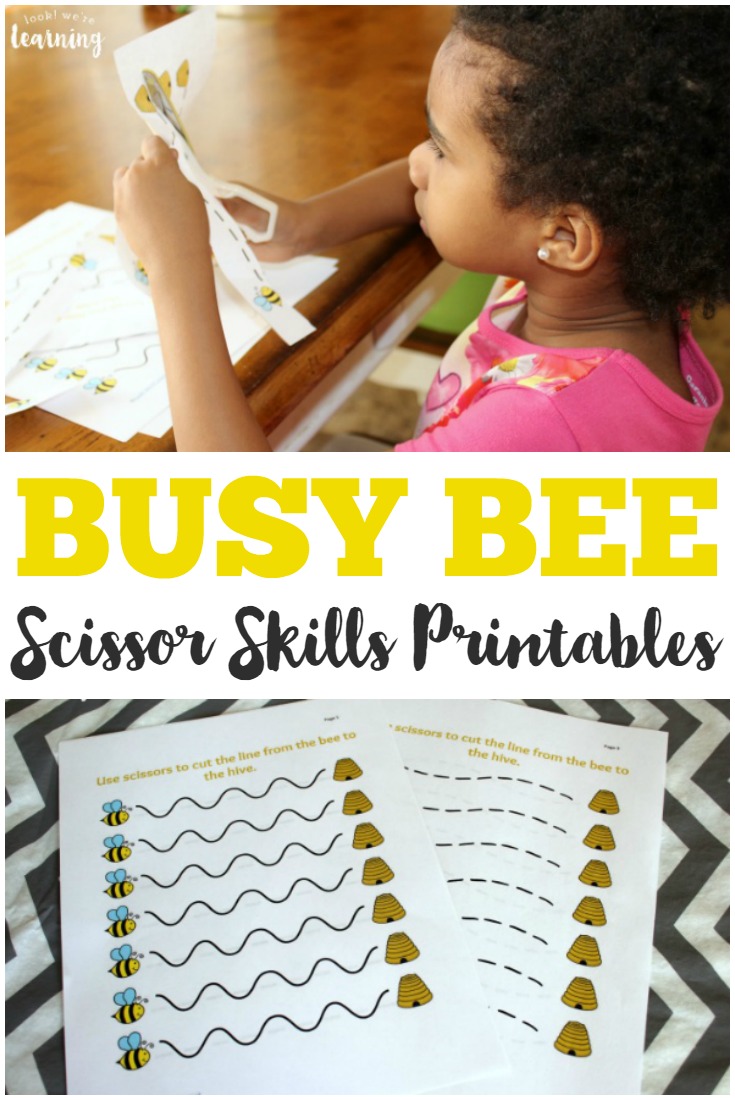
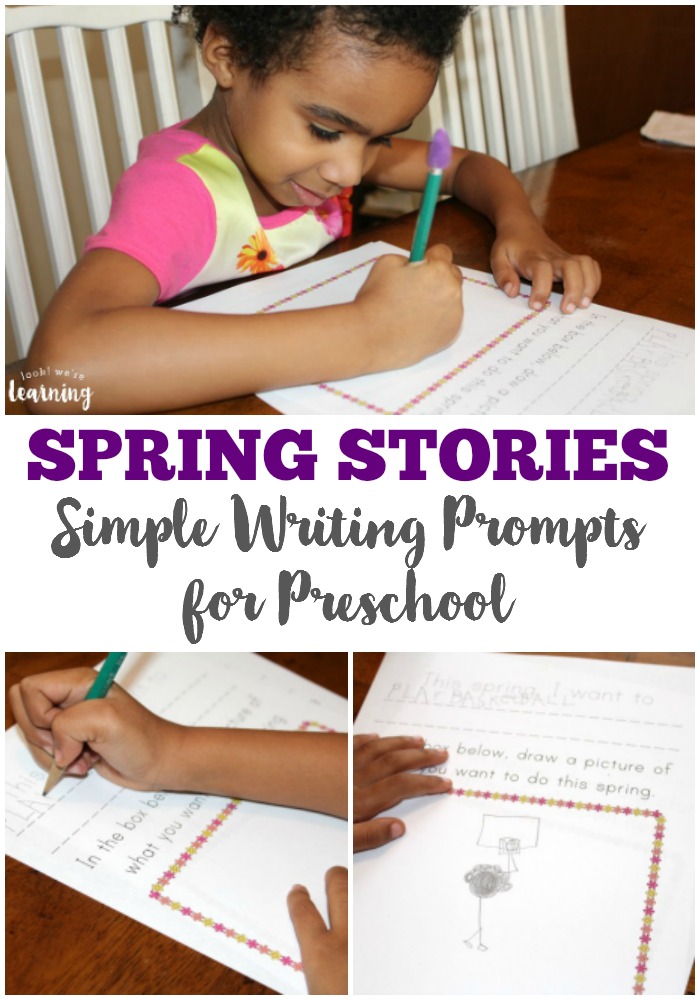
Want to see more about our homeschool plans for this year? Take a look below!

See the 2020 homeschool curriculum choices we made for our family this year!
Banish overwhelm and start learning with this easy guide to first time homeschooling!

Ready to teach your kids how to type? See how we're doing it with Typesy Homeschool Typing!

How to Teach Kids to Type with Typesy Homeschool Typing

March 25, 2019 by Selena Robinson Leave a Comment

Typing is one of those skills that was expected to die out. After all, no one uses typewriters anymore, right?

But now that so many kids, including mine, use computers at an early age, typing is actually more important than ever.

The faster and more accurately a child types, the more capable he or she is of using a computer to interact with others, complete school assignments, and work online in the future.

Which is why I was excited to try out Typesy Homeschool Typing with my kids!

How to Teach Kids to Type with Typesy Homeschool Typing

We’ve used several homeschool typing programs in the past, but my kids have enjoyed this one the most.

Read on to see why? And for more curriculum choices for early grades, take a look at our minimalist kindergarten curriculum picks!

Disclosure: I received access to this program in exchange for this post and I was compensated for my time. All opinions are my own.

Ready to teach your kids how to type? See how we're doing it with Typesy Homeschool Typing!

How to Teach Kids to Type with Typesy Homeschool Typing

When you first begin using Typesy Homeschool Typing, you have the option to set typing and accuracy goals for your children.

If you’re unsure about their abilities, you can simply use the recommended goals and then adjust as you see fit.

Typesy Homeschool Typing Review

Naturally, Typesy begins with a discussion of correct hand and finger placement, as well as proper sitting posture. What I love about it is that the program uses short videos that do all of the teaching for you.

My kids just started a lesson and were off on their own in no time!

Typesy Homeschool Typing Program

Like most typing programs, Typesy begins with a lesson on home row keys. As kids work on typing those letters fluently, they can simply follow the on-screen prompts. 

Since Typesy is completely online, there is no program to download and no special textbooks to buy. Students can simply follow the course and pick up where they leave off each day.

Using Typesy Homeschool Typing with Kids

My six-year-old has been asking to do more of it every day since.

Typesy Homeschool Typing Games

What about kids who tend to get bored easily?

Typesy Homeschool Typing has several online typing games for kids that are great for keeping their attention and improving their typing skills.

My most active learner was thrilled to see that they have a game called “Type-Man”, a typing version of Pac-Man. 

Using Typesy Homeschool Typing Program

It was fun, it helped him practice his typing, and it was no-stress. After all, we want our kids to enjoy what they learn, right?

If you’re looking for a simple, no-prep, fun typing program for kids, I can definitely recommend Typesy Homeschool Typing. Check it out for yourself and see how your kids like learning to type with Typesy!

Don’t miss these other homeschool curriculum choices!

Is choosing a secular science curriculum for your homeschool a challenge? Try these pointers to find the program that will work for your family!

Need to streamline your homeschool lessons? Take a look at this minimalist homeschool curriculum for fourth grade!

And see more choices for your homeschool year on my Homeschool Curriculum Choices Pinterest board!

Ready to help your budding artist take talent to the next level? Try the portrait style homeschool art courses from Sparketh!

Portrait Style Homeschool Art Courses with Sparketh

September 28, 2018 by Selena Robinson Leave a Comment

My ten-year-old son is the artist in the family. And by that I mean he wants to be an artist. He’s very interested in drawing and painting, but sadly, neither his father nor I are qualified in the least to teach him those skills.

What’s more, we don’t have any local homeschool art programs that are affordable enough for us at the moment.

Last year, my son got to try the homeschool art courses from Sparketh and he was absolutely hooked. So when we found out that Sparketh now offers portrait style art courses, he jumped at the opportunity to try them.

Sparketh Portrait Style Homeschool Art Courses

In just a few days, he had produced his very first portrait – with no formal artistic training! It was amazing to watch. In fact, it actually made me want to try learning to paint myself.

Read on to see how Sparketh’s portrait style art courses work and how you can use them as a comprehensive homeschool art program with your family!

Disclosure: I received access to this program in exchange for this post and I was compensated for my time. All opinions are my own and I was not required to write a positive review.

Ready to help your budding artist take talent to the next level? Try the portrait style homeschool art courses from Sparketh!

Sparketh Portrait Style Homeschool Art Courses

Sparketh is an online video art program that offers various courses and projects for kids (and adults) to complete. Each course is broken into short videos that demonstrate exactly how to draw or paint a specific object or person.

As students go through each step, they gradually produce their own works of art.

Sparketh Homeschool Art Courses

In addition to their individual art project courses, Sparketh now offers an Art Style Portraits track with several portrait courses in various styles.

As you can see from the list, students can create portraits in Pop Art, Fauvism, Minimalism, and other specific artistic styles. There’s even a manga style course for comic fans!

Sparketh Harlem Renaissance Portrait Homeschool Art Course

My son wanted to begin with the Harlem Renaissance Portrait Course. In this project, students look at a snapshot and repaint it in the cultural style popular during the Harlem Renaissance – one of our favorite periods in history.

All he had to do was click “Join Course” and we were off and running!

Learning to Paint a Portrait with Sparketh Homeschool Art Courses

I should note here that we have tried other video art lessons. Here’s what sets Sparketh’s homeschool art course apart, in my opinion:

  • The courses are short, which keeps students from getting overwhelmed. The entire Harlem Renaissance Portrait course is only 31 minutes long.
  • The platform is very easy to follow. Students can read the supply list before getting started and then decide how much of the project they want to complete that day.
  • Individual steps are broken into separate short videos. This is excellent for kids who have attention concerns (like several of our children do).
  • The videos show the art instructors as they work. My son was able to pause the video and look directly at what the artist did and then recreate it himself.

Taking Homeschool Art Lessons with Sparketh

Once he’d gathered his supplies (and we didn’t need many for this course), he got started.

Learning to Draw with Sparketh Homeschool Art Courses

The instructor showed him how to begin by sketching his portrait, which he did.

Homeschool Art with Sparketh

He simply paused the video to catch up and follow the instructor’s work.

Using Sparketh for Homeschool Art Lessons

Then he moved on to outlining his picture with marker.

Sparketh Homeschool Art Courses for Kids

Like so.

As you might be able to tell, he did the sketching and outlining all within one day. I had to make him stop for that afternoon. That’s how much he loved using Sparketh.

Learning to Paint with Sparketh Homeschool Art Lessons

Later, he went back and added his watercolor paint and he was done!

Learning to Paint Portraits with Sparketh Homeschool Art Courses

I think he might have asked me for help to understand the instruction once during the entire course.

Sparketh is easy enough for a ten-year-old to follow all on his own, so it’s a stress-free homeschool art course for parents. You can just sign your child up for an account and let him or her work through the projects.

Art class for the year? Check.

Want to try Sparketh’s Portrait Style Art Courses with your child? Just sign up on the Sparketh website and let your child browse the list to find a project to try!

See how you can use also Sparketh to teach your child to draw in the post below!

Worried about how to teach art when you're not really artistic Sparketh is a wonderful and easy art program for kids!

Plus, follow my Art Ideas for Kids board on Pinterest to get more suggestions for homeschool art projects!

How to Afford Homeschooling eBook Download

Does your gifted reader really need an online reading program See how we're using Reading Eggs to boost our bookworm's reading skills!

How to Boost A Gifted Reader’s Reading Skills with Reading Eggs

September 4, 2018 by Selena Robinson Leave a Comment

We’ve always wanted to build a love for reading in our kids. Now that we’re down to just one child in early grades, we’re pretty much done with teaching early reading skills.

No more phonics, no more decoding, no more CVC word practice. All four of our kids are off to the reading races.

Our youngest, though, has taken this to a completely different level.

She’s five and she’s in first grade this year. But she’s reading on a fifth grade level. She wants to read everything, and I mean, EVERYTHING.

How to Boost Reading Skills with Reading Eggs

So when it was time to work on reading for this school year, I was a bit stumped. How do you help a child who’s reading four grade levels ahead to improve her reading skills? Was an online reading program the answer?

Which is why I jumped at the chance to try out Reading Eggs from Blake eLearning, even though I didn’t think our child really needed it. A couple of days in, I found out I was wrong. She did need help – but not in the ways I imagined.

Read on to find out how we’re using Reading Eggs to strengthen our gifted reader’s skills and how you can get access to this program for free! Plus, score a discount on Reading Eggs’ new math and reading workbooks too!

Disclosure: This is a sponsored post and I was compensated for my time. All opinions are my own. For details, see our Disclosure Policy.

Does your gifted reader really need an online reading program? See how we're using Reading Eggs to boost our bookworm's reading skills!

Does Your Gifted Reader Really Need Help with Reading Skills?

Honestly, before I tried Reading Eggs by Blake eLearning with our daughter, I thought it was just for very early readers. I didn’t know that the program contains several levels, including lessons for kids all the way to age 13.

We’ve used several reading programs with our kids over the years. But after just a few days, I could see why Reading Eggs has won so many awards.

Reading Eggs Reading Skills Practice for Kids

Each of the levels are designed for kids of different age groups:

  • Reading Eggs Junior: for children aged 2 – 4 years
  • Reading Eggs: for children aged 4 – 7 years
  • Reading Eggspress: for children aged 7 – 13 years
  • Mathseeds: for children aged 3 – 9 years

But those age ranges are only a guide. You can let your child take a placement test (more on that in a bit) and then start working at the level that is best for him or her.

Using Reading Eggs to Improve Reading Skills

Each level of Reading Eggs is loaded with hundreds of reading lessons. And each of the lessons includes multiple interactive activities to help kids practice their own reading and comprehension skills.

Plus, they can read along with over 2,500 ebooks. It is truly a comprehensive literacy program.

Building Reading Skills in Kids with Reading Eggs

Since our little one is such a bookworm, I was glad to see that Reading Eggs evaluated, not just her reading ability, but her comprehension.

She’s pretty good about asking for definitions of words that she doesn’t understand. (I can barely get through a sentence of a read-aloud before she’s asked to get the dictionary.)

Practicing Reading Skills with Reading Eggs

But I like to see her show what she understands about a story she reads on her own. And Reading Eggs is awesome at that.

Using Reading Eggs to Boost Reading Skills

As you might be able to tell, she aced this particular storybook quiz. Only 2,499 ebooks left to read!

How We’re Using Reading Eggs to Boost Our Child’s Math and Reading Skills

So – Reading Eggs is great, but how does it help a child who’s already reading well?

Since the program includes lessons for so many reading levels, you can let your child take the placement test to see where he or she needs to begin. But then you can still adjust the level as needed.

As your child learns, you can track his or her progress and read reports to find out how many books they’ve read, lessons they’ve done, and even their estimated reading age.

Reading Eggs Sequencing Activity for Reading Skills

Here’s what happened when our gifted five-year-old took the placement test. 

The program placed her one-third of the way through Reading Eggspress – on the level of a 9 or 10-year-old.

While I was initially pleased to see that kind of score, I wanted to know more about the level of work that would be expected at that place in the program.

Using Reading Eggs to Boost Reading Skills in Young Readers

And that’s when I learned that, while she could read and answer questions at that level, she was still missing some basic grammatical concepts she would be expected to know at that part of the program.

Even though she reads fluently a few grades ahead, she still needs ELA help to understand language before she can complete lessons at that level.

Practicing Reading Skills in Gifted Readers with Reading Eggs

So, we went backwards and began toward the end of Reading Eggs and started her lessons from there. Her level of mastery went up and so did her understanding of the concepts.

Now when we come back to that part of Reading Eggspress, she’ll be ready!

Reading Eggs MathSeeds Placement Test

Mathseeds works exactly the same way as Reading Eggs.

Kids begin by taking a placement test, called a “Driving Test”, to see where they should begin learning math.

There are tests for each grade and each mathematical concept.

Reading Eggs Mathseeds Placement Test for Math

Fair warning here: The tests are super cute. As students answer each question, they drive around a race track. The goal is to complete the entire track and finish the test.

Building Math Fluency with Reading Eggs Mathseeds

Once they get enough right, they get to play a racing game for 60 seconds. That was definitely her favorite part of the exam.

Reading Eggs Reading and Math Workbooks

One of the biggest drawbacks to using reading apps and online reading programs is that they often don’t have enrichment activities that you can use without screens.

Since some of our children have ADHD, we try to limit screen time as much as we can.

Guess what? Reading Eggs now has print reading and math workbooks that kids can use as they work through the program!

Reading and Math cover spreads

The workbooks are designed to be used with the online lessons in the program: reading workbooks for Reading Eggs and math workbooks for Mathseeds.

Each of the workbooks has a explanation of how to use the materials along with the program, as well as a year planner to help you get an overview of how you can complete the workbook in a single school year.

Reading and Math Sample pages

And they’re available by level, so your younger and older students can work on practicing math and reading skills they need!

Reading Eggs Promo

Ready to try Reading Eggs for yourself? You can get a FREE four-week trial to everything the program has to offer, including Reading Eggs Junior, Reading Eggs, Reading Eggspress, and Mathseeds!

Just visit Reading Eggs and sign up to get started!

You can also save 10% on the new Reading Eggs math and reading workbooks for grades K-5! Check out the Reading Eggs shop and enter promo code WK10A40CWG1 to claim your discount!

    Want to find out even more about Reading Eggs? Check out the program on these networks!

    • Facebook  
    • Twitter  
    • Pinterest  
    • YouTube  
    • Instagram

    Get your little ones reading with these fun booklists featuring beautiful children’s books you can share with your family!

    Make this fall one to treasure with the kids with this list of 50 wonderful fall books for kids to read!

    Read some of these fun books about ice cream for kids to share with your children over the summer!

    These fun farm books for kids are perfect for reading about farms, learning about farm animals, or doing a farm unit study!

    Teach kids how to cook with this fun, hands-on cooking lapbook!

    Teach Kids to Bake with a Cooking Lapbook

    December 19, 2017 by Selena Robinson 3 Comments

    Learning to Bake with a Cooking Lapbook
    This cooking lapbook is a fun way to teach kids how to cook for themselves!

    I have to admit: I’ve been super lax about getting my kids into the kitchen. Tigger knows how to prepare breakfast and lunch for us all, but the boys….not so much.

    Since our kids have ADHD, it’s hard to help them exercise caution and take their time, which are two of the MOST important skills you need to learn if you’re going to cook.

    So I was glad to get a chance to review this adorable Cooking Lapbook from Knowledge Box Central! With it, our boys got a lesson in kitchen safety and a chance to make their very first dessert!

    Disclosure: I received a copy of this resource in exchange for this post. All opinions are my own and I was not required to post a positive review.

    Teach kids how to cook with this fun, hands-on cooking lapbook!

    Learning to Bake with a Cooking Lapbook

    First of all, we needed to assemble the lapbook, which did take some time.

    Here’s the list of supplies you’ll need: (Affiliate links provided here for convenience. For details, see our Disclosure Policy.)

    • Colored file folders
    • Hot glue gun with glue sticks (for gluing the folders together)
    • Colored paper
    • Stapler with staples
    • Metal brad fasteners
    • Tacky glue (for gluing the minibooks into the folders)

    Cooking Lapbook Review

    But look how pretty it is!
    Cooking Lapbook Review

    Here’s the inside of the first folder.

    Cooking Lapbook Review

    Then the second…

    Cooking Lapbook Review

    and the third.

    Cooking Lapbook Review

    We decided to begin at the beginning with the activity “What is the first thing you should do BEFORE cooking?” Anyone have an idea what it is?

    *hums Jeopardy thinking music*

    It’s “Wash Your Hands”! The lesson plan included in the Cooking Lapbook described how children should be washing their hands before they cook. So we all got up, used warm water, lathered for 20 seconds, and rinsed well. 😉

    See the lapbook in action on the next page!

    Pages: 1 2
    Love the Montessori method? Use it at home to teach math to your kindergartner!

    Montessori Homeschool Kindergarten with ShillerMath

    October 19, 2017 by Selena Robinson Leave a Comment

    Our preschooler is raring to go for kindergarten this year, so when I was considering what we’d use as our primary curriculum, I looked around and tried a few things. We love using apps to reinforce what she’s learning, but I also wanted her to have some hands-on kinesthetic activities to help her really “see” the concepts.

    She’s also very enthusiastic about doing “schoolwork” like her siblings, so I knew she would want a program that would challenge her and be able to grow along with her ability.

    So when I got the opportunity to review ShillerMath Kit A and ShillerMath Language Arts Foundations, I was thrilled! This was just the kind of program I was looking for!

    Shiller Math Language Arts Foundations and Math Kit A Review

    If you’re considering a Montessori homeschool kindergarten approach, take a look at how ShillerMath curriculum makes learning math and ELA into an interactive experience for young kids! Plus, see how you can score a discount on a ShillerMath order of your own!

    And for books your early reader will love, check out our simple homeschool kindergarten reading list!

    Disclosure: I received this product in exchange for this post. All opinions are my own and I was not required to write a positive review.

    Thinking of a Montessori approach for language arts? See how Shiller Math Language Arts Foundations works for kindergarten!

    Montessori Homeschool Kindergarten: ShillerMath Language Arts Foundations

    When I opened my boxes from ShillerMath, I really didn’t know what to expect, so I was amazed by how complete the curriculum is.

    Language Arts Foundations is a relatively new program from ShillerMath, which is designed to introduce ELA to children aged 4 to 5 (think: preschool through kindergarten).

    Shiller Math Language Arts Foundations Books

    The program includes lesson plan books and manipulatives – so, so many manipulatives. There is no way kids will get bored with this curriculum.

    Shiller Math Mother Goose Rhymes

    I have been aware of the Montessori method for some time. I haven’t used it with my children, but I have always liked the idea of helping children to take ownership of their education through hands-on learning, which is what Montessori teaches.

    But – I’m not a Montessori teacher and I was unsure how to go about using this method with my kids. Which is why ShillerMath is so awesome. You don’t have to know the Montessori method to use it. It’s all outlined for you in the lesson plan!

    Finding Letter C with Shiller Math

    This is one of the lessons in ShillerMath Language Arts Foundations. As you can see, the entire script is laid out for you. You can truly just open the book and read the instructions. Which is exactly what we did!

    Shiller Math Language Arts Manipulatives

    For this lesson, we used the movable alphabet, some playdough, and the grain. (All of this is included in the box, by the way.)

    Using the Shiller Math Work Mat

    Once we identified the letter C, we spent a little time working with the wooden letters on the work mat. We turned them backwards and upside down until we recognized how to place them so that we could read them correctly.

    Using Shiller Math Grain to Trace Letters

    Then it was time to break out the grain. As instructed, I gave my little one a small bowl and let her pour the grain herself. She was so psyched to do that on her own.

    Sensory Play with Grain

    Of course, she had to have a little sensory play in the grain before continuing with the lesson.

    Tracing Letters in Grain

    We traced the letter C in the grain for some fine motor skill practice and a sensory experience.

    As you can see, she really loved that part of the lesson.

    Shaping Letters Out of Playdough

    Then it was time to make some playdough letters! We rolled out some dough and made playdough ropes.

    Shaping Letters Out of Playdough with Shiller Math

    Then we just shaped them into the letter C! We decided to do an uppercase letter C and a lowercase letter C.

    That’s an example of the Montessori method in action. Instead of just showing a child the letter, you get to let them explore the letter in as many forms as possible. My kindergartner had a blast with it.

    Keep reading to see how ShillerMath approaches Montessori math for early grades!

    Pages: 1 2
    Need to help your active learner practice math? Smartick Math lets kids get math enrichment in just 10 minutes a day!

    10 Minute Math Practice with the Smartick Math App

    August 18, 2017 by Selena Robinson Leave a Comment

    My boys aren’t that interested in long math lessons. Actually, they’re not that interested in long lessons in any subject. (Pretty typical for 8 and 7 year olds, right?) And since my youngest son is living with ADHD, it’s a real challenge to get him to sit still for much of anything, especially math practice.

    Over the years, they’ve gotten to try lots of math programs and we’ve enjoyed most of them. But the real issue has been getting them to do a program regularly. If each lesson takes a while, they tend to lose interest rather quickly and then they start viewing lessons as chores, instead of something they actually want to do.

    Smartick Math App for Kids

    So I was excited to learn about the Smartick method – a math practice app that helps kids get math enrichment in just 10 minutes a day! And it’s been helping my boys do their math lessons without fussing and fighting – always a win in my book. 🙂

    Read on to see how the Smartick method works and how you can score a free trial and a 25 percent discount on your subscription!

    Disclosure: I received access to this product in exchange for this post. All opinions are my own and I was not required to write a positive review.

    Need to help your active learner practice math? Smartick Math lets kids get math enrichment in just 10 minutes a day!

    The Smartick Method for Math Practice

    Let me be clear: Smartick is NOT a math curriculum. So it’s not a primary math teaching program. Rather, the Smartick method is used for enrichment and regular practice of what kids are already learning.

    Many parents use it as an alternative to Kumon or similar after-school programs, so instead of having to take your child to a math lesson after school, you could try Smartick for a quick math boost!

    Smartick Math Practice App

    It’s easy to set up Smartick for your kids. Once you create a tutor account, you can add your children as students. Each of them will complete an initial assessment to see what math skills they already know and then the lessons can begin!

    Taking the Smartick Math Assessment

    Smartick is not text-heavy. Each of the math problems does have written instructions (with optional audio), but there’s not a lot of reading involved.

    Smartick Pattern Practice Activity

    This was great for my youngest son, who really isn’t much on reading. His patience is low because of his attention issues, so he loved how visual the program is.

    Trying the Smartick Math App

    Since he can do the lesson completely on the tablet, he can just pick it up, log in, and get started!

    Smartick Math App Practice

    What I also love about Smartick is that he can keep up with his progress through the daily lesson and get an idea of how many more problems he has to do. That stops him from constantly asking “How much longer, Mooooom???”

    Smartick Math Session Results

    At the end of each lesson, the boys could see their results: how many questions they got right and how many they missed. They’re also given the opportunity to fix their errors and, if they do, they get an extra point. It’s a nice way to encourage them to review their mistakes and try again.

    Using the Smartick Math App for Kids

    Plus, there are games they can play after they’ve completed their daily lesson. And when they miss a lesson, which mine frequently do, I get an email letting me know that they didn’t do their practice for that day.

    Smartick is a really good, simple to use math program that’s working well for my boys. It’s available in both the Google Play Store and the App Store.

    And it’s worth the time to try it out with your kids too! If you decide to subscribe, you can score a 25 percent discount when you sign up with this referral link!

    Need more math ideas for your students? Try these posts!

    Sidewalk Chalk Outdoor Math Game

    Math Activities for ADHD Students

    Paper Snowflake 2nd Grade Math Factors Craft

    And see more ideas for teaching math on my Math Mania Pinterest board!

    Save money on printer ink this school year with a homeschool printing service!

    Save Money on Ink with a Homeschool Printing Service!

    August 15, 2017 by Selena Robinson Leave a Comment

    How many printers have you gone through during your homeschooling journey? We’re on number three.

    There’s no doubt that homeschoolers use a lot of printer ink. And when I say a lot, I mean a LOT. I finally just set up a subscription ink service because I got tired of always running out…lol.

    And, since I both use and make printables for homeschoolers, I go through even more printer ink and paper than normal. Which is why I was so excited to try the homeschool printing service from The Homeschool Printing Company!

    Homeschool Printing Service for Families

    If you use a lot of printer ink (and I’m sure you do), you’ll want to read on to learn more about how you can save money on ink this year and save yourself a lot of preparation time in the process!

    By the way, to give you an idea of just how affordable this service really is, I’m sharing my actual estimates for each product I had printed. You won’t believe how inexpensive they are!

    Disclosure: I received this service in exchange for this post and I was compensated for my time. All opinions are my own and I was not required to write a positive review.

    Save money on printer ink this school year with a homeschool printing service!

    Why Homeschool Printing Can Be So Expensive

    As I mentioned earlier, a lot of homeschoolers use a ton of printer ink. If you haven’t noticed, printer ink is among the most expensive liquids on earth.

    Think about it: We pay about $2 to $3 for a gallon of gas and when it gets much higher than that, we all start shouting about how gas is too expensive. But we’ll pay $30 or more for three ounces of printer ink without batting an eye. That says something about how much we actually spend in printer ink.

    Public school educators go through a lot of printed materials each year and, increasingly, they have to cover some of those costs themselves. And for homeschoolers, it’s no different. Except we have to pay for everything out of pocket.

    If you’ve got several children in different grade levels (like we do), then your printed homeschool curriculum can cost you a pretty penny each year.

    How to Save Money on Ink With The Homeschool Printing Company

    So what makes the service from The Homeschool Printing Company so incredible? They do all the printing for you! They provide the paper, the color and black ink, and the work that goes into printing them. All you have to do is send in the PDF files you want printed and they’ll do the rest.

    Want your documents printed double-sided? They’ll do that.

    Want your documents spiral-bound? They’ll do that.

    Need some pages laminated? They can do that too!

    They don’t provide more complicated services, such as cutting documents or folding them, so if you use a lot of lapbooks, you can request that The Homeschool Printing Company print the pages. But you’ll need to assemble them yourself. (Which is half the fun, anyway.)

    I chose to have several of my store products printed, since we’ll be using some of them with the kids this year.

    Homeschool Printing Service

    As you can see, you receive all of your documents from The Homeschool Printing Company in one shipment. My entire order was for 500 sheets – one whole ream of paper.

    Using a Homeschool Printing Service for Curriculum

    This is a look at my African Kingdoms Unit Study, which is designed for elementary grades. This unit study is 61 pages long.

    My color-printed estimate: $4.88.

    I chose to have my pages printed one-sided, because some of them include cut and paste activities. But if you decide to have your products printed double-sided, then you can really maximize your order and get twice as much printed. I also chose not to have anything laminated or spiral-bound. I wanted to do that myself (which I’ll talk more about in a bit).

    Homeschool Printing To Do List Separator

    As I mentioned, all of the products come in one stack, but this handy-dandy separator sheet is in between each individual item.

    Homeschool Printing To Do List

    I used the to-do list on the back to keep up with what I needed to do with each product.

    Homeschool Printing Service for Leaves Printable Pack

    This is my All About Leaves printable unit study – 30 pages long.

    My color-printed estimate: $2.40.

    Homeschool Printing Service - Homeschooling with ADHD eBook

    This is my ebook “Homeschooling with ADHD” – 67 pages long.

    My color-printed estimate: $5.36.

    Homeschool Printing Service - Fall Alphabet Playdough Mats

    Here are my Fall Alphabet and Number Playdough Mats – 41 pages.

    My color-printed estimate: $3.28.

    Homeschool Printing Service - Construction Contractions Lesson

    Our Construction Contractions Language Arts Unit – 68 pages long.

    My color-printed estimate: $5.44.

    Homeschool Printing Service - How to Afford Homeschooling

    Our ebook “How to Afford Homeschooling” – 24 pages long.

    My color-printed estimate: $1.92.

    Homeschool Printing Service - Amusement Park Addition Flashcards

    Our Amusement Park Addition Flashcards – 42 pages long.

    My color-printed estimate: $3.36.

    Homeschool Printing Service - Spanish Community Helpers Pack

    Our Spanish Community Helpers Printable Pack – 33 pages.

    My color-printed estimate: $2.64.

    Homeschool Printing Service - We Got Jazz Unit Study

    And our We Got Jazz Unit Study – 139 pages long.

    My color-printed estimate: $11.12.

    Using a Homeschool Printing Service for Printables

    The grand total to have all of the resources printed in color: $40.40 plus $10.75 shipping. That’s it!

    When I got the estimate, I was honestly shocked. I was expecting it to be way, way, way higher.

    Now for the details:

    When you place a request with The Homeschool Printing Company, the normal turnaround time after you get your estimate is two to three days. During peak homeschool planning season (July through September), it could take up to a week, but they’ll get back to you!

    Binding Printables from a Homeschool Printing Service

    Since I opted not to have my pages bound, I had to do it myself for select products. But that’s okay, because it gives me a chance to use this beauty.

    Reading Curriculum Printed by a Homeschool Printing Service

    And then we could get to work with our African Kingdoms unit!

    Using a Homeschool Printing Service to Print Curriculum

    As you can see, the pages are printed clearly and cleanly, so there are no readability issues.

    Using Curriculum from a Homeschool Printing Service

    Looks like this service is going to be a big hit!

    Interested in learning more? Visit The Homeschool Printing Company today and request a free estimate! If you decide to place an order, tell them Selena from Look! We’re Learning! referred you and get a 10 percent discount on your first order!

    Get more tips for organizing your homeschool on my Homeschool Organization Pinterest board!

    Learn how to use an online homeschool lesson planner to make planning for the new homeschool year easier!

    How to Simplify Your Routine with an Online Homeschool Lesson Planner

    July 28, 2017 by Selena Robinson 1 Comment

    We’ve all been there. It’s the start of a brand new homeschool year and we start to experience a mixture of excitement…and dread.

    I have always loved homeschooling my children, but as they’ve gotten older (and my responsibilities have increased), planning just isn’t as much fun as it used to be. When I first started homeschooling, I eagerly shopped for new paper planners and spent hours color coding them, decorating them, and binding them the way I wanted.

    Now that I have four children to teach, though, I just don’t have the time to devote to planning by hand like I used to. Plus, I work now and I have a lot more to care for around the home – with four kids and all.

    Checking a Printed Homeschool Planet Calendar

    So I was so relieved that I’d get a chance to try an online homeschool lesson planner this year – Homeschool Planet from Homeschool Buyers Co-Op! And after using it, I can honestly say that it is a wonderful tool for simplifying my entire routine (both home and school).

    Read on to see how we’re using Homeschool Planet and learn how you can score a free trial for your family!

    Disclosure: I received access to this product in exchange for this post and I was compensated for my time. All opinions are my own and I was not required to write a positive review. This post contains affiliate links. See our Disclosure Policy for details.

    Learn how to use an online homeschool lesson planner to make planning for the new homeschool year easier!

    How an Online Homeschool Lesson Planner Works

    So how does Homeschool Planet work? Well, the best way to learn is by signing up for the free trial. That way, you’ll get a first-hand look at all the features. But here’s a quick primer.

    Homeschool Planet Assignment Tutorial

    When you first access the program, you’ll get video tutorials that explain exactly how to use each feature of Homeschool Planet – everything from how to schedule assignments, how to plan lessons, and how to add calendar appointments for each member of the family.

    Homeschool Planet Online Homeschool Lesson Planner

    This is the monthly calendar view. On the left side, you can add as many family members as you need to the schedule. Plus, there are widgets on the right side and underneath the calendar. The program automatically adds the Daily Quote widget, the To Do List widget, and the Shopping List widget, among others. But you can adjust those and add others (we’ll talk about this in a bit).

    As you can see, the default view has a pink and beige theme. But you can change it to one of several color themes until you find the one you like best.

    Setting Up Homeschool Planet

    Ahhhh…that theme is much better. I love green.

    How to Simplify Your Routine with Homeschool Planet

    Okay, so that’s how Homeschool Planet looks and those are some of its features. Now, how can it actually make lesson planning easier?

    Homeschool Planet Class Adding

    Here’s a look at how to schedule your child’s lesson assignments. Start by adding the classes they will be taking. For this session, I focused on my two youngest children.

    They won’t begin classes until after Labor Day, so I’m still in the pre-planning stages. But I know they’ll be working with Math and Reading. I started by adding my youngest son’s math class.

    Homeschool Planet Adding Weekly Assignments

    Since I already have his textbook, I can schedule the first day of class and the last day of class, as well as the time of day for each session. I can also add his daily assignments to the schedule. Once I choose what pages of the textbook to cover each day, I can continue adding them for the entire month.

    The other tabs allow me to make notes, mark grades, count the hours spent on each class, and list the resources I intend to use. So I can use Homeschool Planet to schedule lessons and track them as we go through the year.

    Homeschool Planet Weekly Calendar View

    Once you schedule your regular class days and times, they’ll appear on the weekly calendar like so. Each day shows the class name and the child who will be taking it at that time. Classes are color coded, so there’s no confusion about what to teach when.

    Homeschool Planet Monthly Calendar View

    After all of the assignments have been added, they’ll appear on the calendar as well. You can even check them off as you go!

    Homeschool Planet Cleared To Do List Items

    And speaking of checking things off, I can keep up with the progress of my To Do List. I actually got some stuff done as I was planning!

    Homeschool Planet Reading List

    As I said earlier, you can add more widgets below the calendar view. A couple I chose to add were Weather and Reading List. We are big reading list fans here and I typically assign one for each child each year, depending on their grade level.

    For my youngest son, we’ll be reading several books and I can keep up with them in the Reading List widget. But I can choose each grade from the dropdown menu and take a look at the books I’ve assigned to each child right from the planner. Homeschool Planet is truly one-step planning – a perfect fit for busy homeschool moms.

    Oh, and did I mention that you can also buy prepared lesson plans in the Homeschool Planet Marketplace? Just scroll down to find the curriculum you’re using and then browse to find a lesson plan that you want to use! It is basically no-prep lesson planning. Plus, you can even sign up for virtual field trips the kids can experience!

    But… I Still Love Paper Planners!

    “But”, you may object, “I still love my paper planner!” Which is fantastic! I still use a paper planner myself. But I just don’t love writing things in it as much I used to.

    Using Homeschool Planet with Paper Planners

    Homeschool Planet can help with that also! Once I finish inserting assignments into the calendar, I can use the Print option to print out the kids’ schedule for the entire month.

    Printing Out Homeschool Planet Schedules

    If you’re on a budget with printer ink, you can choose to print it in color or “economy” view. I prefer the color version, because I want the kids to know which color means which class. But you could easily print it in grayscale and then just highlight their classes as needed.

    Looking at a Homeschool Planet Calendar

    What I like about this digital and print versatility is that I can let the kids consult the schedule, no matter where they are in the house. If they’re at a computer, they can log in and view it that way. If they’re not, they can check the paper planner to get an idea of what’s coming up.

    Using Homeschool Planet to Schedule Homeschool Lessons

    He’s a little unsure about this whole calendar thing. But having all of his assignments in one place is going to be a HUGE help for both of us, especially since he has ADHD and often has trouble remembering what to do each day.

    I will be hanging his calendar (along with my other children’s) on the memo board each month, so they can consult it on their own and get to work. Which makes my life so much easier!

    Are you ready to get a look at Homeschool Planet? Stop by the Homeschool Buyers Co-Op and sign up for the free trial! You’ll get time to check out the program, try it for schedule and lesson planning, and see how you can use it to make your daily routine easier.

    Trust me, it’s definitely worth your while.

    Learn more about Homeschool Buyers Co-Op and the awesome homeschool deals you can score by following the company on social media!

    • Facebook
    • Twitter
    • Pinterest
    • Google Plus
    • Instagram

    Need more homeschool planning inspiration? Check out these tips!

    Think you're behind on homeschool planning You're not. You don't need a lot to homeschool, even if you're a newbie!

    15 Homeschool ADHD Schedule Ideas - Awesome for teaching active kids at home!

    How to Homeschool as a Minimalist

    Plus, see even more ideas for getting your new homeschool year up and running on my Homeschool Planning Pinterest board!

    Overwhelmed by planning your kindergartner's homeschool lessons Try this simple homeschool kindergarten program instead!

    The Simple Homeschool Kindergarten Method We’re Using This Year

    May 23, 2017 by Selena Robinson Leave a Comment

    Piglet is my very last child to homeschool. *sniff* And I probably have enough homeschooling books, workbooks, toys, games, and printables to teach twelve more children after her. (I wish I was kidding.)

    But last year, we decided to streamline our homeschooling materials and practice minimalist homeschooling. Which is using the least amount of materials necessary to teach our kids. Instead of feeling tied to using up everything for each grade level, we focused on what they needed to learn and let them explore the rest on their own. It was life-changing.

    Homeschool Kindergarten with ABC Mouse

    So when it was time to plan to move on to planning our homeschool kindergarten program for her, I decided to stick with the least amount of materials necessary to do it.

    Which is why I was thrilled to have an opportunity to try ABCmouse – an online early learning academy for kids ages 2-8! With this program, we’ll be using a simple homeschool kindergarten curriculum that requires almost no prep at all from me. And I’ll need all the extra time I can find, since my oldest is starting seventh grade this year. *scream*

    Read on to see how we’re using this program to get our kindergartner off to the right homeschooling start!

    Overwhelmed by planning your kindergartner's homeschool lessons Try this simple homeschool kindergarten program instead!

    Disclosure: I received access to this program in exchange for this post. All opinions are my own and I was not required to write a positive review. This post contains affiliate links. For details, see our Disclosure Policy.

    Simple Homeschool Kindergarten with ABC Mouse

    ABCmouse is the most comprehensive digital early learning resource for kids in grades PreK through 2. The program covers over 8,500 different educational standards, so you can easily find out which ones your child knows and which ones he or she needs to master.

    To get started, just go to ABCmouse.com and sign up for the 30-day trial. You can set up your parent profile and then enroll up to three children. From there, your child can create an avatar (Piglet loved this) and then take an assessment to find out what lessons they should start with.

    Easy Homeschool Kindergarten Program

    The assessment takes about 45 minutes from start to finish, but that’s 45 minutes straight, which my four-year-old couldn’t handle. We ended up breaking it into three separate sessions of about 15 minutes. That way, she didn’t get irritable from sitting too long.

    Since she’s already been doing preschool work for the past nine months, we gave Piglet the Kindergarten Readiness Assessment, which tested her on 13 different skills, including shape recognition, picture recognition, early phonics, counting, and more.

    Want to see the assessment in action? Take a look at this quick video!

    So, while you’re not supposed to offer assistance with the questions, you should be nearby to help with navigating the menu. At least at the kindergarten level.

    Simple Homeschool Kindergarten Program

    The third time we had Piglet sit down to work on her assessment, we wised up and used the ABCmouse app on our tablet, which is super easy to navigate and follow. She could just select the answers with her little fingers and move along at her own pace.

    Simple Homeschool Kindergarten with ABC Mouse

    By the way, when you sign up for ABCmouse, there are several apps you get access to that you can use without Wi-Fi, including ABCmouse Zoo, ABCmouse Music Videos, and ABCmouse Mastering Math. These apps are available in the Apple AppStore and in the Google Play Store. In fact, we used it with our Amazon Kindle Fire just fine.

    Simple Homeschool Kindergarten

    And that’s just the tip of the iceberg with ABCmouse.com! There are so many lessons, games, and activities that make learning fun! In fact, we had to tell Piglet “That’s enough school for today. You can do more tomorrow.” Which is a pair of sentences I didn’t think I’d ever utter in my life.

    Ready to get your early learner off to the races? Visit ABCmouse.com and sign up for a free 30-day trial to see how much fun your child can have learning!

    Check out these other early learning resources!

    These cute busy bee scissor skills worksheets are fun spring-themed scissor practice for preschoolers!

    These spring preschool story prompts are an easy way to help preschoolers start writing creatively!

    Ten Minute Preschool Activities

    Want more tips for homeschooling early grades? Follow my Learning for Little Ones board on Pinterest!

    Help your early readers improve reading fluency and spelling with Nessy Reading & Spelling! See how in this partnered post!

    How to Improve Reading Fluency with Nessy Reading & Spelling

    April 18, 2017 by Selena Robinson Leave a Comment

    My seven-year-old is well above grade level at reading comprehension, math, and writing, which thrills me. But his reading fluency needs a little help. Because he has ADHD, he’s super active. (And I mean, super active.) And that makes him rather…impatient.

    When he tries to read aloud or spell words, he gets frustrated whenever he can’t do it right the first time. But, like most kids, he loves to play. So it was it a wonderful gift to get to try out Nessy Reading & Spelling – a game-based reading and spelling program that makes it simple to improve reading fluency for active kids or children with dyslexia!

    Using Nessy Reading & Spelling Program to Help Active Kids Read

    Read on to see how we’re using this fabulous reading program to help our child with ADHD work on reading and spelling. Plus, learn how to score a 15 percent discount on a monthly subscription AND a free book about dyslexia!

    Disclosure: I received access to this program in exchange for this post and I was compensated for my time. All opinions are my own and I was not required to write a positive review.

    Help your early readers improve reading fluency and spelling with Nessy Reading & Spelling! See how in this partnered post!

    How Nessy Reading & Spelling Works

    Nessy Reading & Spelling looks and operates much like a video game, so your kids are not going to fight you when it’s time for reading practice. I promise. 🙂

    When you first sign up, you’ll receive login information and then you can create a “monkey” (an avatar) for your child. Or you can let them create it on their own.

    Nessy Reading & Spelling Student Assessment

    Kids can use their own name to sign in, so you don’t have to worry about helping them remember a username. Once they log in for the first time, they’ll get a quick tour of how the program works.

    Nessy Reading & Spelling Opening Tour

    The tour is really helpful, because it shows kids how to navigate between “islands” (game levels) and how to find all the activities for each island. Nessy Reading & Spelling is touch-centric, so it’s awesome to try on a tablet, by the way.

    Collecting Points with Nessy Reading & Spelling

    After completing the video tour, kids receive “nuggets”, which are basically points. As they progress through games and levels, they receive more that they can use in MonkeyTown, which I’ll talk about in a bit.

    Once they take the tour, kids are prompted to complete the Nessy Challenge – an assessment of their current reading level.

    Using Nessy Reading & Spelling to Assess Student Ability

    During the Nessy Challenge, kids fill in blanks with the appropriate word. As they complete words correctly, the questions get more and more difficult.

    Completing the Nessy Reading & Spelling Student Assessment

    I will admit: The Nessy Challenge is long. It takes kids through all ten levels, and the challenge automatically proceeds to the next level once one is finished.

    After about five levels, my guy was at the end of his patience limit. So I let him stop and go on to the Home screen to find an island he could explore. (You can always resume the challenge or take it again at a different time.)

    Nessy Reading & Spelling Islands

    Here’s a look at the “islands” in Nessy Reading and Spelling. Each one corresponds to about half a grade level, so Islands 1 and 2 are roughly equivalent to kindergarten, while islands 9 and 10 equate to fifth grade or so.

    Phonics Practice with Nessy Reading & Spelling

    You might wonder: How can you go over half of an elementary grade on one of these islands?

    Easy! By including a ton of standard-specific exercises! These islands are jam-packed with reading practice, lessons, games, and even printables!

    Sight Word Practice with Nessy Reading & Spelling

    There’s even sight word and mnemonic practice included – and that’s just in Island 1!

    Nessy Reading & Spelling Monkey Town Play Area

    Remember MonkeyTown? Here’s a look at it. After kids complete their schoolwork for the day, they can go play in MonkeyTown – a game area that’s just for fun. You can set limits as to how long they can play in this area or how many lessons they must complete before entering.

    Using Nessy Reading & Spelling to Improve Reading Fluency

    Once my seven-year-old finished the Nessy Challenge, he was placed on Island 5. After looking through the standards, we started him on compound words – a topic he hadn’t learned much about yet.

    Using the Nessy Reading & Spelling Program for Active Kids

    Since he was already familiar with the concept of compound words (two small words joined together to make a larger word), he went straight to the games.

    Compound Word Game with Nessy Reading & Spelling

    In the game “Monkey Words”, kids can help their monkeys jump to the top of the tree by correctly combining small words to form compound words. My guy did pretty good with this one.

    Nessy Reading & Spelling Game Report

    See? At the end of the game, you can see a report that shows you which words kids learned, how they scored, and how long it took them to complete it. You can set the passing score however you like, but the default is 8 out of 10.

    Compound Word Spelling Game with Nessy Reading & Spelling

    Then it was on to another game – “Hands Off My Bananas”. This was a great activity, because it was practice in typing, spelling, and recognizing the same compound words he just practiced in the previous game.

    Playing a Nessy Reading & Spelling Compound Word Game

    In this game, he had to listen to the compound word being spoken and then type it correctly. I love how Nessy Reading & Spelling lets kids work on reading and recognizing the same group of words through a variety of exercises. So much better than just drilling them over and over!

    Working with Nessy Reading & Spelling for Active Kids

    And, as you can see, even though he worked on the same group of words for about 20 minutes, he didn’t get impatient or frustrated at all. He loved it!

    Nessy Reading & Spelling Compound Word Bingo Game

    Finally, for that lesson, we used one of the printable resources: A compound words bingo game! We printed out the game and let my two boys play against each other.

    Playing Nessy Reading & Spelling Compound Word Bingo

    As with the previous exercises, this game focused on the very same set of compound words. The challenge for each boy was to find the compound word I called out and get “BINGO” before the other.

    Spotting Compound Words with Nessy Reading & Spelling Bingo

    Since the game boards aren’t identical (each one contains different words), there’s truly no way to know who will win.

    Compound Word Bingo with Nessy Reading & Spelling

    But my seven-year-old won anyway. 🙂

    Playing Compound Word Bingo with Nessy Reading & Spelling

    And I made them both shake hands afterward. Good game, fellas!

    We really had a ball working with Nessy Reading & Spelling and this was just a few exercises from one of the over 100 lessons! There’s so much to work with here for kids from grades K-5. It’s truly an excellent, comprehensive program for building reading fluency and spelling skills!

    To learn more about Nessy Learning and how you can get a subscription to Nessy Reading & Spelling, follow the company on social media:

    • Facebook
    • Twitter
    • Pinterest
    • YouTube

    And if you’re ready to sign up for a monthly Nessy Reading & Spelling subscription, you can save 15% with the promo code BLOG17!

    Plus, score an ebook about how dyslexia affects kids – FREE! This is super important if you have a child that struggles with dyslexia or if you suspect your early reader may be displaying signs of a learning disorder. Download the free Dyslexia Explained ebook to learn more about how to help your kids master reading, even if they’re living with dyslexia.

    Get more tips for helping your readers on my Reading for Kids Pinterest board!

    We took a virtual tour of New York City's famous landmarks with gorgeous New York City picture books from Candlewick Press!

    Touring NYC Landmarks with New York City Picture Books

    March 14, 2017 by Selena Robinson Leave a Comment

    New York City is one of our favorite places to visit. One of our family members lives in Queens and the kids always love traveling through the big city, staring at the buildings, and trying to spot the city’s most famous features.

    Usually, though, we don’t have enough time to tour all of the NYC landmarks while we’re in town. So I wanted to put together a New York City landmarks unit study that the kids could use to really get an understanding of these buildings and places and how they fit into the history of New York and the U.S.

    Which is why I was thrilled to get a chance to review five beautiful children’s books about New York City from Candlewick Press! These picture books and nonfiction biographies brought the Big Apple to us and helped the kids learn tons about the city!

    Gorgeous New York City Picture Books - Look! We're Learning!

    Read on to see how we built our unit around lovely children’s books from Candlewick Press! Plus, find out how to score a 25 percent discount on Candlewick books for your family AND see how you can win a set of Judy Moody paperbacks!

    Disclosure: I received these books in exchange for this post and I was compensated for my time. All opinions are my own and I was not required to write a positive review.
    We took a virtual tour of New York City's famous landmarks with gorgeous New York City picture books from Candlewick Press!

    New York City Picture Books about NYC Landmarks

    I love reading great children’s books with the kids and Candlewick Press has made its reputation on excellent children’s literature, so I knew I’d find some wonderful books about NYC in the company’s catalog.

    Picture Books about New York City - Look! We're Learning!

    To cover our New York City landmarks unit, we used five excellent books from Candlewick Press:

    • A Walk in New York by Salvatore Rubbino
    • Panorama Pops: New York by Sarah McMenemy
    • Pop-Up New York by Jennie Maizels
    • Inside and Out: New York by Josh Cochran
    • September 11, 2001: Attack on New York City by Wilborn Hampton

    The first four are absolutely beautiful picture books about New York City, while the fifth is a heartwrenching, but age-appropriate retelling of the events of September 11, 2001.

    Panorama Pops New York Picture Book

    The book Panorama Pops: New York is unlike any other children’s book I’ve ever seen. It’s an exquisitely cut fold-out book that serves as a 3D map of the city.

    Panorama Pops New York Picture Book Unfolded

    You can literally tour the city from the Statue of Liberty to Grand Central Terminal on one side and then travel from Times Square up to Yankee Stadium on the other. Since the landmarks in the book are arranged from north to south, it’s a pretty good geography lesson about NYC as well.

    Reading Panorama Pops New York by Candlewick Press

    I wish you all could have seen me standing over the boys as they looked at this book. “Don’t pull it!” “Turn the pages carefully!” “No, that part is supposed to fold up!” I was basically treating it as a work of art. It’s that beautiful.

    Candlewick Press Panorama Pops New York Central Park

    The book features twelve landmarks in all and gives a few facts about each one, along with a lovely illustration.

    Candlewick Press Panorama Pops New York Times Square

    Plus, there are tiny little foldables. It’s just perfect. In fact, this book is such a little treasure that it would probably make a great gift for an adult.

    Reading A Walk in New York

    With the book A Walk in New York, kids can explore more landmarks as they “walk” along the city. We used it for read-aloud time and my eight-year-old did the honors.

    A Walk in New York Picture Book Illustrations

    My kids were impressed with the size of Macy’s. (As am I whenever I’m in town.)

    A Walk in New York City Empire State Building Foldout

    But that’s nothing compared to the Empire State Building, which has its own fold-out poster in the book.

    New York Inside and Out Picture Book

    Then we took a closer look at the city with the book Inside and Out: New York, another quirky book that I’d never seen before. With this book, you can pull out a large wall-sized chart of the city and explore intricate details about New York and its people.

    New York Inside and Out Picture Book Statue of Liberty

    But, then you can flip the book over and see what’s happening “inside” each of the buildings. You can even see people taking the stairs up to the top of the Statue of Liberty!

    Playing Seek and Find with New York Inside and Out Picture Book

    At the back, there are selected items for kids to find in the pictures. Naturally, my kids started there.

    New York Inside and Out Madison Square Garden

    And the first thing they “found” was the New York Knicks playing basketball at Madison Square Garden, which is NOT on the list! (But we’re huge basketball fans, so it was inevitable.)

    Pop Up New York Empire State Building

    I knew that the book Pop Up: New York was going to be a big hit and it was. Pop-up books are always popular with kids and my four love them. But this book takes pop-ups to a whole new level.

    You can see nearly all of the city’s landmarks in it – to scale! So when you look at the Flatiron Building, you can see the Empire State Building towering behind it. Plus, there are facts about the city tucked away in foldable books throughout.

    Pop Up New York Yankee Stadium

    The kids quickly found the page with Yankee Stadium and tried to find the players. As you can see, on the back sides of each pop-up feature are the names of each place and facts about it.

    Pop Up New York Picture Book

    We spent a little time examining the financial district to find Wall Street and the World Trade Center.

    Pop Up New York World Trade Center

    Which led to a discussion about what the World Trade Center used to look like.

    Reading about September 11, 2001 with Candlewick Press

    September 11, 2001 is a difficult historical event to discuss with kids. It’s still a difficult event to discuss with adults. I didn’t live in New York, so (like so many people) I watched everything happen on television. But whenever I hear the date mentioned, I instantly get a knot in my stomach – even 15 years later.

    The kids know that the original World Trade Center was destroyed. And they know how it happened. But now that my middle schooler is getting older, I wanted her to learn more about what that day was like. So we started reading the book September 11, 2001: Attack on New York City.

    Reading about September 11 2001

    This book talks about September 11 from the standpoint of people who were there and lived to tell about it. They talk honestly about how they felt, what they saw, and how they processed it all afterward.

    September 11 2001 Book for Children

    It’s a difficult book to read, but it is age-appropriate and the pictures are in black and white, which mutes the horror a little bit.

    After skimming a few pages, Tigger disappeared into her bedroom with the book. She came out about five minutes later crying. We hugged and talked about it for a while.

    September 11 2001 Book for Children from Candlewick Press

    At the back of the book is an afterword that ties in the events of that day with the events that followed: the war in Afghanistan, the war in Iraq, the case for weapons of mass destruction, the capture of Osama bin Laden, and more. I’ll be saving this book for a more in-depth middle-grades unit later.

    If you’ve been wondering how to broach this topic with your older kids, this book is a tough, but excellent resource to use.

    Get to know the other reading selections for kids from Candlewick Press! Sign up for the Candlewick newsletter to get news about the latest book releases! Plus, you can read about some of the newest book collections below:

    • SPARKS for New Readers
    • Judy Moody and Stink
    • Read & Wonder
    • Brand New Readers
    • Candlewick Biographies

    For more about Candlewick Press, follow the company on social media!

    • Instagram
    • YouTube
    • Facebook
    • Twitter
    • Pinterest

    Now – for the goodies!

    Score a 25 percent discount on any purchase from Candlewick Press when you use the promo code CANDLEWICK at checkout! AND – enter to win a set of eight Judy Moody paperbacks FREE! One winner will receive a boxed set of books 1-8 from Candlewick Press! Use the Giveaway Tools widget below to enter.


    Entry-Form


    For more awesome ways to use children’s lit with your family, follow my Reading for Kids board on Pinterest!

    Give your homeschoolers a rich lesson in history with the incredible hands-on history unit studies from Project Passport!

    Hands-On Ancient History with Project Passport!

    March 7, 2017 by Selena Robinson 1 Comment

    Personally, I love history, even ancient history. Trying to make those subjects interesting to an eight-year-old, though, poses its own set of challenges. It can be tough to help kids to “see” the people and events so that they can understand what happened and why it has meaning for our modern world.

    And that’s why I was so excited to have a chance to review the Project Passport unit study series from Home School in the Woods! Each unit focuses on a specific time period in ancient history and is chock-full with hands-on ancient history activities, lessons, and readings that make history exciting for kids!

    Take a look at this fabulous history curriculum in our review! Plus, one reader will win all four of the current Project Passport History Unit Studies CDs! Read on to get the details and see how you can score these incredible products for yourself!

    Disclosure: I received this product in exchange for this post and I was compensated for my time. All opinions are my own and I was not required to write a positive review. (Affiliate links provided here for convenience. For more, see our Disclosure Policy.)

    Give your homeschoolers a rich lesson in history with the incredible hands-on history unit studies from Project Passport!

    Preparing a Project Passport Hands-On History Unit Study

    We had planned to cover ancient history with Pooh this year, so the unit studies from Home School in the Woods was a great fit! The newest unit study is Project Passport: Ancient Greece and it is AH. MAZING.

    A Look at the Resources in the Project Passport Ancient Greece unit study

    Here’s a quick look at just some of the resources in this fabulous unit. The CD contains all of the available downloads, printables, and instructions you’ll need to assemble the unit study. By the way, Project Passport unit studies are also available as digital downloads, with all of the same goodies.

    Now here’s a look at how we got started putting our unit together!

    Ancient Greece Unit Study Binders

    Home School in the Woods has done a LOT of the work on this unit for you, so take advantage of every single download, instruction sheet, and PDF in the program. We printed the teacher’s guides, key’s and instructions for one binder. Then we started working on the “Scrapbook of Sights” for Pooh to complete as we went along.

    Project Passport Ancient Greece Unit Study Overview

    At the beginning of the CD (or digital download), you’ll find a comprehensive Travel Itinerary, which gives you an overview of the entire unit. This is super helpful for scheduling your lessons.

    Project Passport Ancient Greece Unit Study Travel Tips

    There are also a lot of travel “tips” listed at the beginning. DO NOT SKIP THIS. This is a great reference sheet as you go along, especially if you’re a need-to-know-everything-at-the-start person (like yours truly).

    I want to add a couple of caveats here:

    • Project Passport is loaded and, I mean, loaded with printables. Invest in a reliable printer. (Here’s the one we use.)
    • There is a lot of information to read through to see which activities to complete with each section of the unit. I have ADD, so I had to break each section down, highlight the action steps on each lesson, and then check off each printable as I printed it. That was the only way I could keep my activities organized.

    Building Our Ancient Greece Scrapbook of Sights

    Pooh and I started off by creating our “Scrapbook of Sights” – a visual memento binder of our “trip” through Ancient Greece.

    Decorating the Scrapbook of Sights Cover

    I loved this activity so much, because it gave him a chance to keep up with little reminders of everything he learned through the unit. In fact, we’re still filling it up as we continue the program!

    Ancient Greece Unit Study Project 1 Overview

    At the first “stop”, you and your child complete several activities that will be completed along the way. Two of these include the actual “passport” (as in “Project Passport”) and your “luggage”, which will collect your travel memories.

    The passport is designed to be used as you travel through all of the Project Passport unit studies, including:

    1. Ancient Egypt
    2. Ancient Greece (which we’re showcasing in this post)
    3. The Middle Ages
    4. Renaissance and Reformation
    5. Ancient Rome (will be released in 2018)

    As you finish each unit, your child gets to add a new “stamp” to his passport!

    Starting Our Project Passport Ancient Greece unit study

    Now that we were all packed, it was time to head on our trip!

    How to Use Project Passport Hands-On Ancient History Unit Studies

    Whew! That was just the getting started part! See what I mean about this unit study being chock-full of activities?

    Project Passport units are designed to last for six to twelve weeks of study. Really, though, I think you could stretch them out to a full school year (36 weeks), especially if you only cover history once or twice a week. These units are that comprehensive.

    Adding to Our Ancient Greece Scrapbook of Sights

    In our first “stop”, we talked about the origin of Ancient Greece. Pooh started adding to his “Snapshots in History” pages in the scrapbook.

    Ancient Greece Unit Study Snapshots in History Activity

    We cut out character/place cards, colored them, and glued them in the scrapbook. At each “stop”, you collect a few of these.

    Map of the Aegean Civilization

    We also began working on our maps of the Aegean Civilizations and the Ancient Greek World.

    Ancient Greece Unit Study Aegean Civilization Map

    Coming along! (This is another activity that you add to as you go through the unit.)

    Reading our Ancient Greece Unit Study postcards

    A really cute part of Project Passport is receiving postcards from historical figures. Each postcard is written as if it came from a person in history, describing what they’re doing and where they’re at. Our first card came from Agamemnon and it briefly explained the origin of the Trojan War.

    Adding to Our Ancient Greece Postcard Rack

    Pooh drew a ship sailing to Troy on the front of the postcard…

    Ancient Greece Unit Study Postcard Activity

    …and then added to it our Postcard Rack in our scrapbook.

    Ancient Greece Unit Study Guide Text

    At the beginning of each stop, you can print a guide text that serves as the basis for the unit. It’s really the “textbook” part of the unit. It’s good to read through this with the kids before you try the activities. Otherwise, they won’t have any context for what they’re learning.

    A quick note here: Project Passport unit studies are not secular. The guide texts mention the Bible, Biblical characters, and God. We’re Christians, but we typically use secular homeschooling curriculum, and I didn’t expect those references. But, they’re very few and far between, so you can skip them if you want. I didn’t see any overtly religious information in the activities.

    Writing for the Greek Weekly Newspaper

    Another of the activities we’ll be building on is the “Greek Weekly” newspaper. At each stop, kids can write their own news stories about what’s happening in the Greek World. (Stories can be based on what they learned from the guide text.)

    Perusing the Ancient Greece Unit Study Greek Weekly Newspaper

    Hmmm….interesting stories in the paper today! (Just kidding, he’d only written one story so far.)

    Placing Timeline Cards in Our Snapshots of History

    In our later “stops”, we collected more character cards and colored them.

    Adding More Characters to Our Ancient Greece Snapshots in History

    And then pasted them in our Scrapbook, which was getting pretty full by this point. 🙂

    Ancient Greece Unit Study Historic Postcards Activity

    And we got another postcard for our scrapbook too!

    The Grandeur of Athens Matchbook Activity

    Project Passport also has a mega lapbook you can complete along the way. And what’s really nice is that kids are working their way into it through the unit. In this stop, Pooh worked on making matchbooks that each contained information about life in Ancient Athens.

    Adding Matchbooks to the Grandeur of Athens Activity

    Each matchbook contained information and pictures about an aspect of the city. We added the base page to our scrapbook and started assembling.

    Reading the Grandeur of Athens Matchbooks

    This activity alone could last a week. I mean, you’re studying about the cultural, political, social, and economic features of the city of Athens in ONE activity.

    Enjoying Our Project Passport Ancient Greece unit study

    And we’re finished! (With that activity, that is. We easily have another nine weeks of activities in the unit.)

    Project Passport Hands-On History Unit Studies - Look! We're Learning!

    What you’ve seen in this review is just a few of the activities in three “stops” on the Project Passport: Ancient Greece unit study. Know how many stops there are altogether? 25. Now that’s a serious hands-on ancient history homeschool curriculum!

    Stop by and pick up a Project Passport unit study yourself! If you want to go in chronological order, start with Ancient Egypt, then move on to Ancient Greece, the Middle Ages, and the Renaissance and Reformation. It will be an awesome history education for your kids!

    Now: for the great giveaway news! One winner will receive all four Project Passport CDs – FREE! (If the winner lives outside the U.S., he or she will receive digital downloads instead of CDs.) Enter for your chance to win using the Giveaway Tools widget below!

    Entry-Form


    Find out more about the entire Project Passport product line by following Home School in the Woods on social media!

    • Facebook
    • Twitter
    • Pinterest
    • Google +
    • And sign up for the Home School in the Woods newsletter in the upper right corner of the website!

    For more ideas to teach hands-on history to your kids, follow my Living History for Kids Pinterest board!

    Learn to use if else statements and other advanced coding functions for kids with Bitsbox!

    Advanced Coding Lessons for Kids with Bitsbox

    March 3, 2017 by Selena Robinson Leave a Comment

    Since we’ve been working on coding with our middle schooler this year, she’s learned how to write code for apps, video games, and more! So in this month’s Bitsbox box, we were excited to see her branching into some advanced coding lessons for kids, including if – else statements and sin() functions.

    And to top if all off, she got to explore these coding techniques while creating fun fairy-tale inspired apps and art! See how we used the Bitsbox A Land Far Away box to introduce advanced coding skills with absolutely no tears!

    Why Our Kids Love Coding with Bitsbox

    If you want to see more Bitsbox coding in action, be sure to check out how we used our first box to introduce coding for kids to our tween and how we used our second box to explore robotics!

    Disclosure: I received this product in exchange for this post and I was compensated for my time. All opinions are my own and I was not required to write a positive review.

    Learn to use if else statements and other advanced coding functions for kids with Bitsbox!

    Bitsbox A Land Far Away Subscription Box Unboxing

    I always like to begin these posts with a look at what’s inside the Bitsbox deluxe subscription box. Each month’s box has a different theme, so when you purchase a Bitsbox subscription, your child get a new set of apps to create based on a new theme in each box. This month’s theme was “A Land Far Away” and all of the apps were inspired by fairy tales.

    Bitsbox A Land Far Away Box

    Look at all this coding goodness! What I love about Bitsbox is that they make coding fun for kids, so when you buy the deluxe subscription, you always get a few extra toys along with your coding cards for the month.

    Bitsbox A Land Far Away Unboxing

    This month we had trading cards for making mini apps, supersize cards for building advanced applications, temporary fairy-tale tattoos, a sheet of app stickers for keeping track of her progress through the unit, a Cata-pencil (yep, you guessed it – a pencil with a catapult on top) and a movable wooden snake.

    Shortly after this picture was taken, my sons discovered the snake and ran off with it. I’ll probably never see it again.

    Assembling the Bitsbox Binder

    The first thing we did was to add our new coding cards to our Bitsbox binder. We received that along with our second box last month. As we shuffled through the cards, Tigger found two apps she wanted to make right away.

    Choosing a Bitsbox App to Code

    A mini app called “Dream Catcher”.

    Exploring Code Functions with Bitsbox

    And a supersized app called “Bling This Thing”. Color me surprised.

    A Look at the Bitsbox Coding Binder

    Once we had all of the app cards in the binder, it was time to get started!

    Advanced Coding Lessons for Kids with Bitsbox

    In the Grown-Up Guide (seen in the unboxing picture at the beginning), Bitsbox adds a bit of explanation for parents about exactly what our kids will learn in this box. By the way, that guide is a life-saver. A lot of us parents are like “Huh?” when we hear coding terminology, so that overview was very helpful.

    One of the skills used this month is the if-else statement, which is an important skill to use for JavaScript programming. If-else statements are also used in Microsoft Excel and in basic logic, so they’re very useful.

    Coding the Bitsbox Dream Catcher App

    The apps Tigger wanted to work with first don’t use this function. But one does use the sin() function, a skill used in C programming. When she saw that one app let her make art, she was off and running with that one, no matter what programming functions it used.

    Working with Advanced Coding Functions

    Since Dream Catcher is a mini app, it only requires a few lines of code. She had it completed in just a few minutes. And it creates this:

    Pretty neat, right? It’s a look at how math can be used to create actual art!

    After that, it was on to the app “Bling This Thing” – the one she was most excited to create this month.

    Coding with Advanced Functions

    “Bling This Thing” lets kids choose an object to decorate with jewels. And you can choose really any of the available coding stamps in the unit: cupcakes, crowns, thrones, even monsters!

    You can also choose which jewels you’d like to show up as available stones, whether you want the app to select random jewels, and if you want to add any sounds when the jewels appear. It’s a really great exercise in customizing coding to create a desired result – super helpful if your kids are thinking about coding or graphic design for a living.

    Exploring Coding as Siblings

    This app was such a big hit that my third-grader tore himself away from the wooden snake to come out and watch. (Side note: There is no doubt that these children are siblings. Wow.)

    It works! Tigger found that she could customize the app even more, slowing down or speeding up the appearance of each jewel or deciding which way the jewels would rotate as they showed up.

    Keeping Track of Completed Bitsbox Apps

    After we were done, she added the “Bling This Thing” sticker to her app tracker guide to mark it as completed.

    We have absolutely loved learning to code with Bitsbox! In just three months, my tween has learned that computer coding is used to create apps, video games, graphic design, sound effects, and images.

    Plus, she’s learned how to use coordinate geometry, sin() functions, and JavaScript programming language – without any mind-numbing boredom. After all, when your twelve-year-old asks you to code for fun, you know you’re on the right track.

    Learning to Code at Home with Bitsbox

    Sign up for a Bitsbox subscription yourself and let your children take some advanced coding lessons for kids at home! If you want to try just one box to see how you like it, visit the One-Time Product Shop to buy a single box!

    Don’t forget: You can save 20 percent on a brand new Bitsbox subscription with you use the promo code SELENA20! (This code is only valid on new subscriptions and does not apply to purchases from the One-Time Product Shop. All subscriptions automatically renew on the first of the month.)

    Want to learn more about Bitsbox? Sign up for the Bitsbox mailing list to learn about new products, boxes, and upcoming promotions! And if you want more ideas for teaching with Bitsbox, sign up for the educator mailing list!

    Be sure to check out Bitsbox on social media:

    • Facebook
    • Twitter
    • Pinterest
    • Instagram

    See our other Bitsbox reviews below!

    Stumped by how to teach computer coding? Make basic coding for kids easy and fun with Bitsbox!

    See how we used our Bitsbox subscription box to cover introductory robotics for kids! My middle schooler loved it!

    And follow my STEM for Homeschoolers Pinterest board for more engineering inspiration!

    See how we used our Bitsbox subscription box to cover introductory robotics for kids! My middle schooler loved it!

    Introductory Robotics for Kids with Bitsbox!

    February 10, 2017 by Selena Robinson

    We’ve been working on STEM concepts with our middle schooler for the past several months and she’s been enjoying learning science, technology, and even math concepts along the way. Our Bitsbox subscription has been a huge help in this. This girl absolutely hated math a year ago, but now that she’s learning how to use it to make things, she’s seeing mathematics in a whole new way!

    This month’s Bitsbox subscription box came with a new theme: Robots! And it was a perfect way to cover introductory robotics for kids with my sixth-grader! Read on to see what’s in the Bitsbox Robo Boogie box and how we used it to code a robot video game!

    Disclosure: I received this product in exchange for this post and I was compensated for my time. All opinions are my own and I was not required to write a positive review.

    See how we used our Bitsbox subscription box to cover introductory robotics for kids! My middle schooler loved it!

    Bitsbox Robo Boogie Subscription Box

    Last month, we got the introductory Bitsbox basic subscription box: Animal House. So this month we were on the next box with the theme: Robo Boogie! As you might guess, it’s all about having fun with robotics!

    Bitsbox Subscription Box Review - Look! We're Learning!

    One of the best things about a Bitsbox subscription is that it starts being fun as soon as you pop open the box. There’s absolutely no drudgery about learning to code with these kits.

    Bitsbox Subscription Box Unboxing - Look! We're Learning!

    The Robo Boogie box included a new set of app supercards, a miniature app trading card pack, a set of temporary robot tattoos, a super nifty deluxe binder for storing all of our cards, and a fun Cubebot toy. (As a mom nerd, I was most psyched about the binder. I am not ashamed of this.)

    Bitsbox Robo Boogie Supercards - Look! We're Learning!

    Each supercard contains a fun robot-themed app that kids can code using the code on the back. There are also cards with tips and tricks for making each app a bit unique.

    Bitsbox Subscription Box Trading Cards - Look! We're Learning!

    The trading cards are tiny little app instructions for mini coding sessions.

    Bitsbox Cubebot Toy - Look! We're Learning!

    And the Cubebot was a fun “extra” in the kit. It’s actually a really neat toy. It comes as a perfect cube. But if you move the pieces around, you get a robot! The challenge is getting him back into a perfect cube again. It’s hard!

    Introductory Robotics for Kids with Bitsbox

    Bitsbox Robo Boogie Mini Apps - Look! We're Learning!

    After we organized all of the supercards into our brand new binder, Tigger decided to start with the app “Robodog Loves Robocat”. At the risk of sounding condescending, I knew she’d pick that one first. 🙂

    Working on Bitsbox Robo Boogie Apps - Look! We're Learning!

    So she read the coding instructions, signed in to her Bitsbox account, and got to writing the code. After completing the initial app, she wanted to add a bit of “flair”. So we flipped to another supercard and found a unique fill to add as the background.

    Robodog Loves Robocat Bitsbox App - Look! We're Learning!

    Ta-da! This is Robodog Loves Robocat with the Future City background. When you click Play, the robot dog chases the robot cat off the screen. Neat!

    Keeping Track of Completed Bitsbox Apps - Look! We're Learning!

    As you move through a Bitsbox subscription box, you can keep track of the apps you’ve completed with this fun sticker page. One down, eleven to go.

    Bitsbox Castle Defender App - Look! We're Learning!

    For the next app, Tigger really wanted to code “Castle Defender.” If you look at the top right corner, you’ll see that this app has an icon that shows the needle all the way to the right. That means this is an app with a higher degree of difficulty.

    I pointed that out to Tigger, but she would not be swayed. She was determined to code that app. I love it.

    Coding the Bitsbox Castle Defender App - Look! We're Learning!

    She read the instructions, stopping to test it after each step. According to the instructions, the game includes two characters: a heroic, selfless rock and an evil robot. After double-checking the code and re-reading the instructions, we ended up with a pretty neat robot video game!

    As you can hear, even my little ones came in to watch the game being played. They all wanted a chance to try!

    The original coding instructions call for the rock to spin at a rate of 15, but when we tried to play it that way, we had a hard time hitting the robot. With a little tweaking (reducing the speed to 5), we got a speed we could manage better.

    And that’s one of the biggest parts of engineering: tweaking code to suit your (or your client’s) vision. I love how easily she’s learning these concepts without feeling bored or overwhelmed.

    Completed Bitsbox App Tracker - Look! We're Learning!

    Boom! Another app successfully coded in this month’s box!

    Coding a Robot Video Game with Bitsbox - Look! We're Learning!

    Now that Tigger sees what you can code robots to do in an app, we’re going to start researching how robotics engineers use coding to program actual robots to move, speak, and more. This was a wonderful way to start learning about that field!

    Introductory Robotics for Kids with Bitsbox - Look! We're Learning!

    Our Bitsbox subscription just keeps getting better. We’re looking forward to sharing next month’s box with you!

    Be sure to check out the Bitsbox Basic Subscription and sign up! You can choose from one-month, three-month, or twelve-month plans – and they are all amazing! Or if you just want to buy a box outright, you can do that in the One-Time Shop! Great for testing the box to see if your kids love it! (They will.)

    PROMO CODE: Save 20% on a new Bitsbox subscription of any length with the special Bitsbox promo code SELENA20! This code does not expire, but it does not apply to purchases from the One-Time Shop or to subscription renewals. New subscriptions only. All subscriptions renew automatically on the first of the month, unless canceled.

    For more information about Bitsbox subscription offers and boxes, sign up for the Bitsbox mailing list! And get special tips for teaching with Bitsbox when you sign up for the teachers’ mailing list! Plus, keep up with Bitsbox online at:

    • Facebook
    • Twitter
    • Pinterest
    • Instagram

    Want more details about Bitsbox? Check out our review of the first subscription box!

    Stumped by how to teach computer coding? Make basic coding for kids easy and fun with Bitsbox!

    Plus, learn more about teaching STEM to kids on my STEM for Homeschoolers Pinterest board!

    Get your reluctant readers into classic literature with these tips for how to make Shakespeare fun for kids!

    How to Make Shakespeare Fun for Kids – Even Reluctant Readers!

    February 1, 2017 by Selena Robinson 1 Comment

    I didn’t learn about Shakespeare at all during grade school, so it wasn’t until I got to college that I got a chance to read and watch classic Shakespearean plays. And, to be honest, it was confusing. I watched a live rendition of Twelfth Night for English lit class and I think I went to sleep during Act II.

    As I’ve gotten older, though, I’ve started to appreciate the wit, vocabulary, and poetry of Shakespeare’s writing. It’s almost as if each line is intentionally written to stand alone as a quote. Rereading his works as an English major when I returned to college a few years ago left me in awe at how poignantly he could describe the most ordinary things.

    So I decided to introduce Shakespeare to my children as soon as possible. But my two boys are not the voracious readers that my girls are, which means I had my work cut out for me.

    And that’s why I was excited to review the book How to Teach Your Children Shakespeare with the kids! With the quotes and ideas from the book, we were able to make Shakespeare fun for kids, even my reluctant readers!

    Read on to see how we did it. And find out how you can win a FREE copy of the book for your family!

    Disclosure: I received this product in exchange for this post and I was compensated for my time. All opinions are my own and I was not required to write a positive review. (Affiliate links provided here for convenience. For more, see our Disclosure Policy.)

    Get your reluctant readers into classic literature with these tips for how to make Shakespeare fun for kids!

    How to Make Shakespeare Fun for Kids

    I started by reading the book How to Teach Your Children Shakespeare by Ken Ludwig. It is truly packed with ideas and suggestions for how parents can bring these works to life, even for kids who are very young or unenthusiastic about learning poetry.

    How to Teach Your Children Shakespeare Book

    Personally, I had made a list of reasons why I thought I had to wait until my kids were older to teach them about the Bard, including the following:

    • My kids are too young to study Shakespeare. They won’t understand it and it’ll be a waste of time.
    • My kids won’t be interested in memorizing dialogue. They’ll get frustrated at the long words and give up after a few tries.
    • My kids will get bored trying to read the plays. Most of Shakespeare’s plays are pretty long. How on earth could I keep them excited about reading them?

    Learning about Shakespeare's Life and Work

    And this is why How to Teach Your Children Shakespeare is so awesome. The author, Ken Ludwig, doesn’t shy away from any of these potential challenges. In fact, he addresses them head on.

    Yes, your kids will have difficulty understanding the plays.

    Yes, your kids will get frustrated at trying to memorize the lines.

    Yes, your kids will get bored if they try to read the plays as they are written.

    But there are ways to help them get past these obstacles and truly love these plays if we try the suggestions offered. I greatly appreciated the candor of Ludwig’s writing and that made me more receptive to trying his ideas. By the way, those ideas really work.

    Learning to Memorize Shakespeare Dialogue for Kids

    In the book, Ken recommends starting children off with memorizing a short passage from A Midsummer Night’s Dream. He emphasizes going line by line and looking up any words that are unfamiliar.

    Since Elizabethan English is quite different from modern English and since Shakespeare’s plays are a bit on the long side, that’s going to take some time. But that’s okay! We have time to sink our teeth in and savor these plays with the kids. There’s no hurry whatsoever.

    Since I’d already seen Twelfth Night as a teenager (but couldn’t remember it due to falling asleep), we started working with that play.

    On the How to Teach Your Children Shakespeare website, you can print off passages from the plays mentioned in the book and use them to help the kids work on memorizing short lines. We grabbed a few scenes from Twelfth Night and got started.

    Twelfth Night Puppet Printables

    My boys weren’t too enthused about reading the lines at first, so we made some printable stick puppets from some of the principal characters in Twelfth Night.

    DIY Shakespeare Twelfth Night Puppets

    Then we just cut them out, stuck them on some colored craft sticks, and made character puppets to act out the scenes!

    Once my boys saw the character puppets, they wanted to jump right into playing with them. But they’re not just toys – they’re characters who have specific things to say to one another. Which means they had to learn their lines. Once the ground rules were established, they were ready to work on practicing the dialogue.

    Learning Lines from Shakespeare for Kids

    Interestingly, one of the attributes Ken encourages parents to stress is the way Shakespeare adds twists and turns to his plays so that the audience is surprised by how each story unfolds. When I assigned the Twelfth Night characters to the boys, I told my youngest that he’d be playing Olivia and my oldest that he’d be playing Cesario. The oldest taunted my younger son, crowing “Ha, ha! You have to be the girl!”

    Learning about Shakespeare's Twists in Twelfth Night

    When he found out that Cesario is actually a woman named Viola disguised as a man, he was aghast. Serves him right. 🙂

    Putting On a Shakespeare Puppet Show for Kids

    After spending some time practicing their lines, they were ready to do a few passages from Act 1, Scene 5 of Twelfth Night.

    http://vid1300.photobucket.com/albums/ag98/lookwerelearning/MVI_7910_zpsrtnkcsr1.mp4

    Here’s their rendition. I couldn’t get my youngest to deliver the lines with Olivia’s quiet admiration of Cesario, but he is seven, after all.

    My oldest also got to play the role of Sir Toby in Act 2, Scene 3.

    http://vid1300.photobucket.com/albums/ag98/lookwerelearning/MVI_7912_zpsfyde1bnn.mp4

    When he saw the line “Ye lie”, he was determined to say it like a pirate. Oh well.

    To help them see how the play ultimately turned out, we watched this really good summary of the play. And as we watched, we checked off a few common playwriting devices Shakespeare uses in his comedies.

    Playing Shakespeare Comedy Bingo

    We printed off this adorable Shakespearean Comedy Bingo sheet from Good Tickle Brain and crossed off each plot device as it happened in the play.

    Shakespeare Comedy Bingo Game

    Hey! We got four in a row!

    This was such a fun unit that I had to tell the kids it was time for lunch. That’s a record. 🙂

    If you’re interested in learning how to make Shakespeare fun for kids, I cannot recommend How to Teach Your Children Shakespeare enough. It’s full of wonderful resources for developing a love for classic literature in your kids!

    Oh – and if you’re interested, you can grab our free printable Twelfth Night Stick Puppet Figures set below! They’re awesome for using with the printable passages from How to Teach Your Children Shakespeare!

    >>>>>>> Printable Twelfth Night Puppet Figures <<<<<<<

    Don’t forget to enter for a chance to win one of TEN copies of the book! To enter, use the Giveaway Tools widget below!

    Entry-Form

    How to Make Shakespeare Fun for Kids

    To learn more about the book and to connect with Ken Ludwig, follow him on social media!

    • Facebook
    • Twitter

    And be sure to follow my Reading for Kids Pinterest board for more tips to help kids learn to love reading!

    Need to give your homeschooled kids a standardized test? Learn how to do easy homeschool standardized testing at home!

    Affordable Homeschool Standardized Testing for Families

    January 17, 2017 by Selena Robinson Leave a Comment

    Standardized testing is a somewhat controversial subject among homeschoolers. Some families perform testing regularly to assess their children’s performance each year. Others decide not to use standardized testing at all, opting for other ways to check their children’s understanding.

    Our state requires us to assess our children with a standardized test occasionally. And, while I’m not a big fan of testing in general, I do want to know where my kids need the most help so I can adjust my homeschooling methods to assist them.

    Which is why I was excited to try MAP testing from Affordable Homeschool Testing Services LLC! Read on to see how we used the company’s MAP test to administer a standardized test to our kids with almost no prep at all!

    Disclosure: I received this product in exchange for this post and I was compensated for my time. All opinions are my own and I was not required to write a positive review.

    Need to give your homeschooled kids a standardized test? Learn how to do easy homeschool standardized testing at home!

    The Challenges of Homeschool Standardized Testing

    We’ve been homeschooling for eight years, so we’re not new to offering standardized testing to our kids. But over the years, we’ve found that giving a test at home can pose quite a few challenges.

    • Deciding on a test format: This can be daunting. There are so many tests to choose from! From the CAT to the ITBS to the PASS, there are several standardized tests available and trying to find the best one to assess your children can be confusing. Some tests are not even available for parents to proctor and must be completed at an assessment site, which can be inconvenient.
    • Scheduling a test for more than one child: Think back to taking a standardized test in school. Remember having to sit in a quiet room for at least an hour so you could concentrate? How do you offer that kind of environment when you need to test more than one child?
    • What adjustments to make for active kids: Since some of our children have ADHD, I was concerned about making a few adjustments to the testing schedule to help them stay focused during the assessment.
    • How to help the kids after the test is over: Once you get the testing results, how can you go about helping the kids to master the concepts they struggled with? A final score alone is not enough to help us know what to teach going forward.

    How to Take MAP Homeschool Standardized Testing Online

    With Affordable Homeschool Testing Services LLC, though, we found that all of our concerns were met. The Measures of Academic Progress test (MAP) is a thorough assessment of exactly which concepts kids grasp and which ones they need additional help mastering and that’s the test we administered.

    The test assesses three subjects: reading, math, and language arts over the years of three days. On the first day, the kids were tested in reading, then math on the second day, and ELA on the third.

    Homeschool Standardized Testing Setup at Home

    I set my two oldest kids up at the school room table (also known as the dining room table) with separate computers they could use. Each child has to work at his or her own computer, because the test is administered entirely online.

    The test is designed to be challenging, so kids will only get about half of the questions right. Fortunately, they don’t know if they’re getting any right or wrong. The test just moves continuously. No error messages or warning sounds, which can be discouraging.

    Taking a Homeschool Standardized Test Online

    I did make sure that the kids had a couple of pencils and some scratch paper nearby, especially for the math portion. Other than that, all we had to do was log into the testing site and wait for the test proctor to call us to set us up. Since we scheduled our testing days and times in advance, we were ready to go.

    Reading the Instructions for a Homeschool Standardized Test

    With the reading portion, the kids really needed to slow down and concentrate, which is something they struggle with because of their short attention spans. For example, the reading test often featured a passage for them to read and then answer a few questions. On the next page, they might see the same passage again – this time with different questions. So they couldn’t just run through and assume they knew the answers.

    Taking a Homeschool Standardized Test on the Computer

    Another option I appreciated was that the kids could go back and review their answers before finally submitting the test. That gave them a lot of flexibility to reassess their answers, just in case they had completed the test in a hurry.

    Taking a Break During a Homeschool Standardized Test

    Since the test was untimed, we could take breaks as needed. I didn’t allow them to decide when they wanted a break. Otherwise, they’d have been asking for a break every 10 minutes. But we did take them every 30 minutes or so.

    The actual length of the test varies according to each child’s performance on the assessment. If it seems that your child has grasped a specific concept, the test may shorten by a few questions. If it seems that a concept is challenging, it may add a few more. My daughter, who was taking a 6th grade assessment in all subjects, had about 50 questions per subject.

    Helping Kids Concentrate During Homeschool Standardized Testing

    We finished taking the test on Wednesday morning. By Friday afternoon, I had an extremely detailed report (around 60 pages) that showed me the grade level each child was performing at in each subject. The report also included a list of the specific subject objectives that were mastered and those that needed reinforcement.

    But, what I really loved was the math objectives list. Not only did it explain which math concepts my kids needed assistance with, it included links to those specific objectives on Khan Academy so I could view the videos with the kids. That was a goldmine of information. Sometimes the way educational standards are written can be confusing, but seeing the specific objective in action gave me a great starting point.

    Simple Homeschool Standardized Testing at Home

    Have you administered a standardized test to your kids? Do you have questions about using the MAP test with your family? Ask away in the comments!

    Now is a great time to try out MAP testing from Affordable Homeschool Testing Services LLC, because through July 5, 2017, you can save $5 on the assessment with the coupon code MAPTest17!

    To learn more about Affordable Homeschool Testing Services LLC and the different homeschool testing options available, visit the company’s website to schedule a MAP testing appointment or follow them on Facebook!

    Don’t miss these other homeschooling posts!

    Teaching a child with ADHD at home? You've got to read this list of the best ADHD homeschooling tips around!

    How to Homeschool Without a Planner @ Look! We're Learning!

    How to Homeschool in Five Hours a Week

    Plus, get more tips for teaching kids at home on our Homeschooling Pinterest board!

    Engineering a Toothpick Bridge for Kids

    STEM for Homeschoolers: How to Build a Toothpick Bridge with Pitsco Education!

    January 3, 2017 by Selena Robinson 1 Comment

    STEM education is a huge priority in our homeschool these days. We’ve got a busy middle schooler and I want her to get a good introduction to science, technology, engineering, and math during these years. That way, as she goes on in her schooling, she won’t be intimidated by these subjects later. And who knows? Maybe she’ll become an engineer herself!

    So I jumped at the chance to try the Toothpick Bridges Maker Project from Pitsco Education! See how this curriculum helps kids learn how to build a toothpick bridge and learn about design and engineering at the same time!

    Disclosure: I received this product in exchange for this post. All opinions are my own and I was not required to give a positive review.

    Engineering a Toothpick Bridge for Kids

    Pitsco Education Toothpick Bridges Maker Project

    Pitsco Education offers many, many resources for homeschoolers who want to work on STEM concepts with their kids. Each of the resources are grouped by category. For example, if you want to focus on math, you can browse plenty of awesome math projects. What I love about Pitsco’s product selection is that all of the lessons feature hands-on projects, which are an incredible teaching method for active homeschoolers (like ours).

    The Pitsco Education Toothpick Bridges Maker Project was the foundation for our lesson. In the kit, there are:

    • Structural glue
    • A ton of toothpicks
    • Bottles for handling the glue
    • A toothpick bridge tester
    • And an instructional video on how to design your own toothpick bridge

    We also received the complete lesson plan Masterpiece Toothpick Bridges: A Guide for Teachers and Students, which was a huge help for me as the educator. The plan includes plenty of activities, research, and illustrations to make an entire month of lessons based on this concept. It’s very, very detailed and an excellent in-depth lesson we’ll be working on through the rest of the year.

    How to Build a Toothpick Bridge

    I was so thankful for the Toothpick Bridges DVD. It really helped my middle schooler to “see” exactly what the process is for designing and creating her bridge.

    Pitsco Toothpick Bridge DVD Lesson

    Since she has ADHD, she watched the video once and said “I got it!” As we started on the project, though, I could see that she didn’t really get it quite yet. So I played it a second time and watched it along with her, pausing frequently to ask about her understanding. That really helped her get a clearer idea of what was involved in the process.

    Pitsco Toothpick Bridge Lesson Plan

    In the Toothpick Bridges teachers’ guide, there are examples of stunning toothpick bridges constructed by students. Some of these are practically works of art. This time, though, we stuck to the basics.

    Drawing a Toothpick Bridge Template

    We started by creating a paper template to use as the design for our bridge sides. My middle schooler used the template on the DVD as her guide.

    Designing a Toothpick Bridge

    Then it was time to start measuring how many toothpicks we’d need for each side. We laid them down on the template to get a look at how to place them before we started adding glue.

    Drying Toothpick Bridge Sides

    As the video shows, building these bridges takes time. You can only create one side at a time and you can only construct one set of diagonals at a time. Which meant that we’d work on it for a while, let it set up, then resume working on it. For a child with a short attention span, this was an excellent activity for working on a longer-term project.

    Assembling a Toothpick Bridge

    Once the individual sides dry, you can stand them up and attach them together, forming your bridge. As you can see, we used a LOT of glue. Next time, we’ll cut back on that a bit…lol.

    Preparing to Test a Toothpick Bridge

    Once our bridge was constructed, it was time to test it! The goal here is to put as much weight as you can possibly can on the bridge to see how much it can bear before it breaks.

    Testing the Strength of a Toothpick Bridge

    As the video showed, we put on some safety goggles first. No one wants to catch a toothpick in the eye.

    We placed a piece of wood (from the Toothpick Bridge tester) on the bridge and tied the bucket to a string. Our bridge wasn’t quite wide enough for the piece of wood to lie straight down, so it’s possible that our results were a bit skewed. Next time, we’ll be sure to use the piece of wood as the template for how wide the flatbed of the bridge should be.

    We gradually added sand to the bucket until…the bridge broke!

    Breaking a Toothpick Bridge

    Afterward, we weighed the sand to see how much our bridge could hold before breaking. It was 6.5 pounds! Who knew you could hold up six and a half pounds with just toothpicks!

    Testing the Strength of a Completed Toothpick Bridge

    This was a STEM activity we truly loved. And we’ll be repeating it again this school year now that we have a better understanding of how to engineer a bridge from scratch.

    How to Design and Build a Toothpick Bridge

    Are you working on STEM concepts with your kids this year? Be sure to check out the incredible products available from Pitsco Education for kids!

    Plus, get more ideas for teaching STEM on my STEM for Homeschoolers Pinterest board!

    Stumped by how to teach computer coding? Make basic coding for kids easy and fun with Bitsbox!

    Basic Coding for Kids with Bitsbox!

    December 9, 2016 by Selena Robinson Leave a Comment

    My sixth-grader is a bit…shall we say, math-averse? She can do the work, but she really, really, really doesn’t like it. Teaching her math can be frustrating for both of us. And, since she has ADHD, keeping her attentive during lessons is a challenge all its own.

    But, in today’s society, learning a STEM skill, such as computer coding, is critical to understanding the modern world and developing a stable career. There’s just no way around it.

    Naturally, I want my daughter to feel comfortable pursuing a career in any sector she wants. But I was at a loss as to how to get her excited about STEM learning. Which is why I was so glad to be selected to try the Bitsbox monthly subscription box!

    Read on to see how we’ve been using Bitsbox to teach basic coding for kids in a super fun way! Plus, learn how to save 20 percent on your first month’s subscription!

    Disclosure: I received this product in exchange for this post and I was compensated for my time. All opinions are my own and I was not required to post a positive review.

    Stumped by how to teach computer coding? Make basic coding for kids easy and fun with Bitsbox!

    Why Teaching Basic Coding for Kids Can Be Tough

    I think that I might be a member of the last generation born before the widespread use of the Internet. I vividly remember the day we got our first modem. It was a huge event.

    I’m mentioning that because writing computer coding is just not something I learned as a child. It wasn’t until after I became an adult and got started as a web content writer that I discovered how webpages are made. It was fascinating, but the learning curve was steep.

    I knew that I wanted my kids, especially my daughters, to learn coding at an early age. But let’s face it: writing computer code is NOT the most glamorous thing in the world. And since my oldest daughter has ADHD, I was concerned that the required attention to detail would make it almost impossible for her.

    Thanks to Bitsbox, though, I don’t have to even wonder how to make coding interesting. It’s all been done for me! This is the very first time my daughter said “That was fun. I want to learn more.” about anything involving a STEM-related skill. Which is a huge win for us.

    How Bitsbox Makes Basic Coding for Kids a Snap

    So what’s so special about Bitsbox? For one thing, the site is set up specifically for kids, so as a parent there’s very little direct instruction you’ll have to do. While I love teaching my children, by middle school I want them to develop some kind of independence and using Bitsbox really reinforced that with my daughter.

    When you visit the site, you have the option to subscribe to the monthly box program or make a one-time purchase of a specific kit. Once you make your selection of either the Basic Bitsbox or the Deluxe Bitsbox, you just wait to receive your box in the mail. The first box is animal-themed, which was a perfect fit for our daughter, who loves all things animal.

    Bitsbox Kit Unboxing - Look! We're Learning!

    Look at all these goodies!

    What's in a Bitsbox basic coding for kids kit? - Look! We're Learning!

    Our Bitsbox, which is the most like the Deluxe Bitsbox, featured a slew of animal-themed apps written as code language on individual “Super Cards”. There were also stickers, temporary tattoos, miniature cards (for bite-sized coding), an envelope holder for our cards, and a VIP button.

    Bitsbox Animal House Safari Origami Kit - Look! We're Learning!

    Plus, we got a mystery toy – a Safari Origami set!

    Bitsbox Coding Cards for Kids - Look! We're Learning!

    Each card gives a four-digit code that allows users to begin working on an app of their own. Once a student enters the code, he or she can write code in basic HTML that creates and animates an app on a virtual tablet that appears on the screen.

    Using Bitsbox to introduce basic coding for kids - Look! We're Learning!

    The cards progress from very, very easy to a bit more complex. The first app my daughter tried was called “Food Fight”, which walks you through coding that changes the background color of the tablet screen, places a piece of pie in the center, and then makes it explode. Fun, right?

    But what caught my eye right away were the additional questions included in each Bitsbox app’s instructions. How can you change the background to a different color? Can you make an icon dance instead of explode?

    Those are great, because they encouraged my daughter to look at coding as instructions that tell a webpage, program, or document what to do. Rather than just copying down the coding on the card, she started to think about what the instructions were actually implementing. That’s how you encourage kids to become engineers – by developing critical thinking.

    Introducing coordinate geometry with Bitsbox - Look! We're Learning!

    After a few of the other basic apps, she wanted to move on to one of the more complex appls – Run Dodo Run. The coding actually lets kids make their (basic) computer game!

    The instructions include a primer on working with coordinate geometry – something we’ll actually be talking about in math this year. So I copied the coordinates on the board and had her find a few ordered pairs.

    Coding a first computer game with Bitsbox - Look! We're Learning!

    As she learned, the numbers in the coding can mean anything from the places on the screen you want icons to appear to how fast you want objects to move or how high you want them to stand.

    When she first entered the coding, the game wouldn’t work. And guess what? I refused to help her find the mistake. After a few minutes, she called out “I found it!”, corrected it, and voila! Her game worked just fine.

    Coding a computer game with Bitsbox - Look! We're Learning!

    This is a child who can get so frustrated with a mistake in a math problem that she wants to quit. But she wanted to see her Bitsbox app work, so she stuck with it. The fact that the program encouraged her to see her project through was one of the biggest benefits I saw from using the box. And this was on the very first day.

    http://vid1300.photobucket.com/albums/ag98/lookwerelearning/MVI_7789_zpsvdxj82pn.mp4

    Take a look at how her coded game works in the video above!

    Teaching basic coding for kids with Bitsbox - Look! We're Learning!

    She had such fun with this program that she wants to work with it everyday. I see a future coder in our family!

    If you’re ready to get your kids excited about computer coding, I cannot recommend Bitsbox enough. It’s worth a try to see how much it helps your children learn just how awesome writing code can be!

    And now for the really awesome news: You can score a 20 percent discount on your first month’s subscription to Bitsbox! Just use the unique promo code SELENA20 at checkout and – boom! – 20 percent comes off the price of your first box! And you can use it on a one-month, three-month, or twelve-month subscription. So there’s no length requirement to get your discount!

    Just a note: You can use this 20 percent off code on any Bitsbox subscription, but it is not valid for purchases from the one-time product shop or for subscription renewals. All subscriptions renew automatically on the first of each month, so if you want to cancel, you’ll have to contact the company before then. But I really don’t think you’ll want to cancel. 🙂

    How to teach basic coding for kids with Bitsbox - Look! We're Learning!

    To learn more about Bitsbox, subscribe to the company’s mailing list for news about products or sign up for the special mailing list for educators to get tips for how to use Bitsbox for your kids!

    Plus, you can keep up with Bitsbox on social media using the following networks:

    • Facebook
    • Twitter
    • Pinterest
    • Instagram

    Don’t forget to use the special promo code SELENA20 to save 20 percent off your first month’s subscription! And when you sign up and receive your first box, be sure to let me know how you and your children like it!

    Get more tips for teaching STEM to your kids with my STEM for Homeschoolers board on Pinterest!

    Studying Animal Predators with Scanorama Interactive Books

    Interactive Homeschool Science with Scanorama Books!

    September 20, 2016 by Selena Robinson Leave a Comment

    I cannot tell you how much my boys love learning about animals. They get so excited when they get a chance to see animals up close or even just to read about them. A lot of it has to do with their fascination with the Wild Kratts, which is just fine with me!

    In particular, my sons love studying animal predators. As typical boys, they love learning about big, strong animals that eat other animals. So I was psyched to get to try the Scanorama series from Silver Dolphin Books! One of the books is called Deadly Predators, which I just knew would be a huge hit with my kids. And they ended up loving it even more than I thought!

    See why the Scanorama series is so popular with kids (even kids who don’t love to read) and enter to win one of your own below!

    Disclosure: I received this product in exchange for this post and I was compensated for my time. All opinions are my own and I was not required to post a positive review.

    Reading about Animal Predators with Scanorama Interactive Books

    How Do Scanorama Interactive Homeschool Science Books Work?

    If you’re kind of puzzled about the name “Scanorama”, I get it. At first, I wondered what it was all about too. Here’s the simple explanation:

    Titles in the Scanorama series let kids scan over images of animals and get an X-ray view of their skeletons. Did I mention I have typical boys? They were truly wowed by that feature, as you’ll see later on.

    Oh – and see that book about dinosaurs peeking out from behind the Deadly Predators book? Read on for something awesome involving that one. 😉

    Scanorama Deadly Predators Book

    There are three different titles in the Scanorama series available from Silver Dolphin Books:

    • Scanorama: Deadly Predators
    • Scanorama: Dinosaurs
    • Scanorama: Amazing Animals

    We got a look at the first two. Take a look at the Scanorama series in action below. (This page is from the Deadly Predators book.)

    Studying Tiger Bones

    Scanning Tiger Vertebrae

    Viewing Tiger Bones

    See how kids can “scan” over the image and investigate how the animal’s skeleton contributes to its prowess? That’s just super, duper neat.

    Reading about Fierce Reptiles

    Plus, there is a LOT of information in each book about the kinds of animals covered. The Deadly Predators book contains sections about several types of predators, including scorpions, reptiles, big cats, sea mammals, and more.

    Oh, and fair warning: There is a section about spiders, which contains vivid, full-color pictures of spiders. (Just so you don’t do like I did and drop the book in sheer terror when you come to that part.)

    Learning about Big Cats with Scanorama Homeschool Science Books

    When I handed the Scanorama series book Deadly Predators over to my boys, they had a short conference about which section of the book they wanted to cover first.

    Exploring Deadly Animal Predators

    And, as I expected, they reached a unanimous decision: Big Cats. So big cats it is!

    Reading about Big Cats

    In the section, they got to examine five different big cats. And, since they’re already huge fans of wildlife, they knew some of the information. But, they were impressed at how long each animal was. I don’t think they had realized just how long a tiger can be before!

    Exploring Scanorama Predators Books

    When they discovered the “scan” picture of the tiger, they truly came to life!

    Studying Animals with Scanorama Interactive Books

    I had to keep telling them, “No. Wait. Let your brother have a turn.” and “You just did it. Let him try!” and “Okay, okay, everyone will get a chance.” I literally had two boys fighting over a book. That is an actual first in our household.

    Reading Scanorama Books Together

    Even our preschooler wanted to get in on the fun!

    Watching a Video about Big Cats for Kids

    Then we watched a short video about big cats. The boys really enjoyed it, as you can see.

    Actually, they were laughing at the way the lady in the video says “jaguar”, but they were still learning something, I swear!

    Learning about Big Cat Carnivores

    Finally, we took a look at the different kinds of prey each big cat eats.

    Matching Predators with Prey

    And the boys did a quick matching activity using the diagram in the Deadly Predators book.

    Predator and Prey Matching Activity

    Finito! And we had all that fun just from one section of one book in the Scanorama series! Be sure to stop by and browse all three book titles and pick up one your kids will get excited about too!

    Studying Animal Predators with Scanorama Interactive Books

    Want one of these books for your family? Enter to win the Scanorama book of your choice from Silver Dolphin! TEN WINNERS will receive one of the three Scanorama books: Deadly Predators, Dinosaurs, or Amazing Animals! To enter, just use the Giveaway Tools widget below! (Books will be shipped to US or Canadian addresses only.)

    Entry-Form

    To learn more about the awesome books available from Silver Dolphin, follow the company on social media:

    • Facebook
    • Twitter
    • Pinterest
    • YouTube
    • Instagram

    Now – for ANOTHER giveaway! 😉

    Scanorama Dinosaurs Book

    Remember that Scanorama book about dinosaurs I mentioned earlier?

    Reading about Armored Dinosaurs

    It’s just as awesome as the one about predators!

    Viewing Dinosaur Skeletons

    Right down to the scan-and-see-inside-the-creatures feature!

    Scanning Dinosaur Skeletons

    If you have kids that are dino-crazy, they’re sure to love this book!

    Examining Dinosaur Skeletons

    So I’m giving it away to one of my readers! To enter the giveaway, stop by the Look! We’re Learning! Facebook page at 8:12 p.m. EST tonight! It’s the easiest contest in the world to enter, I promise. 🙂 Full rules will be posted and the giveaway will be open for a week, so you have plenty of time to enter and win!


    We're loving the HoliMaths Multiplication Card Game - It's a great way for kids to make multiplication practice fun!

    Make Times Tables Fun with HoliMaths Multiplication Game for Kids!

    September 6, 2016 by Selena Robinson 1 Comment

    I’ve worked on multiplication with my oldest child for years. And I mean, actual YEARS. It took a while to get her to try learning her times tables, and then it took even longer to get her to work at remembering them. After several grades, the only hurdle left was getting her to enjoy working with multiplication. (Am I the only person who actually did multiplication problems for fun? Probably.)

    Thanks to HoliMaths, a brand new multiplication game for kids, practicing times tables can be actual, honest-to-goodness fun! Plus, several of my kids could play it together!

    Read on to see how practicing multiplication is a snap with HoliMaths!

    Disclosure: I received this product in exchange for this post and I was compensated for my time. All opinions are my own and I was not required to post a positive review.

    We're loving the HoliMaths Multiplication Card Game - It's a great way for kids to make multiplication practice fun!

    What is HoliMaths Multiplication Game for Kids?

    HoliMaths is a fun and flexible multiplication card game that kids can play with or without adult supervision. There are ten, yes, ten different ways to play with these cards, so you’re almost guaranteed that your kids will never get bored.

    HoliMaths Multiplication Card Game

    HoliMaths comes in two levels: One game featuring times tables from 1 to 6 and a second featuring times tables from 7 to 12. Each game can be played by up to six players, so if you have both games, you could have up to 12 people playing the game at any time.

    And, yes, the boxes are in Spanish. More on that in a bit.

    What's In the HoliMaths Game Box

    Here’s what’s inside the HoliMaths game box. It’s a lot, right?

    HoliMaths Multiplication Tables

    The game includes multiplication table charts – one for each player.

    HoliMaths Problem Cards

    There are also multiplication problem cards. In this set, there are times tables from 1 to 6, so each set is color coded. The ones tables cards are all grey, the twos tables cards are all yellow, and so on.

    The card at the bottom of the image with the symbols is the scoring system. Since each card is coded with a symbol, you can look at the point (puntaje) card to see how to count each correct pair. The player with the most points at the end wins!

    HoliMaths Solution Cards

    Finally, there are many small solution cards. These are pretty important, as you’ll see next.

    How to Play HoliMaths Multiplication Game for Kids

    So how do you play HoliMaths? As I mentioned earlier, there are ten different game play options. Since our game included kids of several grade levels, I started with the Classic Play method (Method #1). For a look at how to play each version of HoliMaths, see the How to Play section on the HoliMaths website.

    As I also mentioned earlier, most of the documentation in the game box is in Spanish. That’s because the game was originally designed for a Spanish-speaking audience. But you don’t have to be bilingual to play HoliMaths! There’s an English-language version of the website, complete with video instructions in English!

    HoliMaths Game Play

    This version is basically Go Fish, but with times tables. 🙂

    We chose three times tables to work with, since we had three players. Because my boys are in 2nd and 3rd grade, respectively, we used the ones, twos, and threes tables to play with.

    Using HoliMaths Multiplication Cards

    My sons haven’t memorized their multiplication tables yet, so we handed out a times tables chart for each player as we dealt out the cards. That way, they could find the solutions to the problems on their cards easily – without getting frustrated.

    Using HoliMaths Multiplication Card Game with Kids

    The idea is to make a match of a problem card with the correct solution card. My third grader, for example, had the problem card 1 x 12. When he looked at the correct color-coded table on the chart, he saw that 1 x 12 = 12. So he had to match that problem with a solution card featuring the number 12.

    Playing HoliMaths Multiplication Card Game

    As you might have noticed, some of the cards have smiley faces on them. These are “wild” cards – they can be used to represent any problem or solution you need to make a match. First, you clear all of the matches out of your hand as soon as the cards are dealt. Then, you tackle the remaining cards in the game.

    Making Matches with HoliMaths Multiplication Card Game

    As the kids removed the matching problems and solutions from their hands, they became much more comfortable with using the game cards. One of the suggestions in the “How to Play” section that I love was to have the kids call out the problem and solution once they matched them up. That way, you can see if they’re answering each problem correctly.

    My kids, who always love a bit of drama, decided to announce their math matches with great fanfare. Like this:

    Child 1: *Loud clearing of throat*

    Child 2: “What is it?”

    Child 1: “I declare that 1 times 12 is equal to 12!”

    It’s silly, but it works! They were reciting multiplication facts left and right!

    HoliMaths Multiplication Card Game Playing

    If you can’t find a match for your problem cards or solution cards, you draw another problem card from a pile on the table and you draw a solution card from the game bag. As the game continues, each player empties their hand and then counts up their score.

    Playing with HoliMaths Multiplication Card Game

    At the end of our game, our youngest player actually had the highest score! He was pretty excited about his success.

    We really loved playing this fun multiplication game for kids! I can’t wait to “plan” a morning of multiplication practice with my boys by just having them play HoliMaths for an hour or so. They’ll be thrilled!

    Be sure to visit HoliMaths to learn more about this game, all the ways you can play it with your kids, and how to get it for yourself!

    HoliMaths Multiplication Card Game - A Fun Way to Practice Times Tables with Kids

    Now for the fun – the HoliMaths giveaway! Use the Giveaway Tools widget below to enter! By the way, if you buy the product (in Kickstarter) and win the giveaway, HoliMaths will send you a refund. 😉

    Entry-Form

    And don’t forget to follow HoliMaths on social media for product news!

    • Instagram
    • Twitter
    • Facebook
    • Tumblr
    • Pinterest
    • Google+
    • YouTube

    Get more ideas on how to make math fun from my Math Mania board on Pinterest!

    The Ultimate Guide to Brain Breaks

    • 1
    • 2
    • 3
    • Next Page »
    Hi! I'm Selena, a teacher and a veteran homeschool mom to four. I'm so glad you're here!
    About Me Contact Terms of Use Privacy Policy Places I Share
    Facebook Twitter Pinterest Instagram
    Homeschool Printables Unit Studies Shop the Store
    Copyright ©2023, Look! We're Learning!. All Rights Reserved. Design by Pixel Me Designs