Look! We're Learning!

Early Learning. Happy Teaching.

  • Shop
  • Printables
  • Homeschool
  • Crafts
  • Parenting
  • Blog

10 Cute Valentine’s Day Toilet Paper Roll Crafts for Kids

January 14, 2025 by Selena Robinson Leave a Comment

Valentine’s Day is right around the corner and these cute Valentine’s Day toilet paper roll crafts for kids are just what your winter lesson plans have been missing!

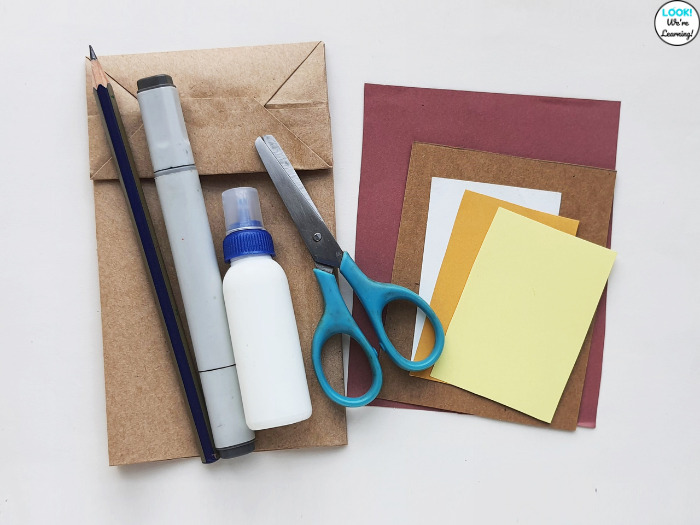
If your classroom is in need of supplies, don’t worry. This list of simple paper roll crafts only requires a few basic materials.

Plus, you can get parents to donate the toilet paper rolls. Win!

Valentine's Day Toilet Paper Roll Crafts for Kids

10 Fun and Easy Valentine’s Day Toilet Paper Roll Crafts for Kids

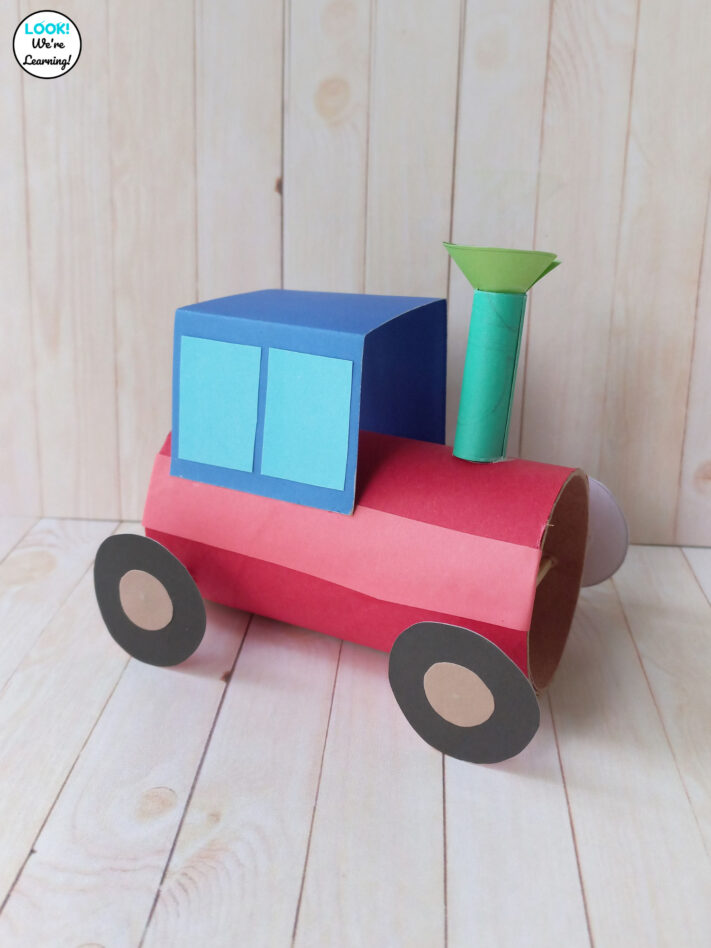
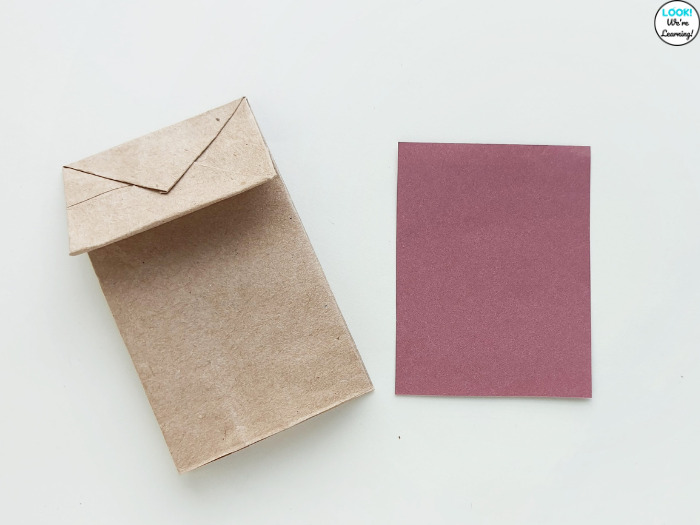
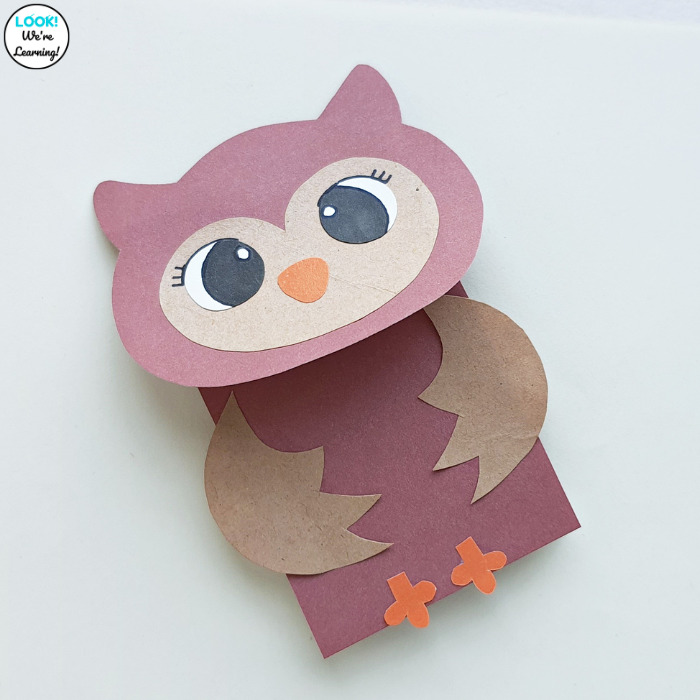
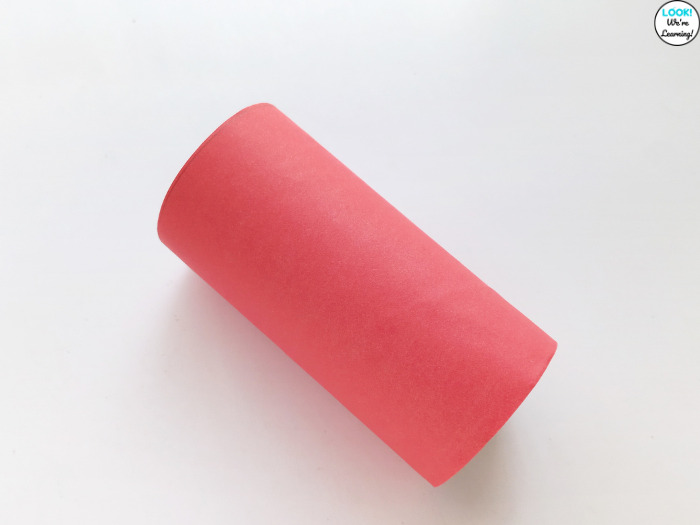
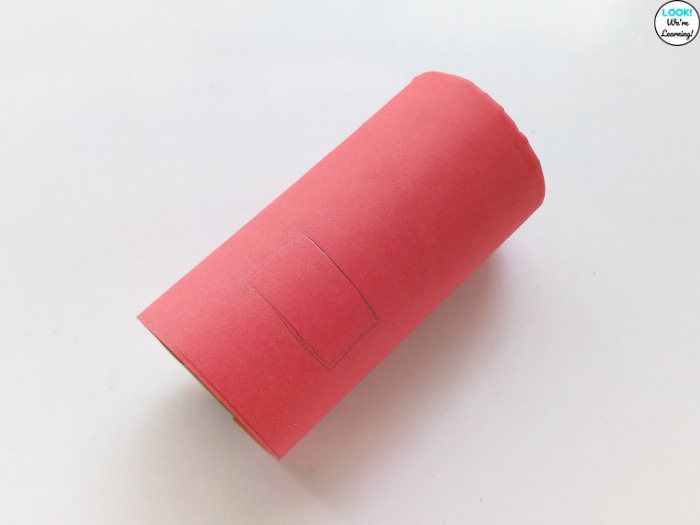
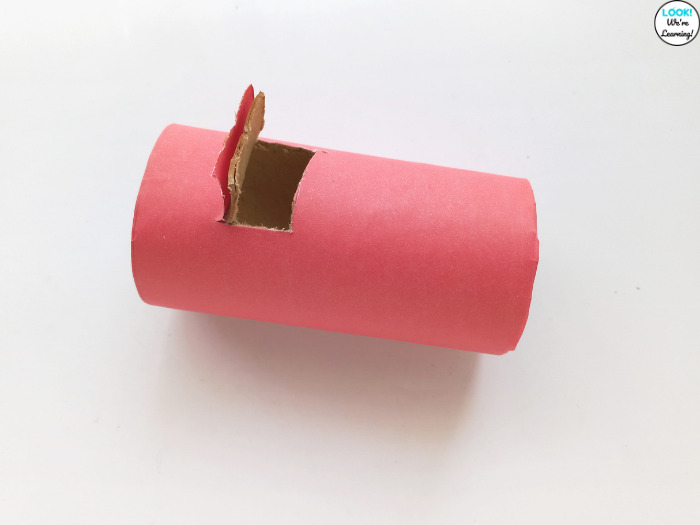
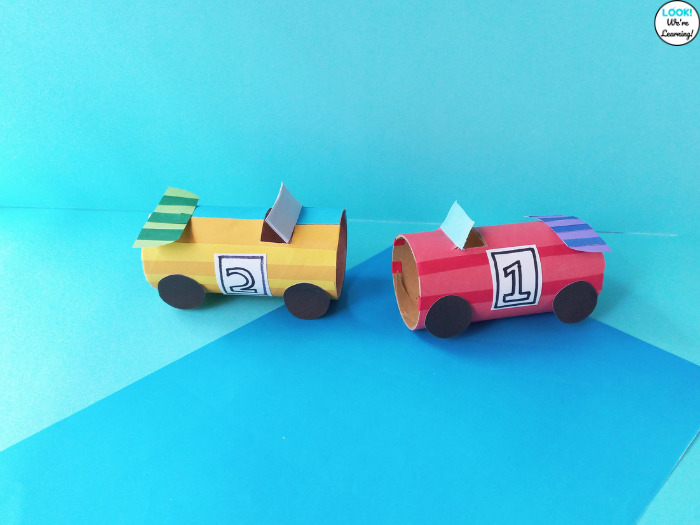
Toilet paper rolls aren’t just for the trash. They can be transformed into fun and creative Valentine’s Day crafts!

With some imagination, these everyday items can become adorable craft projects that add a personal touch to your Valentine’s Day lesson plans.

Easy Valentine's Day Toilet Paper Roll Crafts

10 Valentine's Day Toilet Paper Roll Crafts for Kids

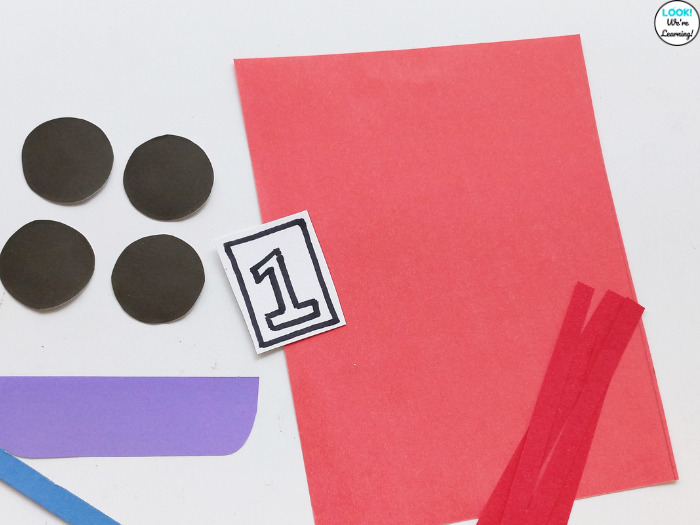
Take a few supplies and make these adorable Valentine's Day toilet paper roll crafts with your students!

Photo Credit: www.easypeasyandfun.com

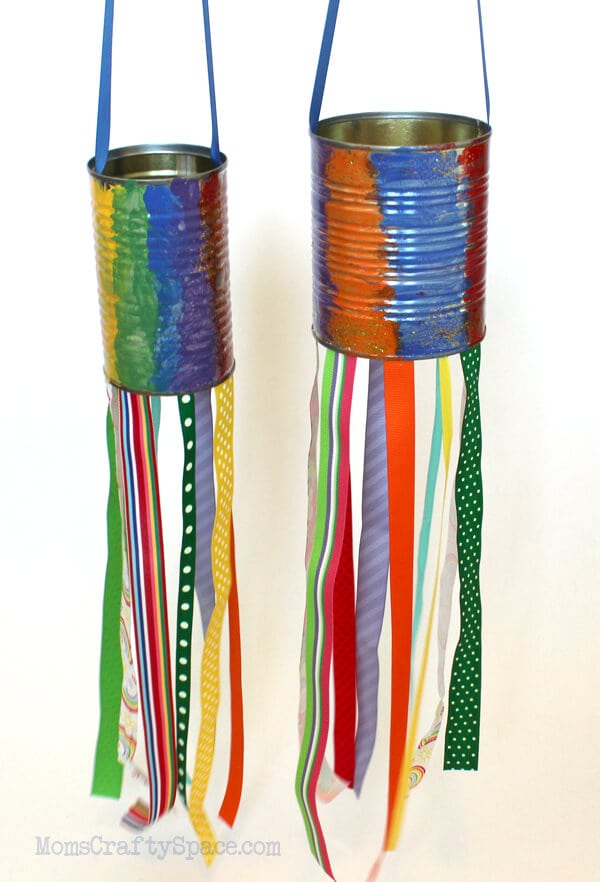
Valentines Day Windsock Toilet Paper Roll Craft by Easy Peasy and Fun

This is the perfect craft since February is often known as a pretty blustery month. This cute little toilet paper roll windsock is just the thing for a windy day.

Photo Credit: www.redtedart.com

Toilet Roll Love Bugs by Red Ted Art

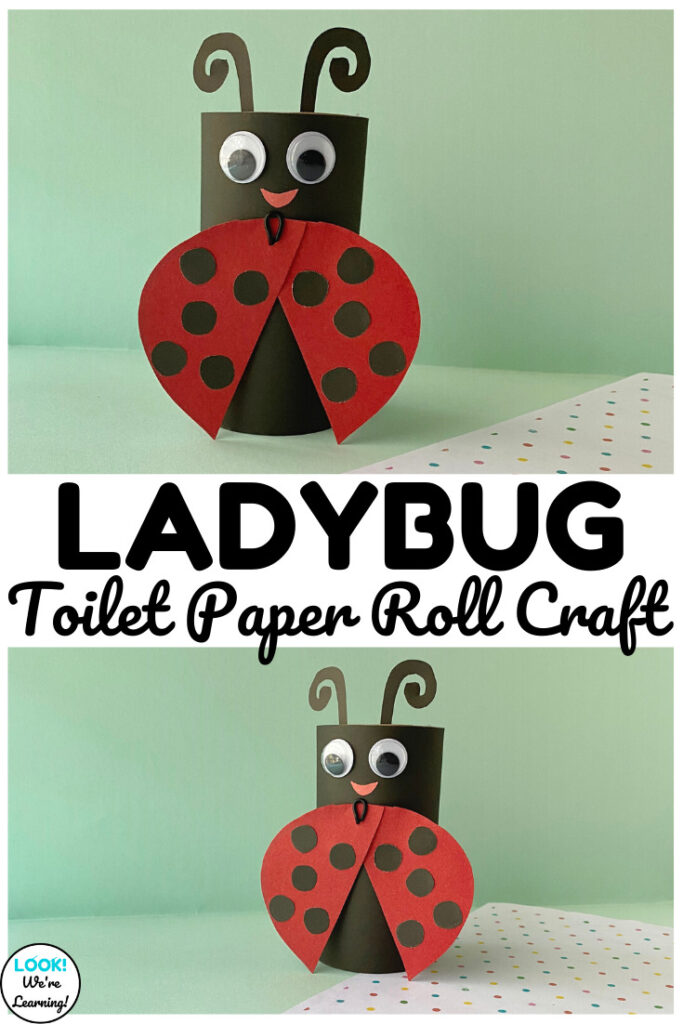
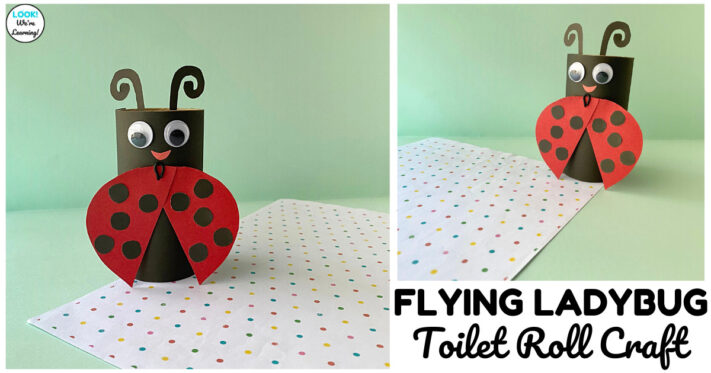
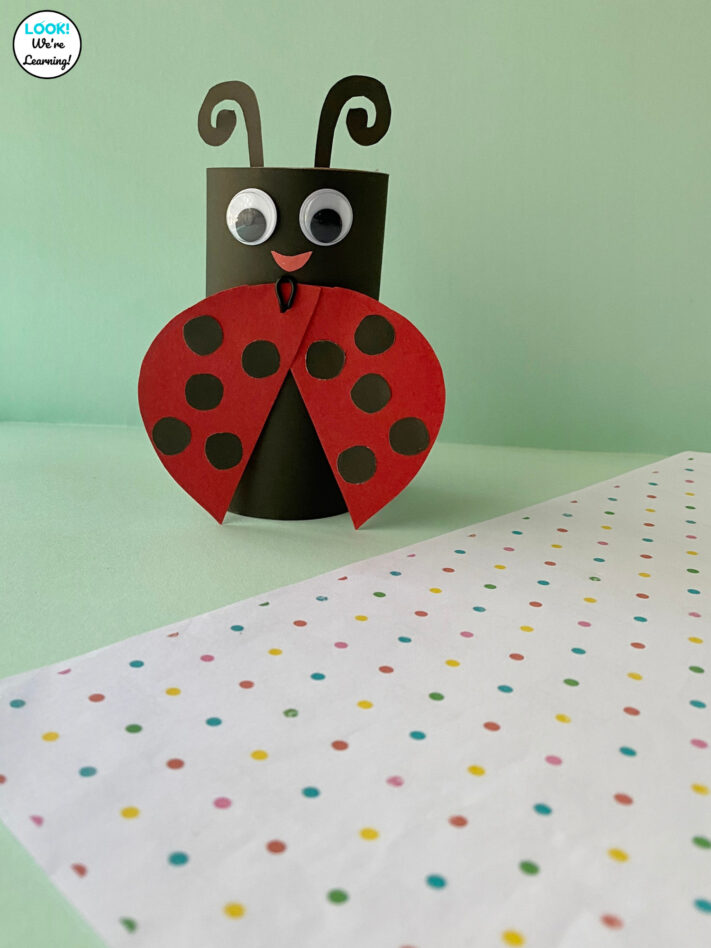
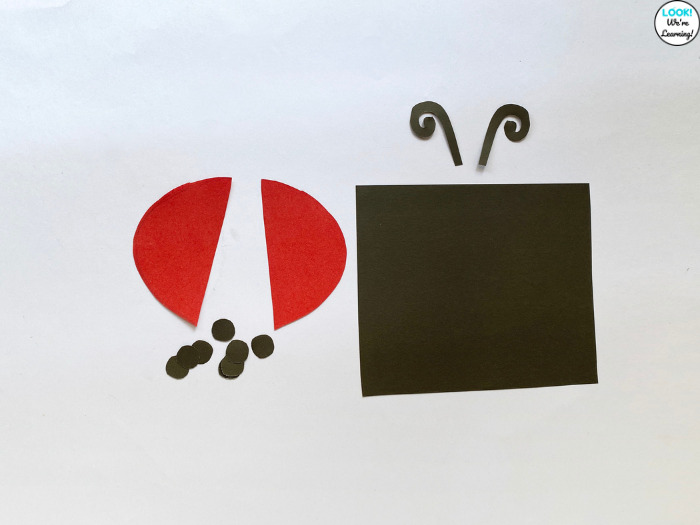
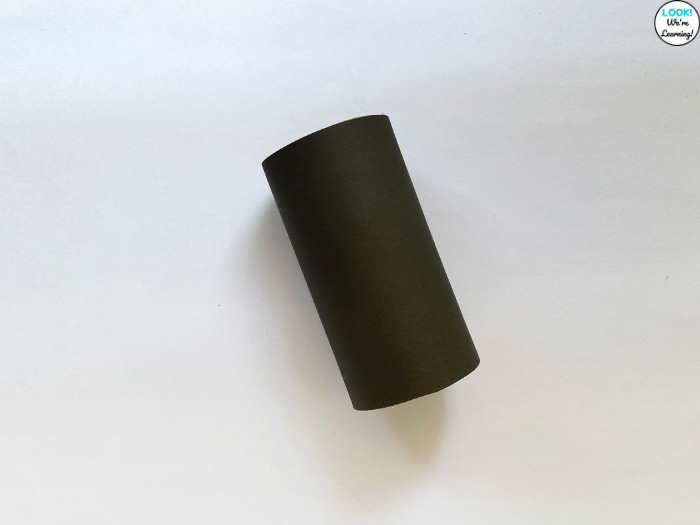
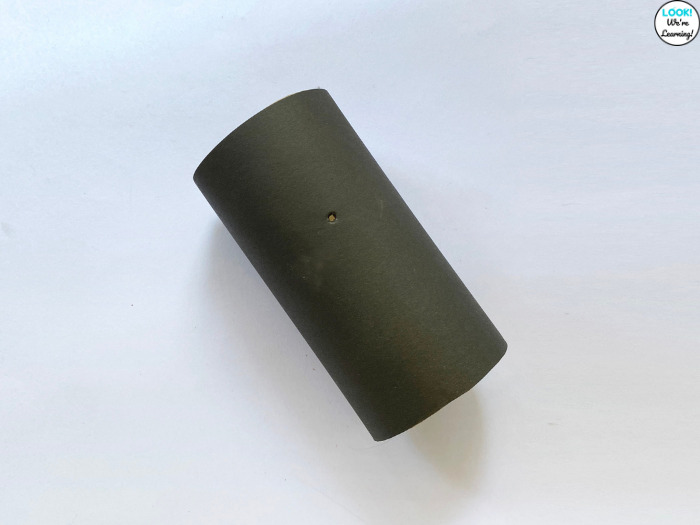
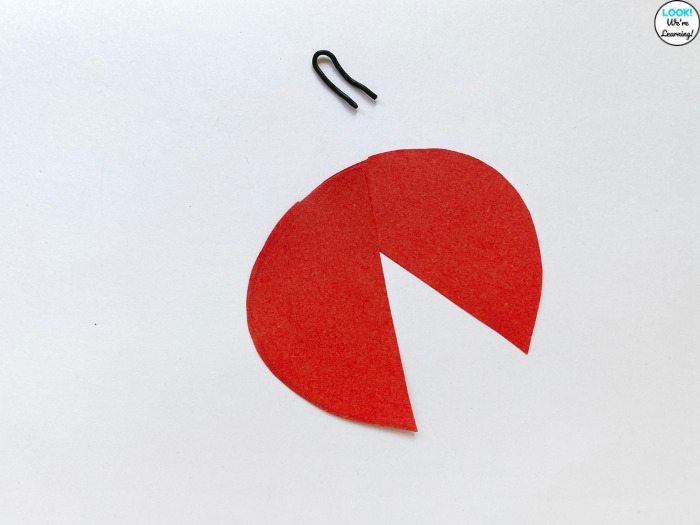
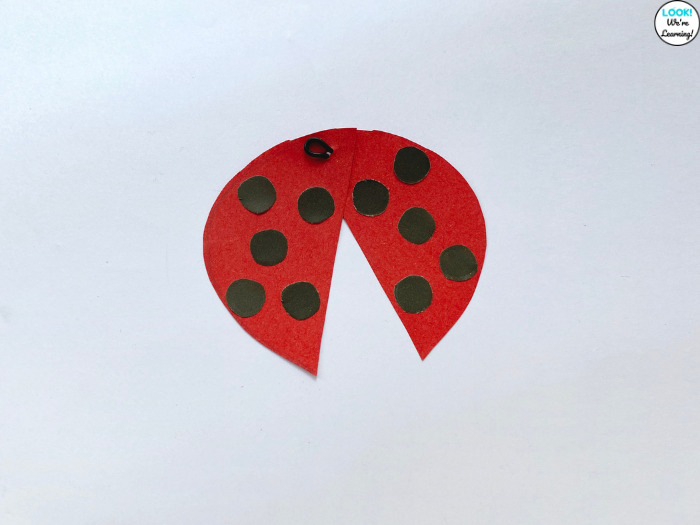
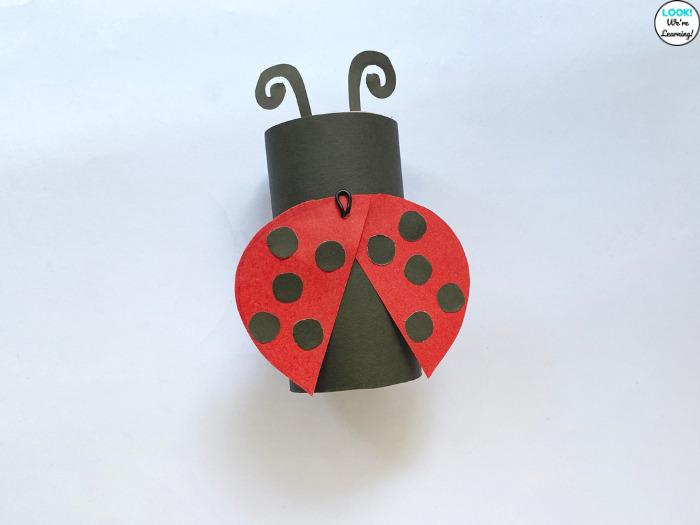
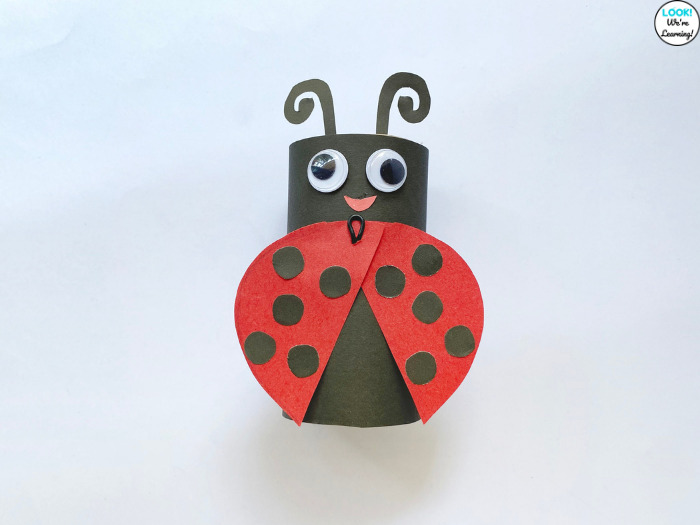
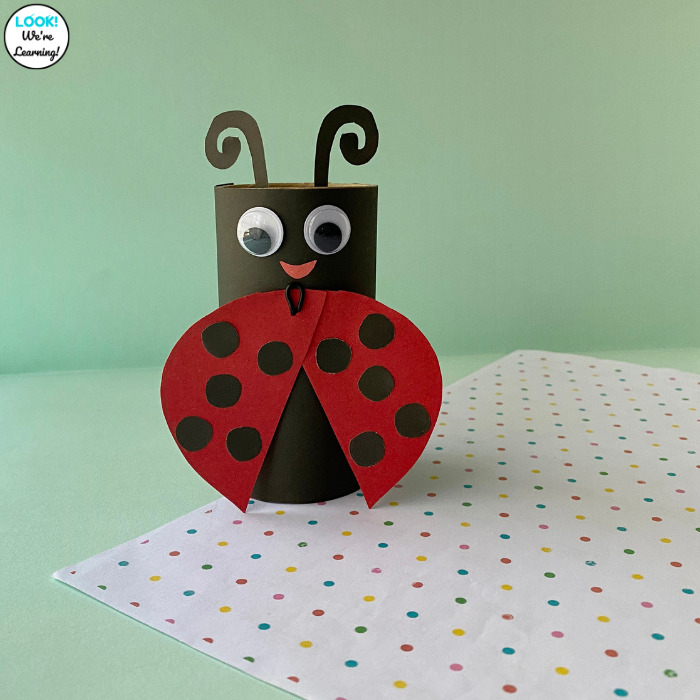
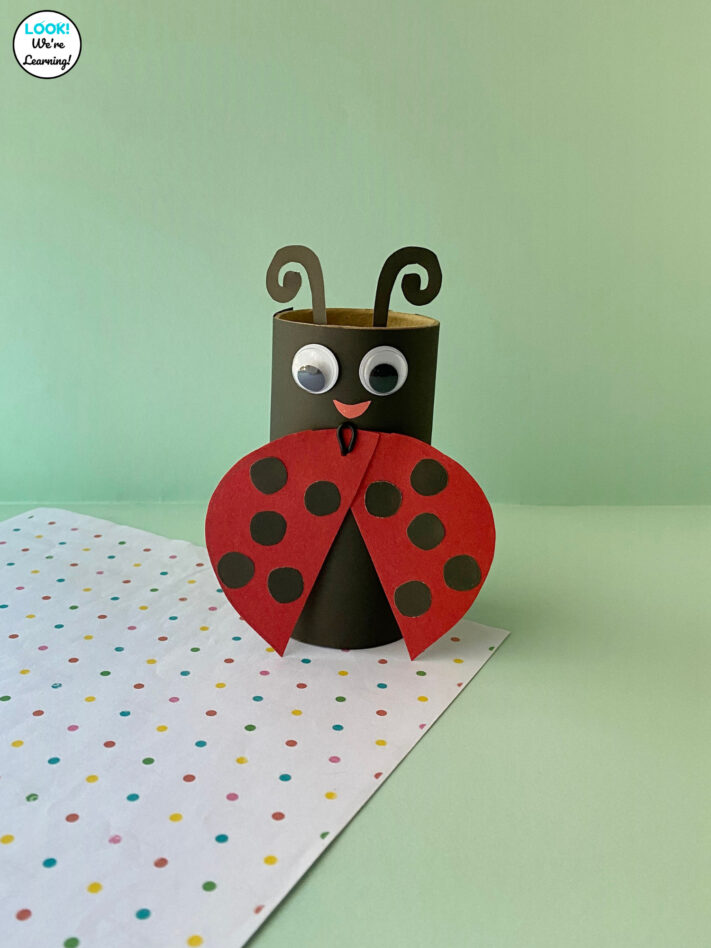
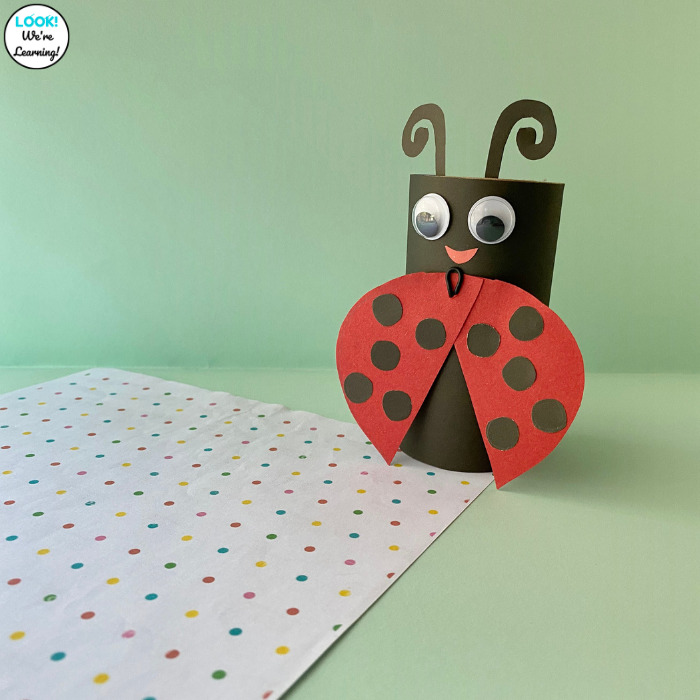
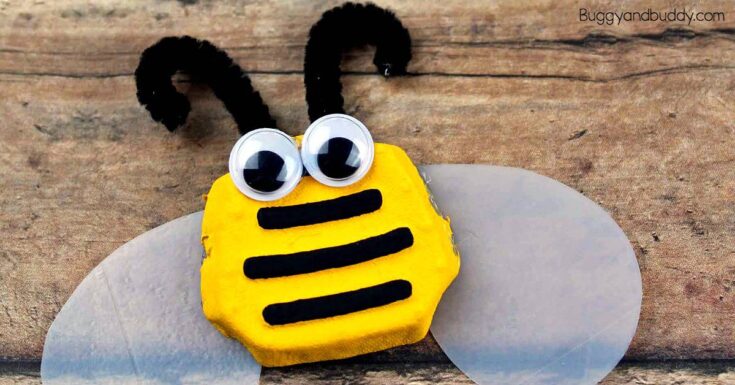
Love bugs are such a fun craft because they can look like just about anything. All of these cute little bugs are made from toilet paper rolls!

Photo Credit: www.mommymadethat.com

Toilet Paper Roll Heart Butterfly by Mommy Made That

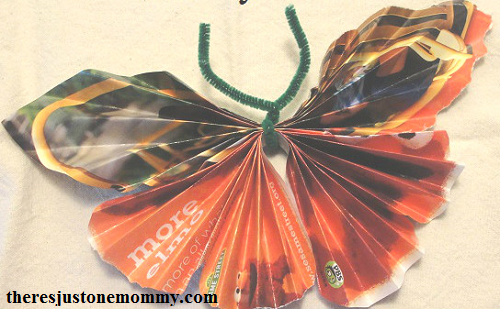
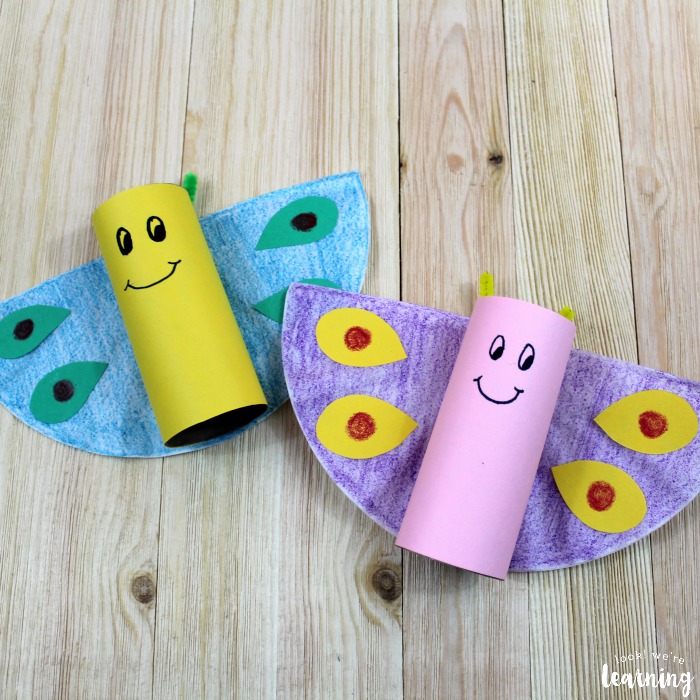
The pretty heart on this butterfly craft makes it perfect for Valentine’s Day. The printable template makes creating a lovely butterfly so easy!

Photo Credit: www.ourkidthings.com

Cardboard Roll Love Monster Craft by Our Kid Things

These love monsters are so cute that it’s monstrous. This is another fun craft that lets creativity run wild!

Photo Credit: kidscraftroom.com

3D Cardboard Tube Heart Art by Kids Craft Room

Here is a fun project that is perfect for classrooms. Kids can make a lot of cardboard hearts from toilet paper tubes and then glue those to a piece of paper to create 3D artwork.

Photo Credit: mommyevolution.com

Toilet Paper Roll Heart Painting by Mommy Evolution

Another excellent use for toilet paper roll hearts is as stamps. Kids can make a beautiful Valentine's Day card by stamping hearts with their toilet paper rolls.

Photo Credit: uniquegifter.com

Easy DIY Valentine Advent Calendar by Unique Gifter

Save up those toilet paper rolls for this craft. Making a countdown calendar for Valentine’s Day with little gifts for each day is such a fun way to get kids excited for February!

Photo Credit: momwifebusylife.com

Love Bug Toilet Paper Roll Craft by Mom Wife Busy Life

Here’s another cute little love bug made from a toilet paper roll. This one is perfect for small hands, since you can wrap the entire roll to make the love bug.

Photo Credit: www.thebestideasforkids.com

Toilet Paper Roll Bracelets by The Best Ideas for Kids

If you prefer a friendly take on Valentine's Day, this is a great friendship craft. Your students can whip these up in no time and exchange them with friends!

Photo Credit: www.messylittlemonster.com

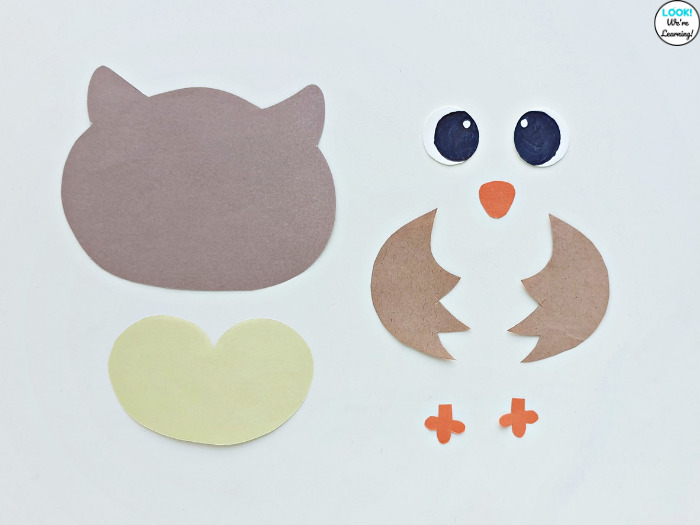
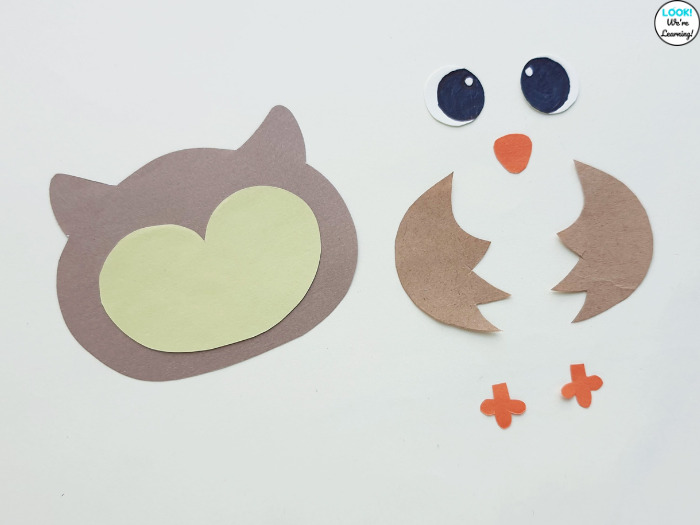
Easy Penguin Craft for Preschoolers by Messy Little Monster

This sweet little Valentine’s penguin just wants to spread a little love. Print the template, grab a toilet paper roll, and get crafting with your class!

If you decide to make any of these toilet paper roll crafts for Valentine’s Day, I’d love to know which ones your students liked the best!

Take a look at these other kids’ crafts you can make with toilet paper rolls!

Make a fun spring animal craft with this easy toilet paper roll ladybug craft with wings that move!
Make this fun and easy toilet paper roll snowman craft with little ones!
Make this simple toilet paper roll racecar craft with little ones for a quick transportation craft!

Filed Under: Crafts Tagged With: crafts, crafts for kids

Easy Paper Roll Train Craft for Kids

November 12, 2023 by Selena Robinson Leave a Comment

Transportation is one of my very favorite early learning themes.

Preschoolers get so excited whenever it’s time to talk about something that moves. (Maybe because they move so much themselves?)

Simple Toilet Paper Roll Train

When I was young, I grew up in a very small town with a train track. Hearing the sound of the train was a pretty common occurrence.

When I was a teenager, my father even turned our entire backyard into a model railroad layout. Honestly, that was a bit too far, but I digress.

Simple Toy Train Paper Roll Craft to Make with Kids

I still love trains. And I thought this fun toy train paper roll craft would make a simple and fun transportation activity to share with all of you!

Kids Toy Train Paper Craft

Keep reading to see how to make one with your students.

And for more fun with transportation, take a look at our Revving Racecar Scissor Skills Printables!

Make this simple toy train paper roll craft with kids for an easy transportation theme activity!

What You’ll Need to Make the Easy Paper Roll Train Craft

To make this toilet paper roll train craft, you’ll need the following: (Affiliate links are used below. For details, see our Disclosure Policy.)

  • Colored craft paper
  • Pencil
  • Scissors
  • Craft glue
  • Toothpicks
  • Toilet paper roll
  • Printer (with ink)
  • Printer paper
  • A copy of the Toy Train Paper Roll Craft Printable Template
Paper Roll Train Craft Template

Once you’ve printed the paper template, use a pencil to trace the individual pieces onto colored craft paper. Then cut each piece out.

If you’re working with very young children, you may want to do this step yourself before you begin the activity.

After you’ve cut out all the pieces, you’re ready to go!

How to Make a Train Paper Roll Craft for Kids

Glue the body of the train around the empty paper roll to form the train chassis.

Use the end of the scissors to poke holes through the paper roll.

You’ll need a total of four holes – one for each train wheel. (This step should be done by an adult.)

Easy Paper Roll Train Craft

Now it’s time to make the train “wheels”.

Glue the small circles onto the larger circles to form the wheels.

How to Make a Train Out of Toilet Paper Rolls

Attach a toothpick to the end of one wheel using craft glue.

Easy Train Out of Toilet Paper Rolls

Insert a toothpick through the hole on one end of the paper roll and push it through to the hole on the other side.

Attach the second wheel to the open end of the toothpick.

Easy Paper Roll Train Craft for Kids

Do the same on the other side to form the second set of wheels.

Making a Paper Toilet Roll Train

Now, make two fold lines in the train “top” piece.

Glue the four smaller rectangles on each end – two on each side. These are the train “windows”.

Simple Paper Roll Train

Finally, you’ll make the funnel.

Fold the smaller cylindrical piece into a tube and secure the end with craft glue. Fold the top funnel piece into a circle and glue the ends together.

Glue the two pieces together to form the funnel.

Making a Paper Roll Train Craft

All that’s left now is to glue the cabin and the funnel onto the train!

Easy Toy Train Paper Roll Craft

Such a cute train craft to make with little ones!

Looking for more activities about things that go? Try these transportation theme activities for early learners!

Make this simple toilet paper roll racecar craft with little ones for a quick transportation craft!
Teach early learners how to build basic math patterns with these colorful cars math pattern clip cards!
Get some early math practice with little ones and make this simple shape train craft!

Filed Under: Crafts Tagged With: crafts, crafts for kids, crafts for preschoolers

Easy Paper Bag Owl Craft for Kids

October 11, 2022 by Selena Robinson Leave a Comment

Have you started hearing hoots in your neighborhood yet?

As fall settles in and the days get shorter, we start to hear a hoot every so often.

Of course, we never see exactly where the owls are living, but they definitely make their presence heard.

If you’re doing a fall or nocturnal animal theme with your students this time of year, this easy paper bag owl craft is a must-try!

Fun Paper Bag Owl Craft for Kids

This is an easy (and fun!) project that even little ones can make.

And you can save a lot of craft time by prepping the project in advance.

Simple Paper Bag Owl

Read on to get the printable template and the full instructions.

Be sure to check out our list of beautiful children’s books about owls too!

This easy paper bag owl craft is a perfect fall project for kids to make!

Easy Paper Bag Owl Craft for Kids

What I love about this fall craft is that you can make a LOT of them at once. So if you’re working with a class, this is a perfect craft to try.

Easy Paper Bag Owl Craft

To make this simple paper bag owl craft, you’ll need the following: (Affiliate links are listed below. For details, see our Disclosure Policy.)

  • Printer (with ink)
  • Printer paper
  • Scissors (Note: If you are allowing students to cut out the template pieces themselves, use child-safe scissors)
  • Paper bag
  • Construction paper
  • Craft glue
  • Pencils
  • Washable markers
  • Printable Owl Craft Template
Paper Bag Owl Craft Supplies

You can really use any combination of construction paper colors. Browns, reds, and oranges are good for a fall theme, but real owls also come in black and white!

Simple Paper Bag Owl Craft

Choose a piece of construction paper for the owl’s body. Trim it to fit the paper bag.

After you’ve printed the craft template, use a pencil to trace the pieces onto colored paper.

Paper Bag Owl Template Pieces

Cut out the template pieces and you’re ready to get started!

If you’re making with craft with little ones, you can cut out the pieces in advance and make the project faster for them to finish.

How to Make a Paper Bag Owl

Begin by gluing the face onto the owl’s head.

How to Make an Owl Craft with Kids

Then add the eyes on each side and the beak in the center.

Easy Fall Owl Craft for Kids

Glue the trimmed piece of construction paper onto the long part of the paper bag (under the flap). This will be the owl’s body.

How to Make a Paper Bag Owl

Glue the owl’s head onto the paper bag flap.

How to Make an Owl Out of Paper

Finally, add the wings and feet by gluing the wings onto each side of the paper bag and the feet onto the bottom edge.

Paper Bag Owl Craft

Your paper bag owl is all done!

Simple Paper Owl Craft

You can make an entire owl family by using different colors or by changing the faces a bit.

Cute Paper Bag Owl for Kids to Make

Try some of these other owl-themed activities with early learners!

These owl books for kids feature gorgeous pictures and illustrations for learning about these nocturnal flyers!
Teach early students how to recognize animals with different sleeping habits with this hands-on diurnal and nocturnal animals sorting activity!
Make a fun and simple fall animal craft with this toilet paper roll owl craft kids can make!

Filed Under: Crafts Tagged With: crafts, crafts for kids

Easy Toilet Paper Racecar Craft for Kids

July 12, 2022 by Selena Robinson Leave a Comment

Looking for an easy kid-friendly craft to add to your transportation unit?

This easy toilet paper racecar craft is perfect!

It’s simple, only requires a few supplies, and just plain cute too.

Easy Toilet Paper Roll Racecar Craft

One of the books I grew up with was Richard Scarry’s What Do People Do All Day?. I’m sure many of you remember that one too.

What always caught my eye was all the cars and trucks that moved through the town every day. (I think Sergeant Murphy was directing traffic in one of the scenes.)

Paper Roll Car Craft for Kids

Transportation is still a great theme for early learners, which makes this racecar craft a perfect project to make with preschoolers and kindergartners!

Make this simple toilet paper roll racecar craft with little ones for a quick transportation craft!

Read on to get the full instructions and printable template to make it with your students.

And, for more about transportation, check out our printable Racecar Scissor Skills Printables too!

Easy Toilet Paper Roll Racecar Craft

When you’re ready to make this craft, let your students choose what color they’d like. Any craft or construction paper works for this project.

Simple Paper Roll Car Craft for Kindergarten

To make this easy paper roll racecar, you’ll need the following: (Affiliate links are listed below. For details, see our Disclosure Policy.)

  • Colored craft paper
  • Cardstock
  • Empty toilet paper roll
  • Pencil
  • Scissors
  • Ruler
  • Craft glue
  • Washable markers
  • Printer (with ink)
  • A copy of the Toilet Paper Roll Racecar Craft Template
How to Make a Paper Roll Race Car

After you’ve downloaded the Toilet Paper Roll Racecar Craft Template, print it out on cardstock paper. Use scissors to cut out the template pieces. (You may need to print two to have enough stripes to decorate your car.)

Making a Toilet Paper Racecar

Trace each of the template pieces onto the colored paper. Cut them out and you’re ready to get started.

If you’re working with multiple students, you may want to do this step in advance. Then the kids can get started right away.

How to Make a Toilet Paper Roll Race Car

First, wrap the colored craft paper around the empty toilet paper roll. Use scissors to cut off the excess paper.

Secure the ends with glue.

How to Make a Paper Roll Car

Trace the rectangle from the template onto the toilet paper roll.

How to Make a Racecar Out of a Toilet Paper Roll

Cut the rectangle shape out on three sides, leaving the edge closest to the front in place. (This step is best done by an adult.)

Reach into the toilet paper to push the cut sides up. This forms the “windshield” of the car.

Making an Easy Toilet Paper Roll Car

Cover the windshield with a piece of light blue craft paper. Glue it in place.

Simple Paper Roll Racecar

Trace the stripes onto craft paper and glue them onto the sides of the car.

Paper Roll Car Craft for Kids to Make

Make the rear wing by tracing the wing template and shorter stripes onto craft paper. Glue the stripes onto the wing and attach to the back of the car.

Trace (or draw) the number template and glue it to the side.

Cute Racecar Paper Roll Craft

Glue the wheels on and you’re done!

Toilet Paper Racecar Craft for Kids

You might choose to have your class make an entire fleet of cars!

Easy Race Car Craft for Kids

See how many different colors your students can use!

Try some of these other simple transportation crafts for kids to make!

Get ready for back to school with this super cute paper school bus craft for kids! So easy to make, even for little ones!
Get some early math practice with little ones and make this simple shape train craft!
This fun paper pirate ship craft is a perfect activity for a pirate unit!

Filed Under: Crafts Tagged With: crafts, crafts for kids, transportation

Paper Plate Butterfly Life Cycle Craft for Kids

April 12, 2022 by Selena Robinson Leave a Comment

Have you been studying butterfly life cycles with your students?

I always love this topic, because it’s so cool for kids to see how animals grow to become adults – just like they’re doing.

If you’re looking for a hands-on way to reinforce this concept, this paper plate butterfly life cycle craft is perfect!

Easy Butterfly Life Cycle Craft for Kids

With this easy science craft for kids, you can practice fine motor skills, get some artistic practice, and learn a science lesson. Win!

Simple Paper Plate Butterfly Craft

Read on to get the full project instructions and to pick up the printable template you’ll need to make this craft.

Need more ways to teach this to your class? Don’t miss our printable Butterfly Life Cycle Sequencing Activity!

Learn about how butterflies grow with this fun and easy butterfly life cycle craft for kids!

Easy Paper Plate Butterfly Life Cycle Craft

To make this easy butterfly life cycle craft, you’ll need the following: (Affiliate links are used below. For details, see our Disclosure Policy.)

  • Printer (with ink)
  • Printer paper
  • Child-safe scissors
  • Construction paper
  • Washable markers
  • Pencil
  • Craft glue
  • Paper plate
  • Printable Butterfly Life Cycle Craft Template
Paper Plate Butterfly Life Cycle Craft

To get started, print out the Butterfly Craft Template, which includes the pieces you’ll need to make this project.

Use scissors to cut out the pieces. Then lay them on construction paper and use a pencil to trace each outline.

Caterpillar Craft Template Pieces

Cut out those pieces and you’re ready to get to work!

If you’re doing this with several children, you can prepare the body pieces beforehand. Then students can simply assemble the craft on their own.

How to Make the Paper Plate Life Cycle Craft

This butterfly life cycle craft project features four stages: egg, chrysalis, caterpillar, butterfly.

Start by assembling the egg stage.

Egg Stage Life Cycle Craft

Glue the leaves onto the branch piece. Then glue the three “eggs” on top.

Chrysalis Life Stage Craft

Now, move on to the chrysalis. Glue the chrysalis pod onto the lower branch, then attach the rounded corner on the left side.

If you like, you can use a marker to add ribbed lines along the right side.

Making a Paper Caterpillar

Now it’s time to assemble the caterpillar!

Start by gluing the antennae and legs onto the body pieces.

How to Make a Paper Caterpillar

Then use glue to attach the body pieces together and form the caterpillar.

Simple Caterpillar Craft for Kids

Add a happy face with a marker.

Butterfly Craft Paper Template Pieces

We can finally make the butterfly!

Glue the wing sections onto the wing template. Then glue the body section in the center of the wing template.

Add a happy face to the butterfly.

Butterfly Life Cycle Stages Craft

Once you’ve assembled all four life cycle stages, it’s time to place them in the right order.

Assembling the Butterfly Life Cycle Craft

Start by cutting out a piece of construction paper to fit inside the paper plate.

This is a good point to talk with students and ask:

  • Which stage is the first in the butterfly life cycle?
  • After that, which stage comes next?
Simple Butterfly Life Cycle Craft for Kids

Proceed through the entire cycle and, once students have identified the correct order, have them glue the stages onto the plate.

Butterfly Life Cycle Paper Plate Craft

And we’re done!

Paper Plate Butterfly Life Cycle Craft for Kids

It’s a craft, a science project, and a fine motor skill strengthener – all in one!

Get the printable project instructions below.

Paper Plate Butterfly Life Cycle Craft for Kids

Paper Plate Butterfly Life Cycle Craft

Learn about how butterflies grow from egg to adult with this fun paper plate butterfly life cycle craft!

Prep Time 15 minutes
Active Time 15 minutes
Total Time 30 minutes
Difficulty Easy

Materials

  • Printer paper
  • Construction paper
  • Washable markers
  • Pencil
  • Craft glue
  • Paper plate

Tools

  • Printer (with ink)
  • Child-safe scissors

Instructions

  1. Start by printing out the Printable Butterfly Life Cycle Craft Template.
  2. Cut out the template pieces.
  3. Trace the pieces onto construction paper.
  4. Cut out the construction paper pieces.
  5. Assemble the egg stage: Glue the leaves onto the first branch piece. Add the eggs on the leaf.
  6. Assemble the chrysalis stage: Glue the chrysalis pod onto the second branch piece. Add the rounded section to the left side.
  7. Assemble the caterpillar stage: Glue the antennae and legs onto the body circles. Glue the body circles together to form the caterpillar. Use a marker to draw a happy face.
  8. Assemble the butterfly stage: Glue the wing sections onto the wing template. Glue the body section in the center of the wing template. Use a marker to draw a happy face.
  9. Cut out a piece of construction paper to fit the center of the paper plate. Glue it down.
  10. Add the life cycle stages to the paper plate in the following order: butterfly at the top, then egg stage on the right side, caterpillar on the bottom, and chrysalis on the left side.

Recommended Products

As an Amazon Associate and member of other affiliate programs, I earn from qualifying purchases.

  • Epson EcoTank ET-3760 Wireless Color All-in-One Supertank Printer
    Epson EcoTank ET-3760 Wireless Color All-in-One Supertank Printer
  • SunWorks Construction Paper, 100 Sheets
    SunWorks Construction Paper, 100 Sheets
  • Fiskars Kids Scissors Softgrip Blunt-tip
    Fiskars Kids Scissors Softgrip Blunt-tip
© Selena Robinson
Project Type: Paper Crafts / Category: Crafts

Try some of these other spring craft projects for kids!

Gather up a few basic craft supplies and make this easy coffee filter frog craft for kids!
Make a fun spring animal craft with this easy toilet paper roll ladybug craft with wings that move!
This simple paper bee craft is a fun way to make an easy spring or summer craft with kids!

Filed Under: Crafts, Science Tagged With: crafts for kids, life cycle

Easy Toilet Paper Roll Ladybug Craft for Kids

January 27, 2022 by Selena Robinson Leave a Comment

I’ll be honest.

I’m not the biggest fan of insects.

And I live in the South, where every spring and summer is basically an insect family reunion, so those months are a little bit of a struggle for me.

But I do like ladybugs. They’re so adorable that I’ll even pick them up to show the kids.

So I wanted to share a super cute (and easy!) toilet paper roll ladybug craft that will be perfect for a spring or insect unit with early learners!

Easy Toilet Paper Roll Ladybug Craft

This project only requires a few crafting supplies that you likely already have.

And it’s so cute too!

How to Make a Ladybug with a Paper Roll

Keep reading to get the full instructions and the printable template.

And, for more spring learning ideas in early grades, take a look at our All About Flowers Early Elementary Unit!

Make a fun spring animal craft with this easy toilet paper roll ladybug craft with wings that move!

Easy Toilet Paper Roll Ladybug Craft for Kids

This simple ladybug is a great spring craft for kids to make.

You can walk students through each step and let them add their own ideas as they go along.

They’d be perfect for a spring class display or for parent night!

Paper Roll Ladybug Craft

To make this spring craft, you’ll need the following: (Affiliate links are used below. For details, see our Disclosure Policy.)

  • Empty toilet paper roll
  • Printer (with ink)
  • Printer paper
  • Pencil
  • Scissors
  • Construction paper
  • Plastic wire – or – brass paper fastener
  • Wiggly eyes
  • Glue stick
  • Printable ladybug template (Blackline or color)
Making a Toilet Paper Roll Ladybug Craft

Once you’ve printed the template, you can get started by tracing the pieces onto construction paper.

If you plan to cut the pieces out yourself, regular scissors will do. But if you want your students to complete that step, be sure to use child-safe scissors.

A note: If you use the blackline template, you can have your students color the pieces in too!

How to Make a Paper Roll Ladybug

Now we’re ready to get started.

How to Make a Toilet Paper Roll Ladybug

Begin by wrapping the black body piece around the empty toilet roll.

Use glue to secure the ends.

Making a Toilet Roll Ladybug

Take a sharpened pencil or the point of a pair of scissors and make a small hole about 1/3 of the way from the top of the toilet roll.

This step should only be completed by an adult.

You may want to prepare the rolls to this step in advance before you have the kids get involved.

Easy Toilet Roll Ladybug Craft for Kids

Cut a piece of plastic wire and bend it into a narrow semi-circle. You’ll use this to attach the bug’s “wings”.

Lay the two wing pieces on top of each other so that the points of the wings overlap.

Easy Toilet Roll Insect Craft

Press the open ends of the wire together to close the loop.

Then poke both ends through the overlapping wings.

Making a Paper Roll Ladybug

Use glue to attach the ladybug’s spots to both of the wings.

How to Make a Ladybug from a Toilet Paper Roll

Now it’s time to attach the wings!

Press the closed wire loop through the hole in the toilet roll. The wings should appear on top.

Toilet Paper Roll Ladybug Craft for Kids

Use glue to attach the antenna inside the front edge of the toilet roll.

You’ll want them to appear towards the front.

Smiling Ladybug Craft with a Toilet Paper Roll

All that’s left to do now is to add the face!

The templates include paper eyes, so you can have students use those. Or you can stick a pair of wiggly eyes on instead.

Simple Paper Roll Ladybug for Kids

Then cut out a small smile.

Glue it on and we’re all done!

Making a Simple Ladybug from a Paper Roll

Ta-da! Let students make their bugs fly by moving the wings out and in.

See the printable toilet paper roll ladybug craft project instructions below!

Easy Toilet Paper Roll Ladybug Craft for Kids

Easy Paper Roll Ladybug Craft

Make up a quick spring animal craft with this fun toilet paper roll ladybug craft! The wings actually move!

Prep Time 5 minutes
Active Time 15 minutes
Total Time 20 minutes
Difficulty Easy

Materials

  • Empty toilet paper roll
  • Construction paper
  • Printer paper
  • Wiggly eyes
  • Plastic wire

Tools

  • Printer
  • Scissors
  • Glue stick

Instructions

  1. Start by printing the Blackline Ladybug Craft Template or the Color Ladybug Craft Template. (If you use the blackline version, have students color the pieces before proceeding.)
  2. Trace the template pieces onto construction paper and cut them out.
  3. Wrap the body piece around the empty toilet paper roll. Use glue to secure the ends.
  4. Use a sharp point to poke a hole in the top 1/3 of the toilet paper roll. (Only adults should complete this step.)
  5. Cut a piece of plastic wire and bend it into a narrow semicircle.
  6. Overlap the ladybug's wings and poke a small hole through both of them.
  7. Press the open ends of the wire together and push the closed ends through the hole in both wings.
  8. Glue the ladybug's spots onto each of the wings.
  9. Press the closed end of the wire (with the wings) through the hole in the paper roll. The wings should appear on the front.
  10. Glue the antenna onto the inside front edge of the paper roll.
  11. Add wiggly eyes.
  12. Cut out a small smile and glue it under the eyes.

Notes

Make an entire family of ladybugs! Try letting students choose different colors or make different facial expressions.

© Selena Robinson
Project Type: Paper Crafts / Category: Crafts

Try some of these other spring animal crafts for kids too!

Make this easy toilet paper roll chick craft with kids this spring!
This simple paper bee craft is a fun way to make an easy spring or summer craft with kids!
Share an easy summer craft with the kids and make this easy paper ladybug craft! So fun for little hands!

Filed Under: Crafts Tagged With: crafts, crafts for kids, toilet roll crafts for kids

Over 25 Easy Recycled Craft Ideas for Kids to Make

January 25, 2022 by Selena Robinson Leave a Comment

We all want to do what we can to make our planet safer for future generations.

And one of the easiest things we can do now is to recycle materials we no longer need. Every time we reuse something, we save it from the landfill for a bit longer.

And that’s always a good thing.

Today I’m sharing over 25 easy recycled craft ideas for kids to make!

Over 25 Recycled Crafts for Kids

These are fantastic for in-class projects or parents who want to make crafts with their kids at home!

And they all make use of materials that can be reused, so they’re a wonderful introduction to the idea of recycling and repurposing too.

Read on to see the full list.

And be sure to take a look at our Coffee Filter Earth Craft if you’re looking for more Earth Day ideas!

Make the most of your recyclables with this list of fun recycled crafts for kids to create!

What You Need to Try These Easy Recycled Craft Ideas for Kids

Most of these crafts use materials you likely already have, such as paper towel and tissue paper rolls.

Here are some other recycled materials that are good for making recycled crafts:

  • Empty plastic bottles
  • Cardboard (whole or scrap)
  • Compact discs
  • Shoeboxes

In most cases, as long as the recycled material is clean, you can use it as a base for a craft project.

Fun Recycled Crafts for Kids to Make

How to Use Recycled Craft Ideas with Students

Many of these recycled crafts feature animals, so they’d make a great project for a science unit such as zoo animals, the forest, or winter.

You can also use any of these as a craft project for an Earth Day or a recycling unit. Invite your students to save recyclables from home and bring them in to participate!

Recycled Crafts Books for Kids

Would you like even more ways to make use of recycled materials with young learners?

Here are a few books with plenty of kids’ crafts that use recyclables too! (Affiliate links are listed below. For details, see our Disclosure Policy.)

  • Cardboard Creations: Open-Ended Exploration with Recycled Materials
  • Fun and Easy Crafting with Recycled Materials: 60 Cool Projects that Reimagine Paper Rolls, Egg Cartons, Jars and More
  • Low-Mess Crafts for Kids: 72 Projects to Create Your Own Magical Worlds
  • Cardboard Creations for Kids: 50 Fun and Inventive Crafts Using Recycled Materials

Get a look at the full list of easy recycled crafts below!

Over 25 Easy Recycled Craft Ideas for Kids to Make

Try some of these easy recycled craft ideas for kids to make! There are crafts here that work for all seasons and for kids of all ages!

1

Easy Toilet Paper Roll Ladybug Craft for Kids

Make up a quick spring animal craft with this fun toilet paper roll ladybug craft! The wings actually move!

2

Watercolor & Recycled Newspaper Flower Craft

Photo Credit: whereimaginationgrows.com

Gather up pieces of newspaper and watercolor paints to create these paper flowers!

3

DIY Recycled Plastic Bottle Poppy Craft

Photo Credit: www.muminthemadhouse.com

Turn bottles into flowers with this plastic bottle poppy craft!

4

Earth Day Recyclable Necklace Craft

Photo Credit: littlebinsforlittlehands.com

This earth-themed necklace craft is perfect for Earth Day!

5

Kids Craft: Recycled Tin Can Windsocks

Photo Credit: www.happinessishomemade.net

Hang these recycled tin can windsocks on the front porch!

6

Recycled Bubble Wrap Tree Craft

Photo Credit: raisinglittlesuperheroes.com

Use the bubble wrap from your packages to make this tree craft!

7

Easy Fall Snow Globe Craft for Kids

Have an old baby food jar lying around? Turn it into a fall snow globe!

8

Moving Windmill Recycled Craft

Photo Credit: emmaowl.com

Use plastic cups to make these windmills that actually turn!

9

Easy Paper Bag Fox Craft for Kids

Make a paper bag fox (and forest friends)!

10

Recycled Cardboard Rainbow Craft

Photo Credit: www.stillplayingschool.com

Use old cardboard to make a recycled rainbow!

11

Easy Paper Roll Rocket Craft for Kids

Make a set of rockets out of paper towel rolls!

12

Recycled CD Flamingo Kids Craft

Photo Credit: www.iheartartsncrafts.com

Use an old CD to create a flamingo with kids!

13

Easy Toilet Paper Roll Snowman Craft for Kids

Empty paper rolls make perfect winter snowmen (and snowwomen)!

14

Recycled Apple Craft

Photo Credit: www.notimeforflashcards.com

Make a simple apple craft with cardboard and paint!

15

Easy Toilet Paper Roll Fox Craft for Kids

Make an adorable fox out of an empty toilet paper roll!

16

Weaving for Kids- a Recycled Plastic Bottle Craft

Photo Credit: www.kitchentableclassroom.com

Ever heard of t-shirt yarn? Cut up a few old shirts to make this yarn-woven craft!

17

Easy Toilet Paper Roll Owl Craft for Kids

Use old toilet paper rolls to make a family of cute owls!

18

Colorful Butterfly Craft

Photo Credit: theresjustonemommy.com

Magazine pages make perfect butterfly wings in this recycled craft!

19

Easy Lion Toilet Paper Roll Craft for Kids

This toilet paper roll lion craft is so cute for a zoo unit!

20

Farm Shoebox Diorama Craft

Head down to the farm with this easy shoebox farm diorama!

21

Engineering 201: DIY Recycled Suspension Bridge

Photo Credit: leftbraincraftbrain.com

Take spare cardboard and turn it into a STEM activity with this recycled suspension bridge project!

22

Easy Toilet Roll Butterfly Craft for Kids

Colorful coffee filters and empty paper rolls are all you need for these cute butterflies!

23

Easy Toilet Paper Roll Chick Craft for Kids

Make up this simple toilet paper roll chick craft for a spring or farm animal craft with young learners!

24

Bumble Bee Craft for Kids Using Recycled Materials

Photo Credit: buggyandbuddy.com

Make adorable bumblebees with just a few recycled materials!

25

Super Cute Printable Farm Paper Bag Puppets

Make a set of barnyard animals from brown paper bags!

26

Beach Shoebox Diorama Craft

Take a trip to the beach with this easy recycled shoebox beach diorama craft!

Try these simple craft ideas for kids too!

Get some early math practice with little ones and make this simple shape train craft!
Make this fun and easy origami pig bookmark craft as a fall art project!
This fun paper pirate ship craft is a perfect activity for a pirate unit!

Filed Under: Crafts Tagged With: crafts, crafts for kids

Easy Shape Train Craft for Kids

January 20, 2022 by Selena Robinson Leave a Comment

Shapes are one of my very favorite concepts to cover with preschoolers and kindergarteners.

They’re all around us, so it’s fun to show students the circle in the clock on the wall or the square in the window.

Transportation is another of my favorite themes for preschool.

Which makes this easy shape train craft a perfect way to teach both at the same time!

Easy Shape Train Craft for Kids

If you’re looking for a simple, hands-on way to talk about shapes or transportation, this is it!

It’s simple enough for young learners to complete on their own.

But it also provides a good way to talk about real world math with students, even in preschool.

Simple Shape Train Craft for Kids

Get the full instructions and the printable template below!

Need more ways to talk about shapes in early grades? Take a look at our hands-on Shape Sorting Mats!

Get some early math practice with little ones and make this simple shape train craft!

Easy Shape Train Craft for Kids

This simple shape craft is a perfect low-prep activity for a shape or transportation unit with preschoolers or kindergarteners.

Once you’ve cut out the template pieces, students can assemble the craft with just a few directions.

Making a Math Craft with Kids

To make this easy shape train craft, you’ll need the following: (This post contains affiliate links. For details, see our Disclosure Policy.)

  • Printer (with ink)
  • Printer paper
  • Scissors (if you plan for students to cut out the pieces themselves, use child-safe scissors)
  • Construction paper
  • Glue stick
  • Pencil
  • Ruler
  • Printable Train Craft Template
Easy Shape Train Craft Supplies

Get started by printing the craft template.

Then use a pencil to trace the shape pieces onto colored construction paper and cut them out.

Making a Shape Train Craft

I find it best to use different colors for each piece. That way, it’s easy to point out each geometric shape without confusing the students.

The finished project includes three rectangles, one triangle, two squares, and two circles.

How to Make a Shape Train Math Craft

Now it’s time to assemble our train!

How to Make a Shape Transportation Craft

Use a piece of construction paper as your background.

Start by gluing the large rectangle down towards the right edge of the paper.

How to Make a Train Out of Shapes

Glue the triangle on the left side of the rectangle. The two pieces should touch.

Make sure students rotate the triangle so that the longest edge is facing up and out. This will be the front of the train.

Making a Paper Train Craft with Kids

Complete the body by adding the thinner rectangle vertically along the right side of the large rectangle.

Place it so that it covers the right edge of the large rectangle. This will form the back of the train.

How to Build a Train Out of Shapes

The two circles go in the bottom center of the train, forming the wheels.

An easy way to direct students is to have them glue the circles on the bottom of the large rectangle only.

Making a Simple Shape Train Math Craft with Kids

Add the final small rectangle by gluing it onto the top of the thin vertical rectangle.

Make a Train Out of Shapes

Add the two squares (windows) by gluing them towards the top of the center rectangle.

If you like, you can have students draw perpendicular lines to form windowpanes.

Finished Shape Train Craft

And we’re all finished!

Shape Train Math Craft for Kids

These would make an excellent class project for parents’ night!

Let the students try different colors of paper and add their own touches afterwards: a plume of smoke coming from the smokestack, a conductor in the window, tracks under the train – whatever they can think of!

See the full project directions below!

Easy Shape Train Craft for Kids

Shape Train Math Craft for Kids

This simple shape train craft is a perfect way to teach early learners about geometry and transportation. Plus, they'll get some fine motor skills practice too!

Prep Time 5 minutes
Active Time 10 minutes
Total Time 15 minutes
Difficulty Easy

Materials

  • Construction paper
  • Pencil
  • Printer paper

Tools

  • Printer
  • Ruler
  • Child-safe scissors
  • Glue stick

Instructions

  1. Print the shape train craft template.
  2. Cut out the template pieces and then use a pencil to trace each shape onto colored construction paper.
  3. Cut out the paper pieces.
  4. Glue the large rectangle down onto a piece of white construction paper.
  5. Glue the triangle onto the front of the rectangle, forming the front of the train.
  6. Glue the thin rectangle vertically along the back edge of the large rectangle, forming the back of the train.
  7. Glue the small thin rectangle horiztonally along the top edge of the thin rectangle.
  8. Glue the two circles onto the bottom of the large rectangle, forming the wheels.
  9. Glue the two squares onto the top section of the large rectangle, forming the windows.

Notes

  • Encourage your students to add details, such as: tracks under the train, smoke coming from the smokestack, a railroad crossing sign, or a conductor in the window.
  • Have students use different colors for each train and make a group of trains for a class display.
  • Talk about each shape before adding it to the picture. Ask students: "What shape is this?" or "How many sides does this shape have?"
  • For shapes that are similar, such as the rectangles, talk about how each one is different. Ask: "How is this rectangle different from that rectangle?" Encourage students to examine the differences in height, width, and orientation.
  • If you need to save time, print the template pieces and cut out shapes ahead of time. Then students can simply assemble the craft as you provide instructions.

© Selena Robinson
Project Type: Paper Crafts / Category: Crafts

Take a look at these other shapes activities for early learners!

Help early learners practice recognizing shapes with these printable shape identification flashcards!
Make up this quick and easy shape car craft with the kids! Great for math and art in one simple activity!
Teach early learners to recognize shapes all around them with this preschool shape sorting activity! Great for reusing at centers or in morning tubs!

Filed Under: Crafts, Preschool Tagged With: crafts for kids, shapes

Easy Paper Snowflake Craft for Kids

December 7, 2021 by Selena Robinson Leave a Comment

Making paper snowflakes is one of the winter craft projects I remember the most as a child.

My classmates and I would see who could make the most complicated design. Then we’d fold in half, cut it out, and open it up. Sometimes we’d try cutting out phrases or faces.

And the teacher would hang them on the window afterwards. Good times.

Easy Paper Snowflake Craft for Kids

If you’re looking to make a traditional paper snowflake craft with kids this winter, this colorful one with a printable template is a neat twist!

Kids Paper Snowflake Craft

These are simple to make too. And there are three different template designs to choose from!

Read on to grab the printable template and to read the full instructions.

And, take a look at our All About Snowflakes unit for more ways to create a snowflake theme with primary grade students!

Make this easy paper snowflake craft with the kids this winter!

Easy Paper Snowflake Craft for Kids

To make this paper snowflake craft, you’ll need the following: (Affiliate links are listed below. For details, see our Disclosure Policy.)

  • White printer paper (cut into squares)
  • Colored cardstock (cut into squares)
  • Child-safe scissors
  • Craft glue
  • Hole punch
  • Printable Paper Snowflake Craft Template (download this to use as a tracing guide, if desired)
How to Make a Paper Snowflake

You’ll start with a square-sized piece of white printer paper.

You could also use coffee filters, craft paper, or drawing paper.

Colorful Paper Snowflake Craft for Kids

Then you’ll download the printable paper snowflake craft template.

On the template, there are three different designs: in a large size and a small size.

How to Make Paper Snowflakes with Kids

The templates are optional, so if you have a design in mind, you may not need them.

But if you’re making this for the first time with kids, the templates can help them make a snowflake design.

How to Make a Paper Snowflake Craft

To get started, fold the square of white paper in half diagonally.

The corners should be lined up so that the paper forms a triangle.

Folding a Paper Snowflake Craft

Next, fold the triangle in half. Now you should have a double-layered smaller triangle.

What we’re doing is folding the paper into four layers. This way, we only have to cut the snowflake design once to create all four sides.

Making a Paper Snowflake with Kids

Now, print the snowflake template and choose which design (and size) you’d like to use.

Use a pencil to trace the chosen design onto one side of the folded paper triangle.

Tracing the Paper Snowflake Template

Let kids use child-safe scissors to cut along the tracing lines.

For the circle in the center, it’s easiest to use a hole punch.

How to Cut a Paper Snowflake

Now, help them unfold the triangle. They’ll see a finished snowflake!

Making a Paper Snowflake Craft

All that’s left to do now is to glue the finished snowflakes onto the squares of colored cardstock.

Simple Paper Snowflakes for Kids to Make

These are adorable for hanging from a garland!

Making an Easy Paper Snowflake Craft

They’d also make sweet cards to send to family members and friends.

Simply fold a separate piece of cardstock in half. Write a thoughtful note inside and glue the paper snowflake craft on the front!

Simple Paper Snowflake Craft

However you decide to use them, these simple snowflake crafts are fun for kids to craft during winter!

Try some of these other winter activities for kids!

This fun 3D cereal box polar bear craft is an awesome winter art project for kids to make!
Share some of these fun snow books for kids with little ones this winter!
This easy polar bear paper bag puppet is a fun winter craft to make with kids!

Filed Under: Crafts Tagged With: crafts, crafts for kids

3D Polar Bear Cereal Box Craft for Kids

November 18, 2021 by Selena Robinson Leave a Comment

Polar bears are one of the first animals that come to mind when I think of winter.

They’re wild, of course, but they look so cuddly and adorable. They’re a perfect theme for early grades.

And they also make a great topic for winter crafts.

Which is why this 3D cereal box polar bear craft is so much fun to make with kids!

Fun 3D Cereal Box Polar Bear Craft

This winter diorama craft looks complicated, but it’s really not.

Even better, you only need a few supplies (which you probably already have) to make it!

3D Winter Diorama Craft for Kids

Read on to get the full project instructions and to grab the free printable template.

Want more winter crafting fun? Don’t miss our cute Polar Bear Paper Bag Puppet!

This fun 3D cereal box polar bear craft is an awesome winter art project for kids to make!

3D Cereal box Polar Bear Craft Supplies

You’ll only need a few basic supplies to make this craft.

But, if you’re making it along with younger children, you’ll want to do some of the prepping and cutting work in advance.

That way, they can avoid any possible injuries and it won’t take as long to finish the project.

Fun Winter Cereal Box Craft for Kids

To make this 3D cereal box polar bear craft, you’ll need the following: (Affiliate links are listed below. For details, see our Disclosure Policy.)

  • Empty cardboard cereal box
  • Colored craft paper
  • Glue stick
  • Pencil
  • Child-safe scissors
  • Ruler
  • Washable markers
  • Printable Polar Bear Craft Templates
Cereal Box Polar Bear Craft Supplies

If you’re prepping the printable templates and the cereal box in advance, you can use regular scissors.

But if the kids are doing the cutting part, be sure to use child-safe scissors to keep their little fingers protected.

Start by opening the flaps of the cereal box and laying the entire box flat on a surface.

Cut off the top and bottom flaps so that only the sides of the box are left. Make sure they remain attached as one piece.

How to Make a Cereal Box Polar Bear Craft

You’ll use a pencil and a ruler to outline a rectangle on one of the box panels.

Be sure to mark on the inside of the box so you can see the lines.

You’ll also need to download the printable Polar Bear Craft Templates.

Cut out all of the template pieces and trace them onto craft paper. Then cut them out.

Polar Bear Craft Template

In this project, wintery colors, such as light blue, dark blue, and white are used for the background.

But the choice of colors is totally up to you.

Now we’re ready to get started!

How to Make a 3D Cereal Box Polar Bear Craft

Now that your cereal box is prepped, it’s time to cut out the “window” that you’ll see the winter scene through.

For the most exact lines, use a craft knife to cut out the rectangle. (Be sure to do this away from children.)

Fun Polar Bear Craft for Kids

But you can also use scissors to poke a hole in the center of the rectangle.

Then just cut towards the lines and follow them around to make the rectangular window.

3D Polar Bear Craft for Kids

Glue a piece of light blue paper onto the back of the “window”. It should cover the back panel completely. Trim off any excess.

Fold the sides of the box back together to form a hollow rectangle. Glue the sides closed.

How to Make a Box Polar Bear Craft

Time to start using our template pieces!

All of the scene templates have folding lines at the bottom. Fold each one on those lines to ensure they stand up.

Glue the mountain pieces (numbered as 1) onto the back panel of the box. You want them to overlap slightly at the bottom.

Paper Polar Bear Craft for Winter

Now, glue the snow piles (numbered on the template as 2) in front of the mountains.

Leave space behind them to add more elements to the scene.

Making a Polar Bear Winter Scene Craft

Add the frost-covered trees (numbered as 3) behind the snow piles but in front of the mountains.

Space them out to be seen between the piles of snow and glue them down.

Then glue the long snowbank (numbered as 4) down in front of the snow piles.

Add the last two snow piles (numbered as 6) on either side of the front of the box window.

Making a Paper Polar Bear with Kids

Time to add the polar bear!

Cut out the polar bear and scarf from the template sheet. Use markers to outline the bear and to add ears and a face.

Color in the scarf too! Then glue it onto the polar bear’s neck.

Assembling a Cereal Box Polar Bear Craft

Finally, glue the polar bear in front so that it stands on the long snowbank in front of the winter scene.

Polar Bear Cereal Box Craft for Kids

And our 3D cereal box polar bear craft is done!

3D Winter Cereal Box Craft Kids Can Make

These would make excellent art projects for parent night, winter camps, and take-home crafts!

3D Winter Scene Craft

Check out more winter craft ideas for kids below!

This easy penguin family paper plate craft is such a cute winter craft to make with kids!
Make this cute coffee filter snowman craft with the kids on a winter afternoon!
This easy polar bear paper bag puppet is a fun winter craft to make with kids!

Filed Under: Crafts Tagged With: crafts for kids, winter crafts

  • 1
  • 2
  • 3
  • …
  • 6
  • Next Page »
Hi! I'm Selena, a veteran teacher and homeschool mom to four. I'm so glad you're here!
About Me Contact Terms of Use Privacy Policy Places I Share
Facebook Pinterest Instagram
Homeschool Printables Unit Studies Shop the Store
Copyright ©2025, Look! We're Learning!. All Rights Reserved. Design by Pixel Me Designs